
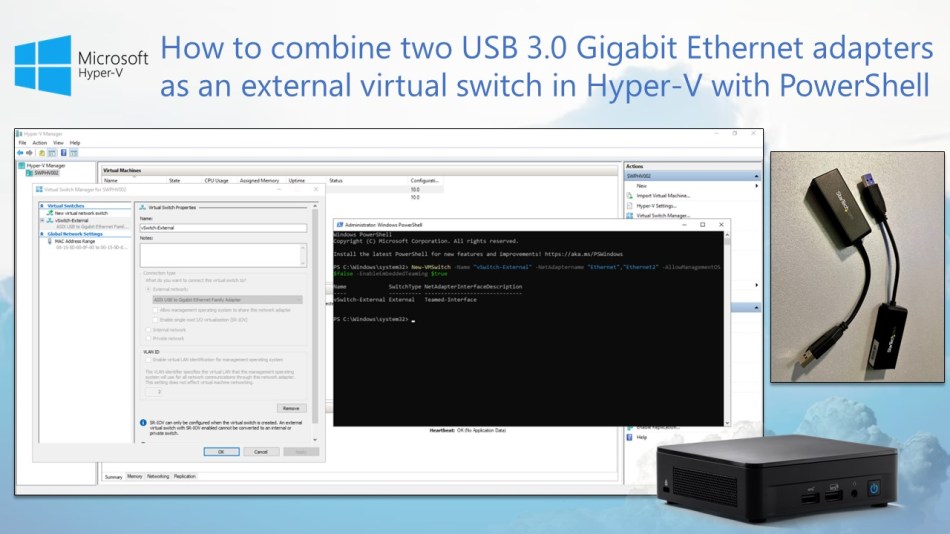
This blog post will guide you through the process of combining two USB 3.0 Gigabit Ethernet adapters and utilizing them as an external virtual switch in Hyper-V.
In a recent blog post, I discussed the installation and configuration process of Windows Server 2022 Hyper-V on an Intel NUC. In that post, I detailed a method for utilizing a USB 3.0 to Gigabit Ethernet Adapter to expand networking capabilities.
By using such an adapter, you can create an external virtual switch (vSwitch), which allows you to create a dedicated VM-LAN next to your HOST-LAN. This can be useful in scenarios where your NUC is equipped with only one physical network interface (NIC), allowing for the segregation of host and virtual machine (VM) traffic.
But what if you’re aiming to take things a step further by combining two or more of these adapters into a single vSwitch? This approach can significantly boost network performance, availability, and redundancy.
In this blog post, I’ll guide you through the steps to accomplish precisely that.
Table of Contents
- Prerequisites
- Create an external virtual switch with PowerShell
- Check network connectivity for the external vSwitch
- Conclusion
Prerequisites
- An Intel NUC, or other similar small form factor computer, running as a standalone Windows Server 2022 (or 2019) Hyper-V host.
- One or two running VMs on the Hyper-V host to test the network connectivity of the newly created external vSwitch.
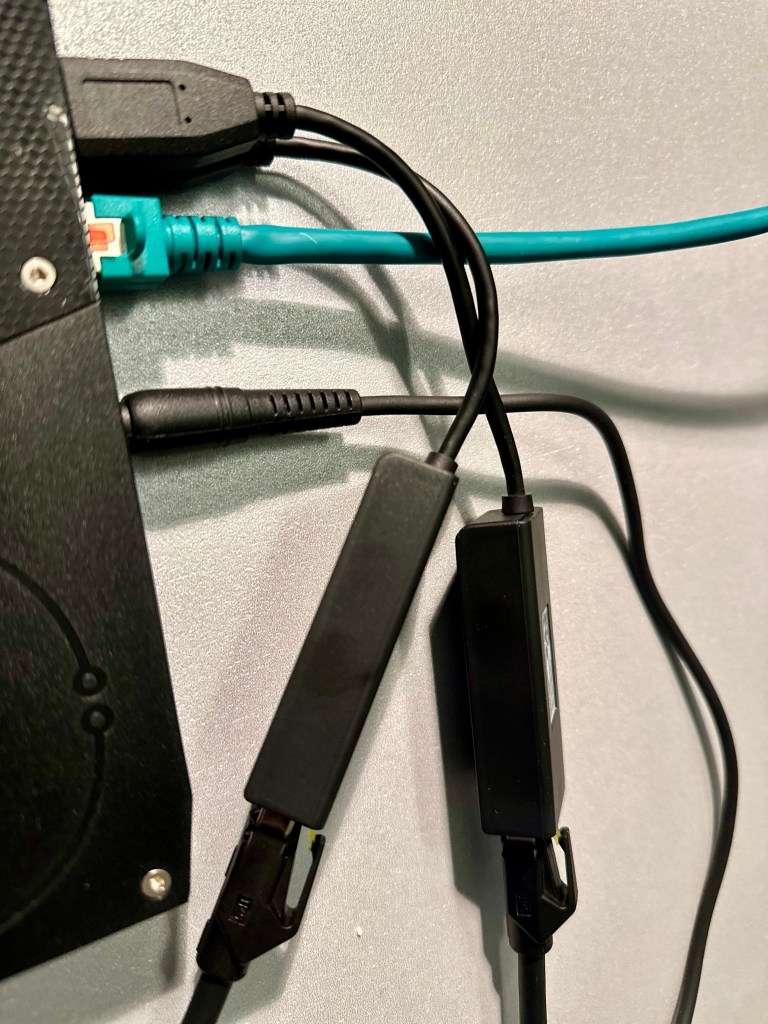
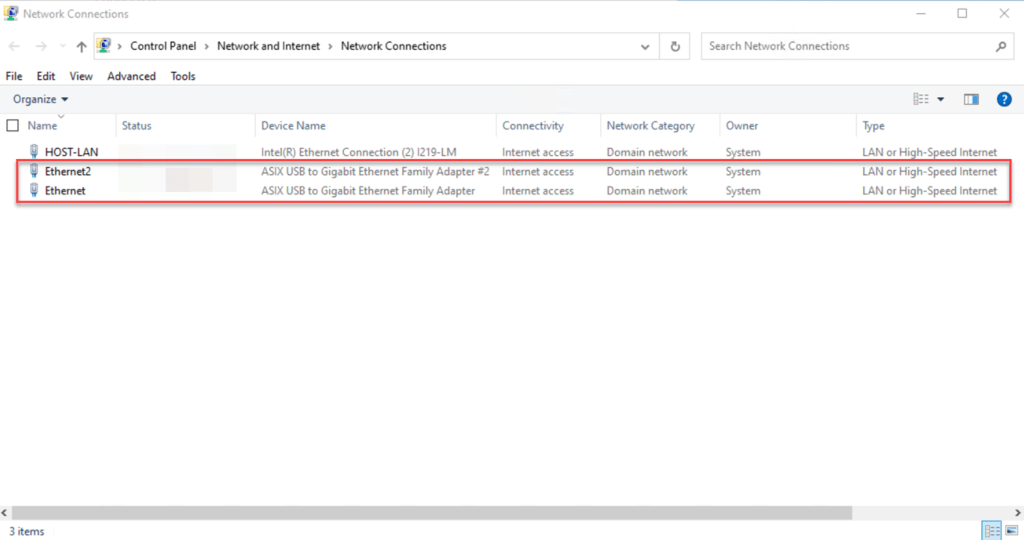
- Two or more USB 3.0 to Gigabit Ethernet adapters connected to USB 3.0 ports on the Intel NUC or a similar device, all linked to the same network or VLAN.


Create an external virtual switch with PowerShell
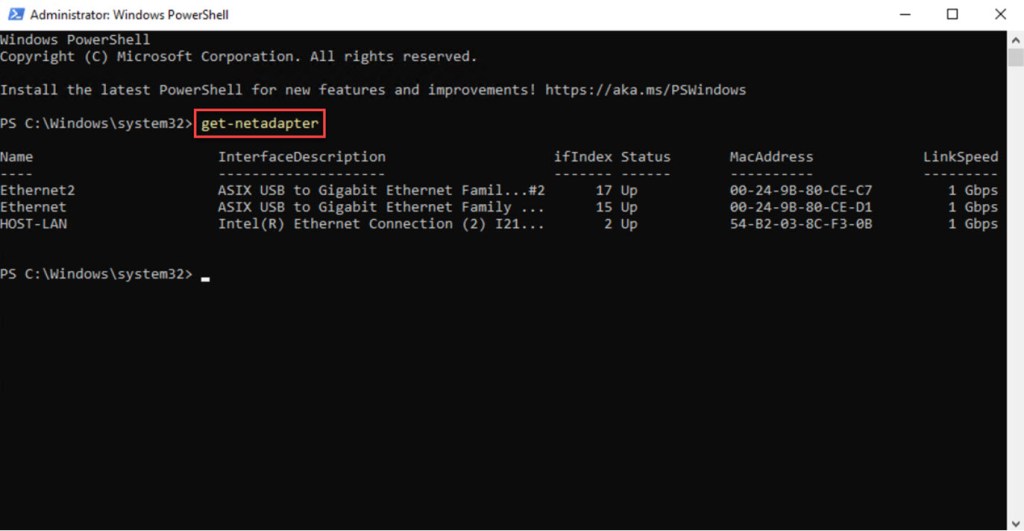
Sign in to the Hyper-V host using an administrator account, and then open a Windows PowerShell window with administrative privileges. Next, enter the following cmdlet to retrieve information about all network adapters available to the system:
get-netadapter
Then create a new external vSwitch with these specific parameters and configurations:
- -Name: Specifies the name of the new virtual switch
- -NetAdapterName: Specifies the physical NICs that will be associated with the virtual switch.
- -AllowManagementOS $false: Disables the ability for the management operating system (the host OS) to use this virtual switch for network communication.
- -EnableEmbeddedTeaming $true: Enables embedded teaming for the virtual switch. This means that the virtual switch will use NIC teaming for redundancy and load balancing purpose
New-VMSwitch -Name "<vSwitch Name>" -NetAdaptername "<Adapter Name 1>","<Adapter Name 2>" -AllowManagementOS $false -EnableEmbeddedTeaming $true

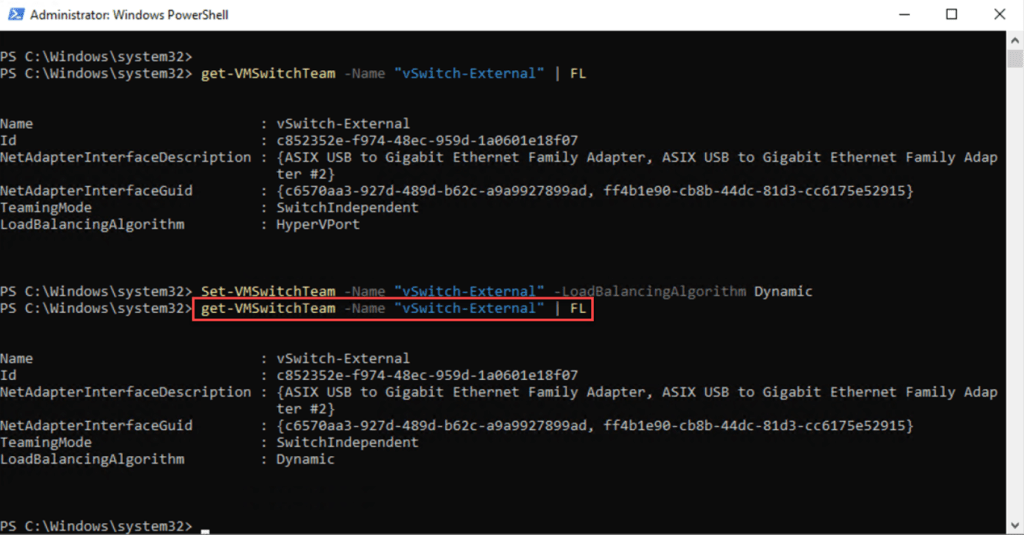
Next, run the below cmdlet to gather details about the vSwitch’s teaming configuration and format the output as a list (FL). Alternatively, you can also navigate to Hyper-V Manager to confirm the successful creation of the vSwitch.
get-VMSwitchTeam -Name "vSwitch Name" | FL
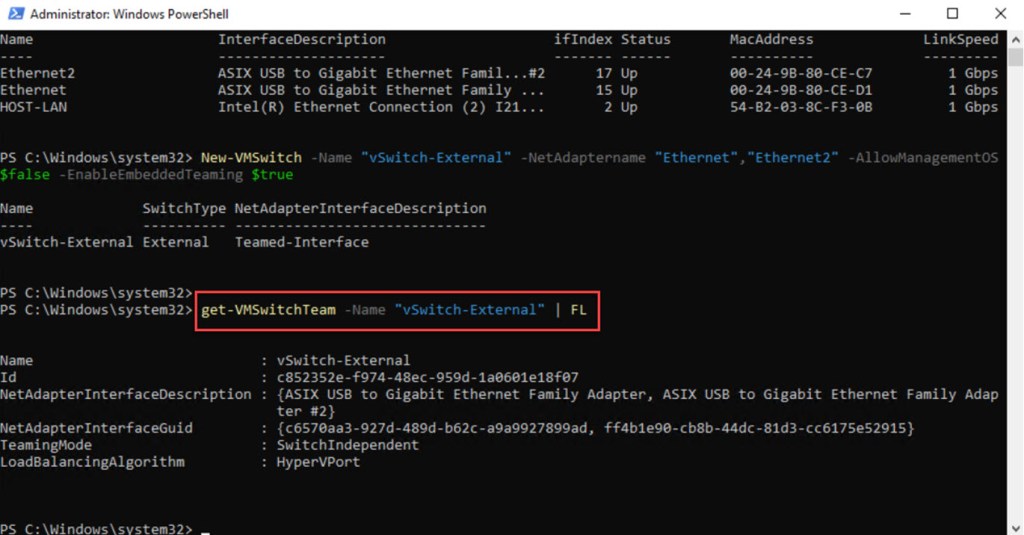

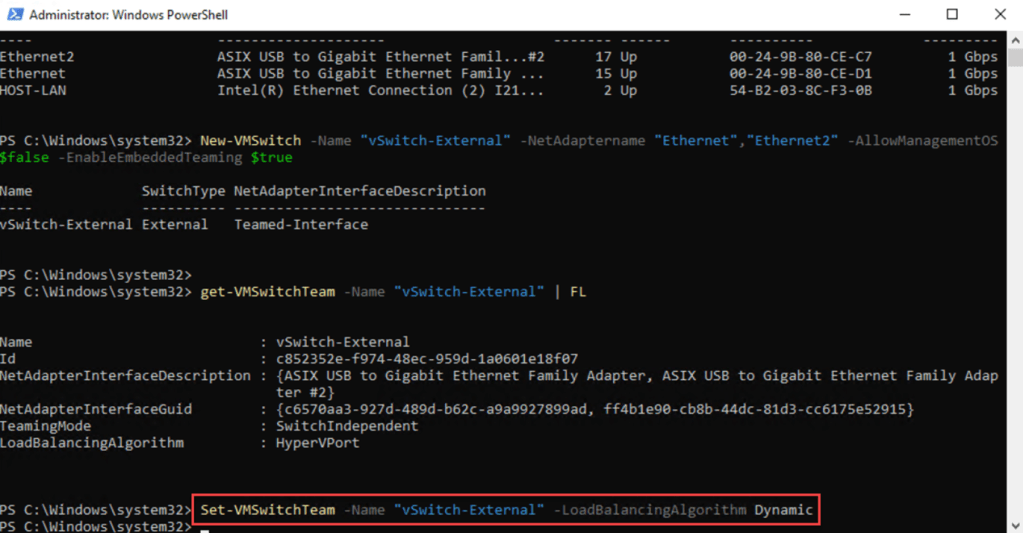
By default the load balancing algorithm is set to HyperVPort
If you have specific requirements and need to change the load balancing algorithm to Dynamic, you can do so by running the following command:
Set-VMSwitchTeam -Name "vSwitch-External" -LoadBalancingAlgorithm Dynamic
Check network connectivity for the external vSwitch
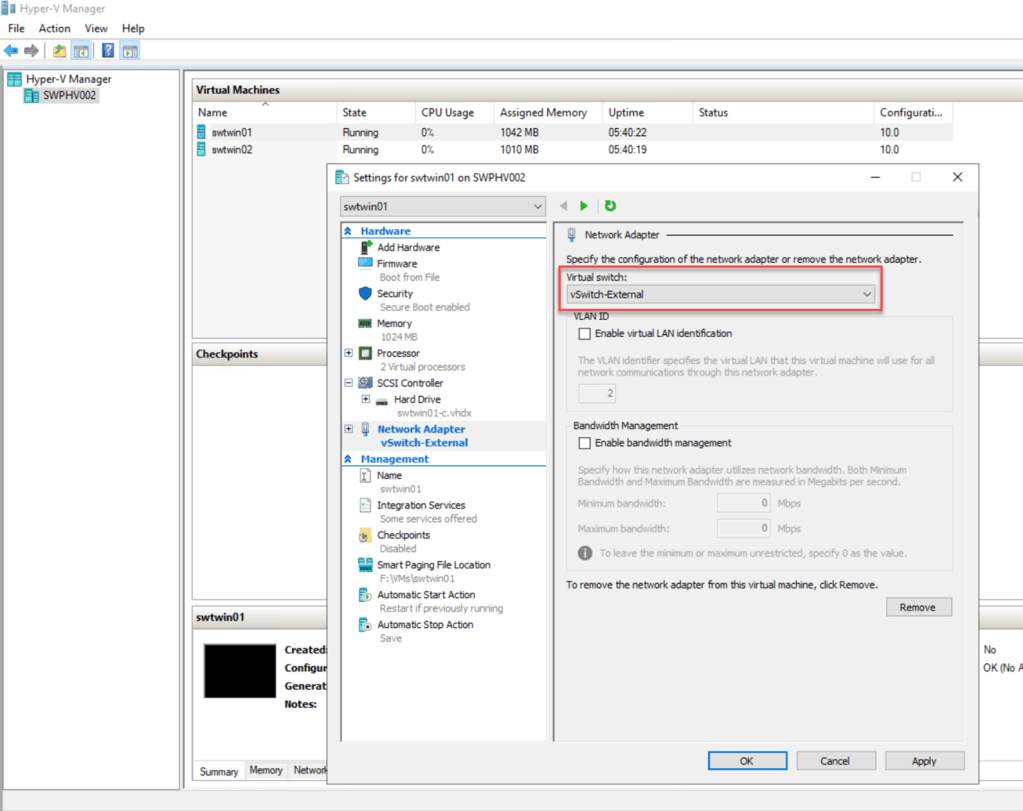
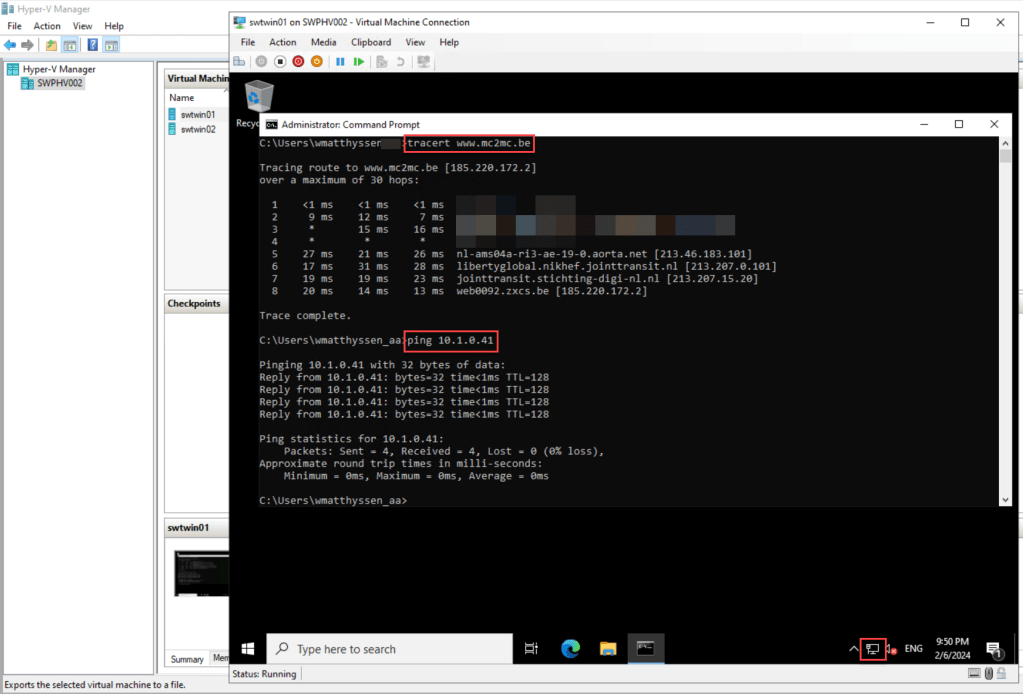
To verify the functionality of the newly created external vSwitch, you can attach it to the Network Adapter on both virtual machines (VMs) and examine whether these VMs are successfully connected to the network.
By adding the vSwitch to the VM configurations and testing network connectivity, you can ensure that the setup operates as it should.
You can also test your VM network bandwith and troughput with the free NTTTCP tool from Microsoft.
You can also measure the transfer rate, along with other metrics, across TCP, UDP, or UDP multicast connections using the NTTCP tool.
Start by ensuring both of your VMs are up and running, one designated as the sender and the other as the receiver.
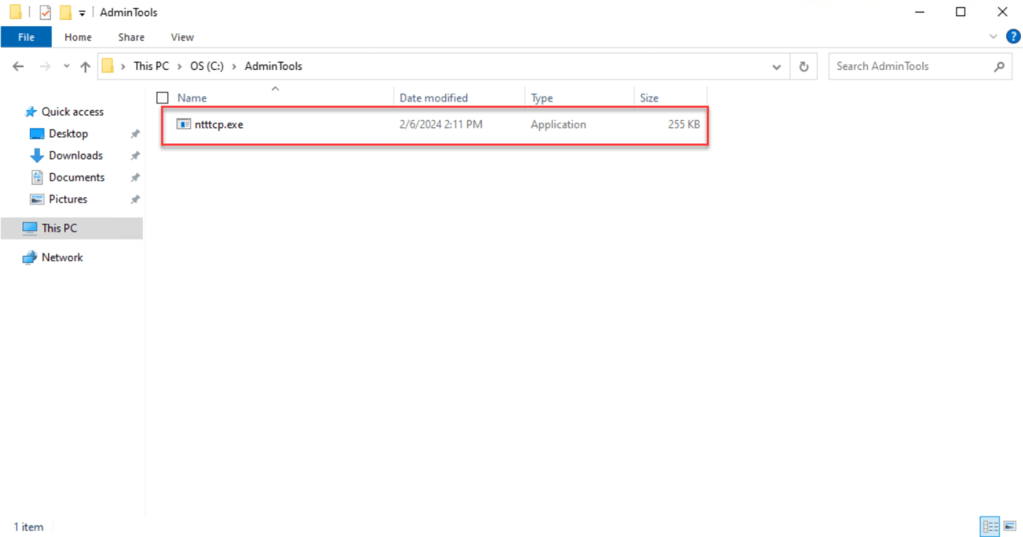
Next, head over to the GitHub website to download the latest release of NTTCP. Once downloaded, store the ntttcp.exe file in a convenient folder on both VMs, such as C:\AdminTools.
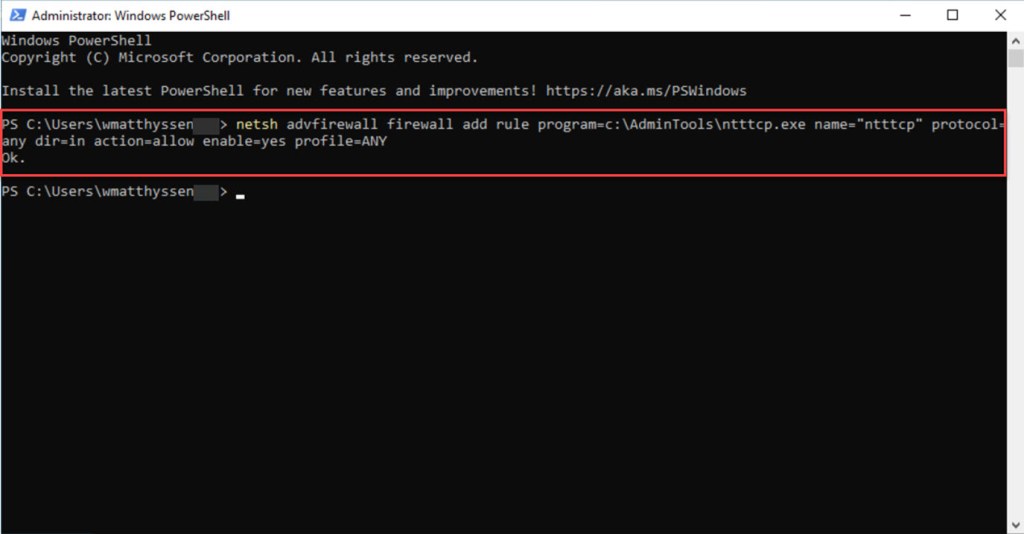
On the receiver VM, set up a Windows Firewall rule to permit NTTTCP traffic. It’s simpler to allow nttcp.exe by name rather than specifying individual inbound TCP ports. Just open a PowerShell window and run the following command:
netsh advfirewall firewall add rule program=c:\<folder name>\ntttcp.exe name="ntttcp" protocol=any dir=in action=allow enable=yes profile=ANY

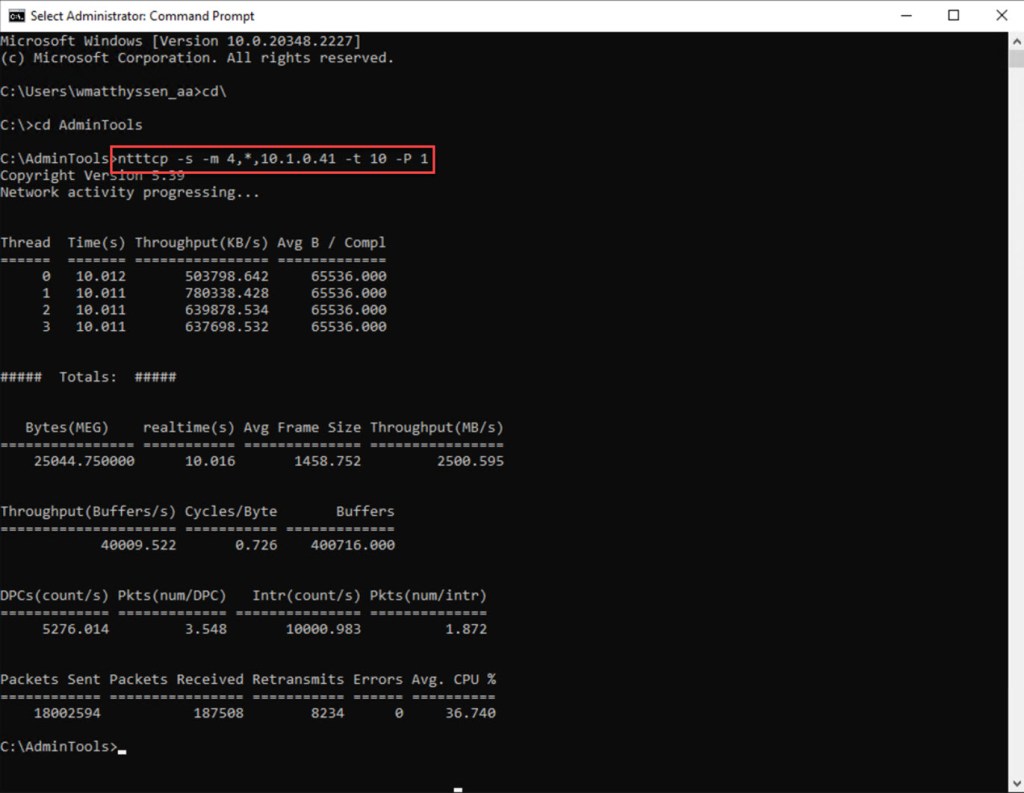
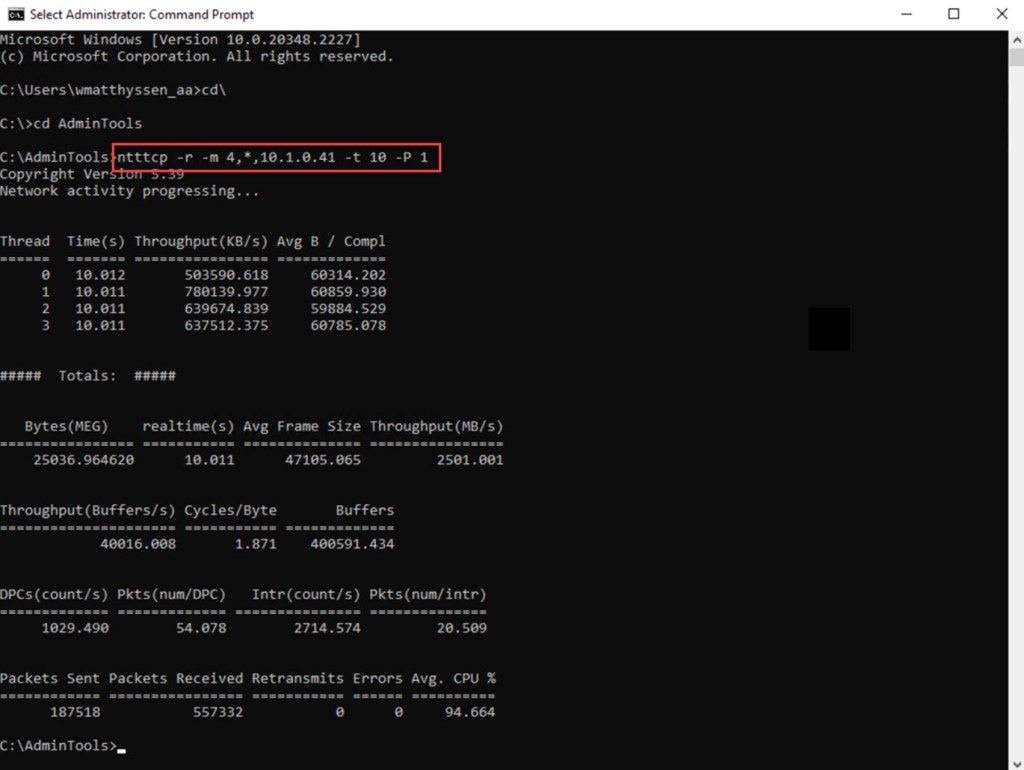
Then launch a command prompt on both VMs and execute the following commands to initiate a 10-second test of a single Transfer Control Protocol (TCP) stream on both the sender and receiver VMs.
On the sender VM:
ntttcp -s -m 4,*,<receiver IP address> -t 10 -P 1
On the receiver VM:
ntttcp -r -m 4,*,<receiver IP address> -t 10 -P 1
Conclusion
Utilizing an Intel NUC, currently under the Asus brand, offers a straightforward and cost-effective solution for creating a Hyper-V home lab. Moreover, for those seeking to further optimize their NUC and enhance VM network performance, combining two USB 3.0 Gigabit Ethernet adapters as an external virtual switch in Hyper-V proves to be an effective strategy.
While there are a few steps to follow, I hope that this blog post provides clear explanations for each.
Should you have any questions or suggestions regarding this blog post or the utilization of a NUC for your home lab, please feel free to reach out to me via my X handle (@wmatthyssen) or leave a comment below. I’m more than happy to assist you.

0 comments on “How to combine two USB 3.0 Gigabit Ethernet adapters as an external virtual switch in Hyper-V with PowerShell”