

In this blog post, you’ll learn how install and configure Windows Server 2022 Hyper-V on an Intel NUC.
Over the last few years, I’ve been using Intel NUCs, such as the Intel NUC11 11TNHv7 and the Intel NUC Skull Canyon, for my home labs to experiment with new Windows Server and Microsoft Hybrid cloud features, including various Azure Arc-related scenarios.

As a public speaker, in some of my presentations, I talk about Azure Arc. Whenever I deliver such a session as a live demo, I mostly manage my home lab infrastructure, including my Windows or Linux VMs, all from the very location where I am presenting with Azure Arc. After those sessions, I often get questions from one or more of the attendees about the hardware I use for my home lab.
I always tell them that I use NUCs because they are not that expensive, and these days you can already go up to 64 GB of RAM in a single NUC, with which you can already run multiple VMs on top of Hyper-V within that same NUC.
For one of my labs, I even utilize an older model, the Intel NUC Skull Canyon (NUC6i7KYB), which even has a maximum memory size of 32 GB of RAM. Despite this memory limitation, it allows me to effortlessly create VMs for testing purposes. And by using the lab on this lower-equipped NUC, I can explore and experiment without jeopardizing the stability of my operational home lab.
I’ve written this blog post to help you build your own Hyper-V home lab on an Intel NUC. Now, let’s dive in and get started.
Table of Contents
- Download and store the Windows Server 2022 ISO
- Use Rufus to create a bootable Windows Server 2022 USB drive
- Install Windows Server 2022 via the bootable USB stick
- Install Intel NUC Windows Server 2022 Network Adapter Driver
- Installing Windows Updates and Optional Updates
- Configure your Windows Server
- Install and configure Windows Sever Hyper-V role with PowerShell
- Use a USB 3.0 to Gigabit Ethernet Adapter to add an extra Virtual Switch for your VM-LAN network
- Add an extra NVMe M.2 disk to store virtual machines
- Conclusion
Download and store the Windows Server 2022 ISO
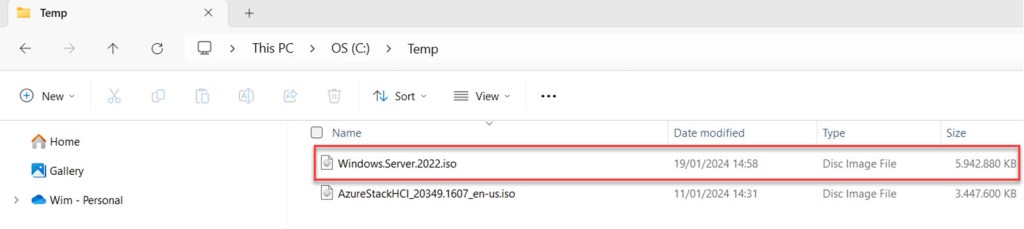
Begin by downloading and saving the most recent version of Windows Server 2022 as an ISO file in the C:\Temp folder on your management workstation.
If you don’t have a license or subscription permitting the download and use of Windows Server 2022, you can always obtain the trial version from the Microsoft Evaluation Center.
Use Rufus to create a bootable Windows Server 2022 USB drive
Download the portable version of Rufus, a freeware tool that helps in formatting and creating bootable USB flash drives, to your management workstation. If you have a preference for another tool or if you’d like to use diskpart, feel free to go with your choice.

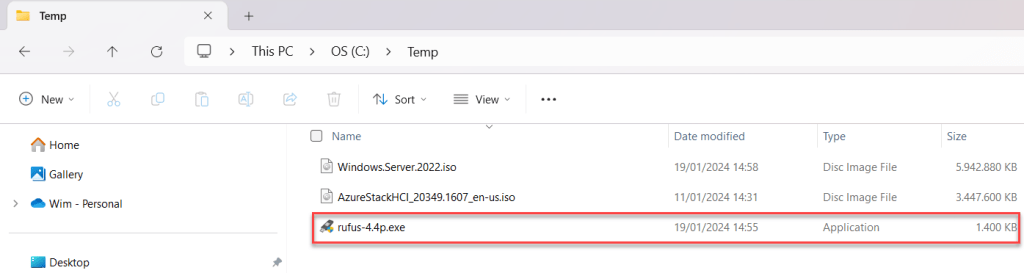
Insert a USB stick with a minimum size of 8 GB into your management workstation. Next, launch Rufus by clicking on the executable file. Confirm by clicking “Yes” on the User Account Control pop-up window.
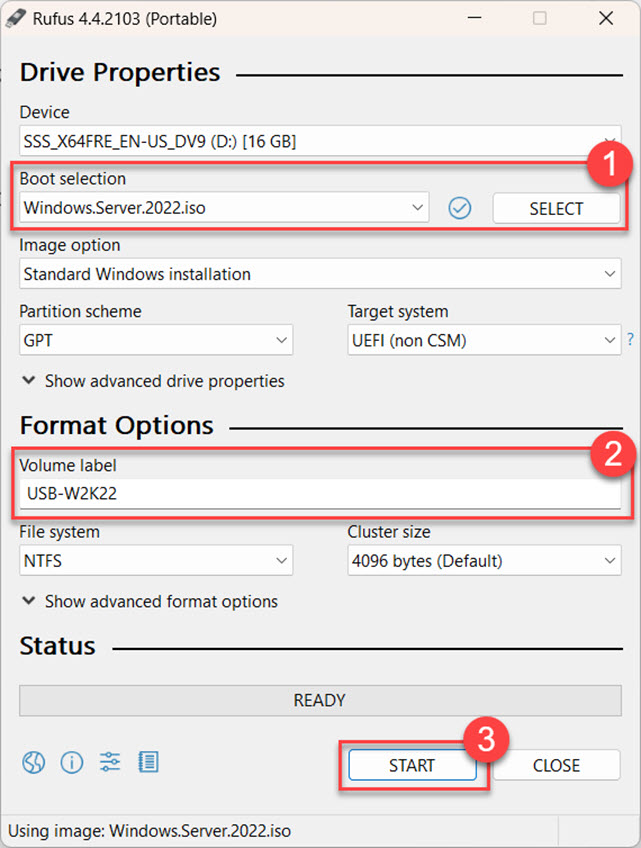
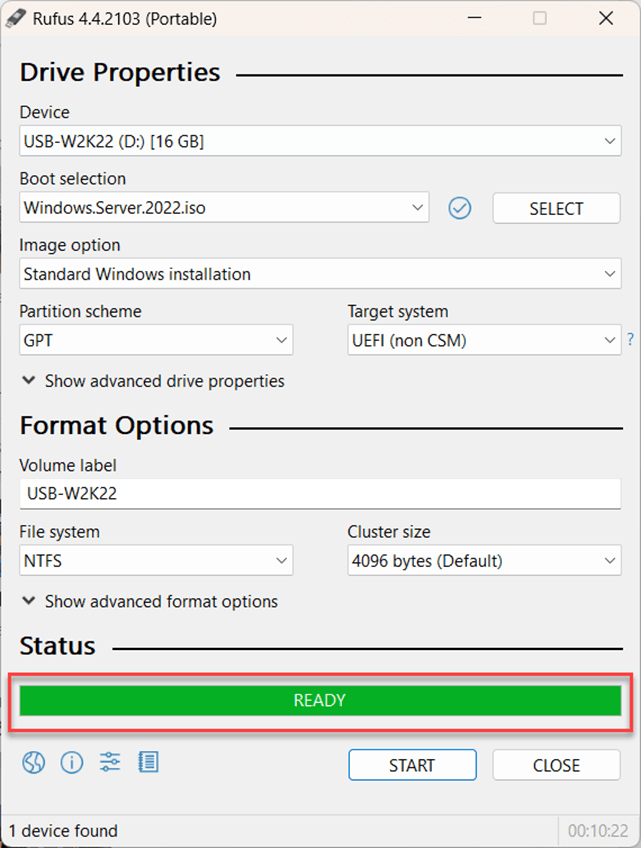
Rufus will automatically detect the connected USB device. All that’s left for you to do is specify the Windows Server 2022 ISO file, set the Volume label if you prefer custom naming, and click on START.
Then simply click OK when the Windows User Experience box appears.

Additionally, click OK to confirm the warning that all previously stored data on the USB stick will be erased.

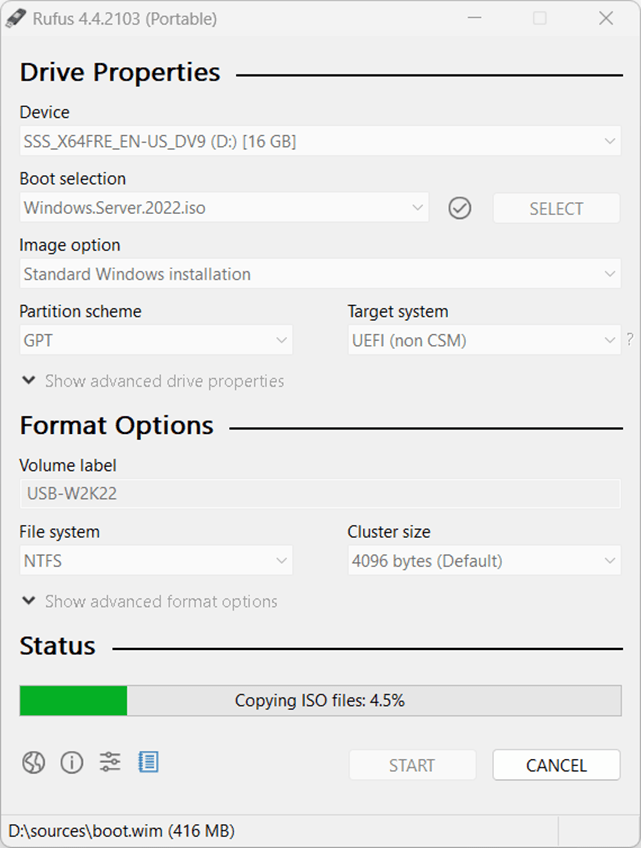
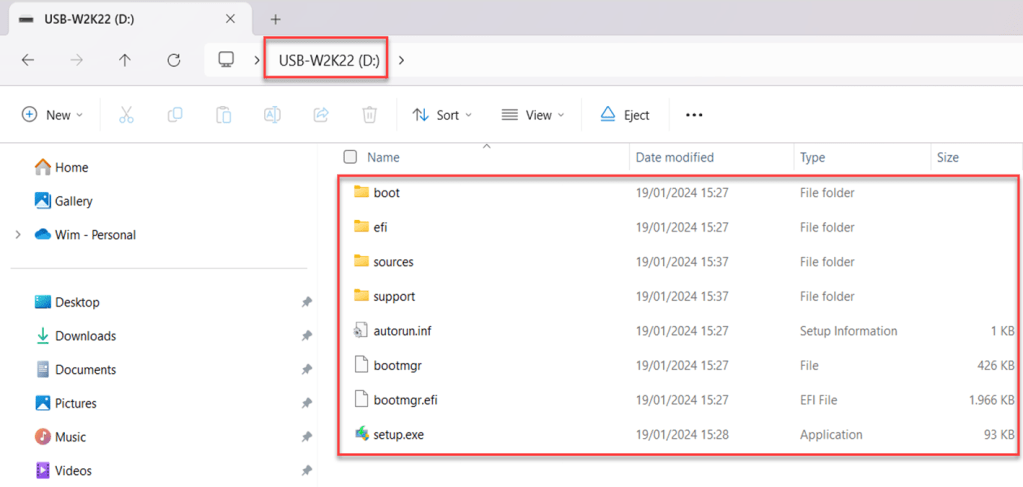
Wait until the status displays as READY, then inspect the contents of the USB stick in Windows Explorer before ejecting it from your workstation and inserting it into a USB port on your NUC.
As a helpful tip, connect a screen to your NUC when initially installing or rebuilding it. This way, you can easily follow your deployment progress.
Install Windows Server 2022 via the bootable USB stick
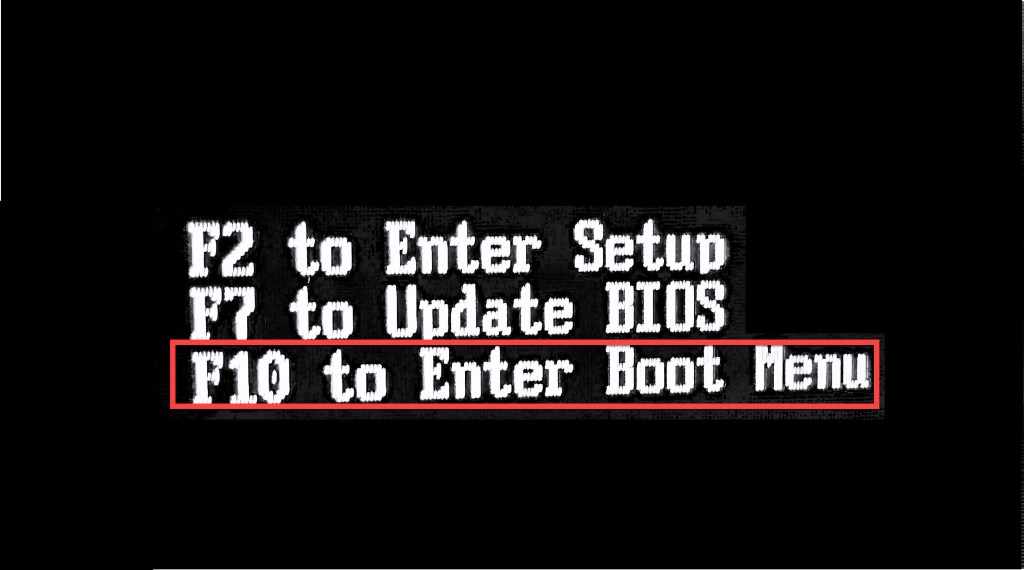
Once you’ve inserted the USB stick into your NUC, start or reboot the system, and press F10 to Enter Boot Menu when the Intel NUC page appears on the screen.
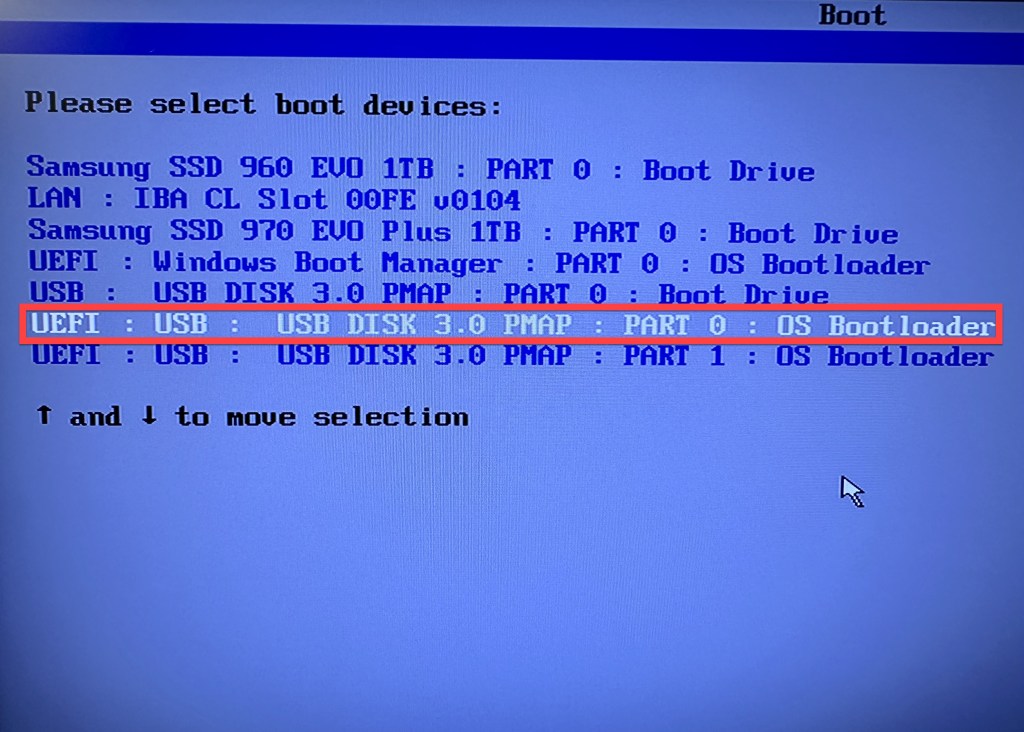
Select the appropriate boot device and press Enter. If you choose the correct one and your USB disk is bootable, the Microsoft Server Operating System Setup will appear.
Proceed with the installation just like you would with any new Windows Server setup. Specify the settings you prefer for your home lab.
For the operating system, I recommend choosing Windows Server 2022 Datacenter (Desktop Experience). This selection will simplify configuring hardware drivers and later adjustments, making the process and management much smoother.

Once the installation is complete, your server will reboot, allowing you to log in using the Administrator account and the password you set during the installation process.
Install Intel NUC Windows Server 2022 Network Adapter Driver
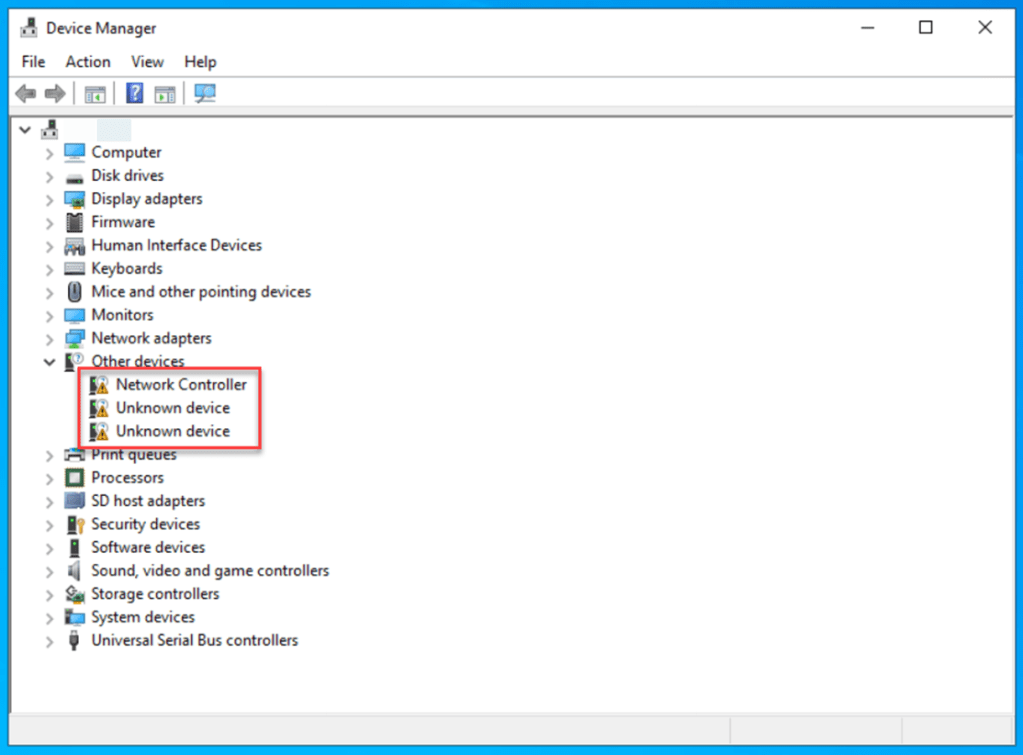
Because Intel NUCs don’t have any Windows Server 2022 drivers for them, several default device drivers, including the Network Controller or Network Adapter Driver, will be unavailable.

Fortunately, a workaround exists to assist you in installing this particular driver.
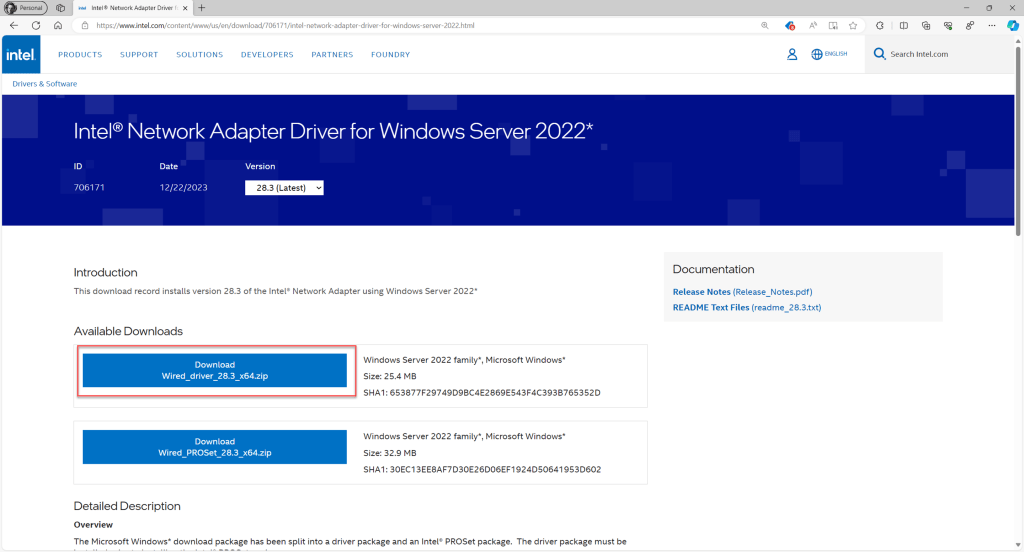
Simply open a browser on your management workstation and navigate to https://www.intel.com/content/www/us/en/download/706171/intel-network-adapter-driver-for-windows-server-2022.html
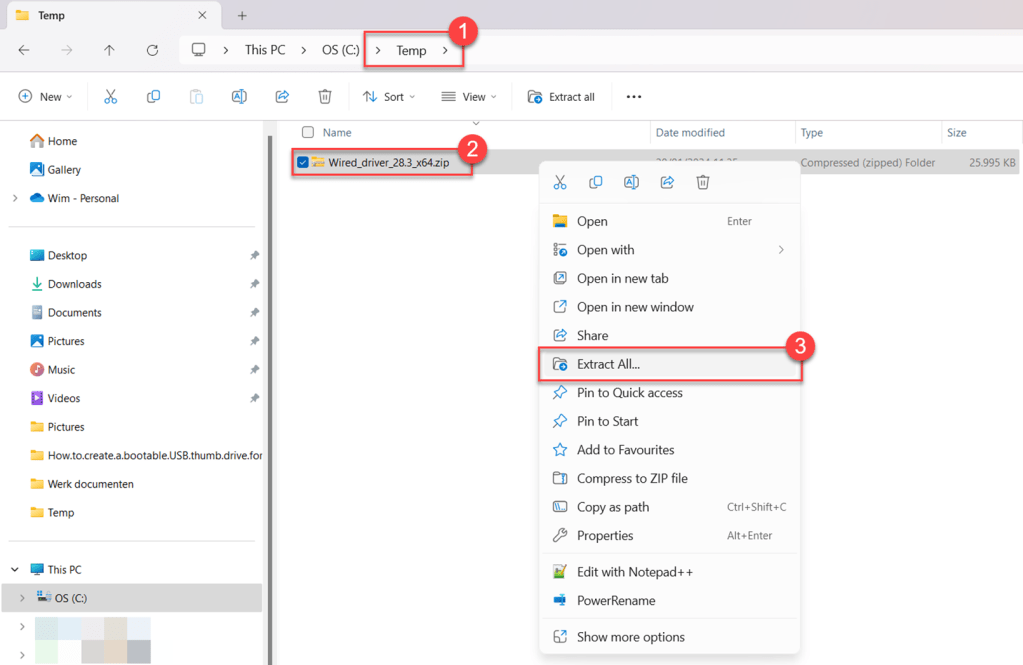
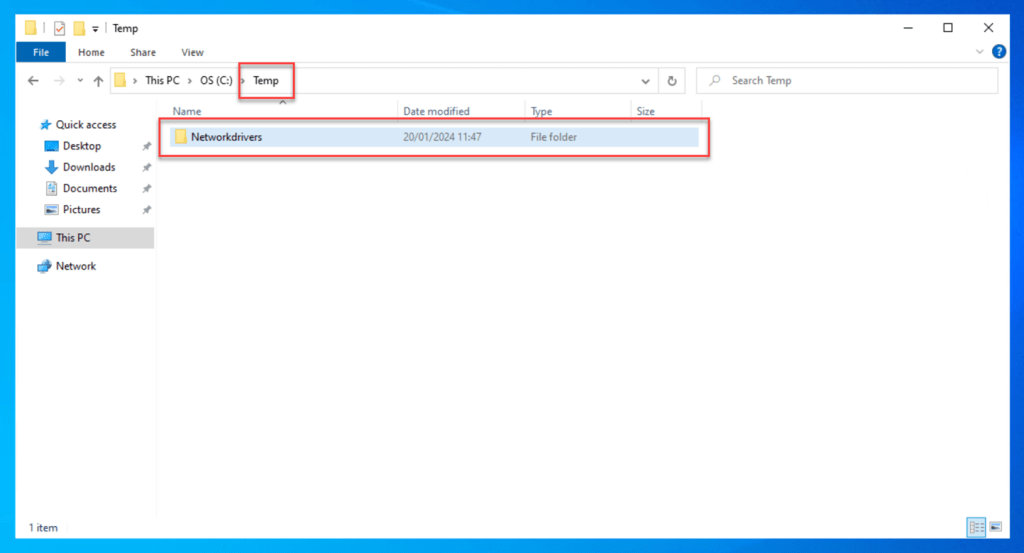
There you can download the “Wired_driver_28.3_x64.zip” file. Move the downloaded ZIP file to the C:\Temp folder.
Next, extract the contents of this ZIP file into the C:\Temp folder.

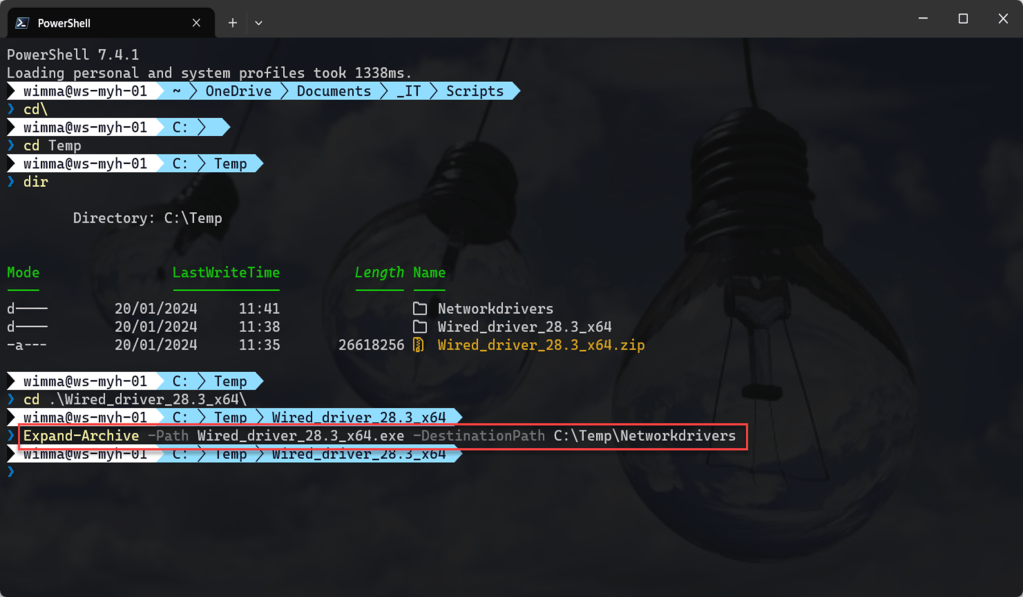
Next, open a PowerShell window in Windows Terminal and execute the below commands:
These commands will extract both the content and drivers from the “Wired_driver_28.3_x64.exe” file and store them in the Networkdrivers folder created within your C:\Temp directory.
cd\

cd Temp

dir

cd .\Wired_driver_28.3_x64

Expand-Archive -Path Wired_driver_28.3_x64.exe -DestinationPath C:\Temp\Networkdrivers
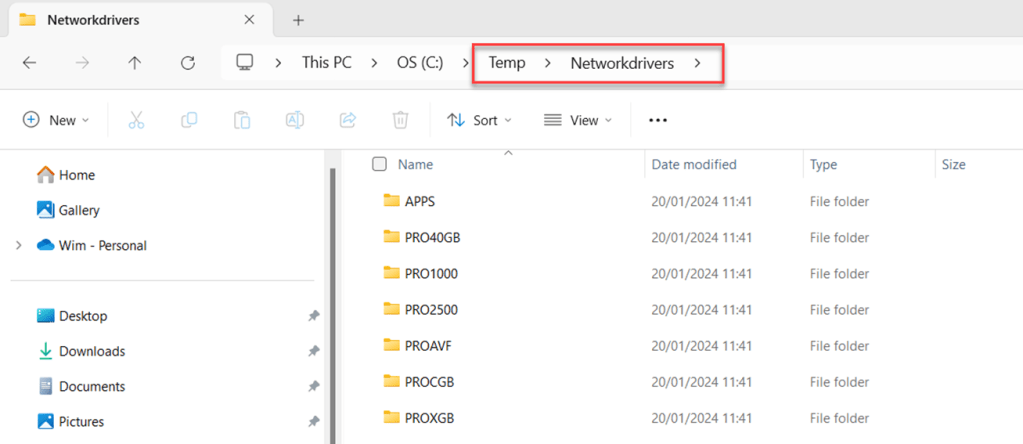
Then copy the Networkdrivers folder to a USB drive and transfer it to the C:\Temp directory on the NUC using the USB drive.
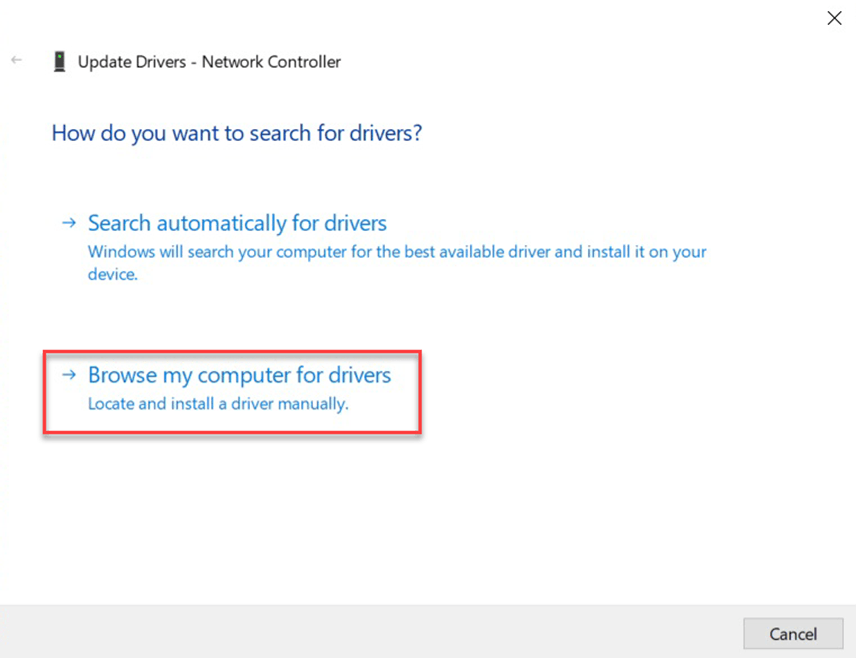
On the NUC, access Device Manager, right-click on Network Controller, and choose Update Driver.
Then select “Browse my computer for drivers” and then select “Let me pick from a list of available drivers on my computer” Click Next, and then choose Network adapters. Click Next once again.

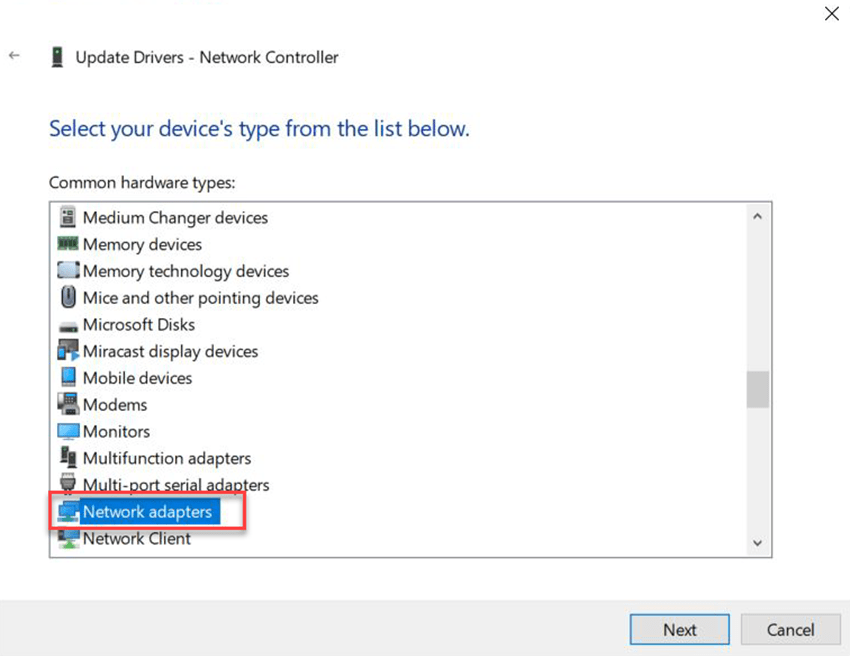
Select “Have Disk…” and input the following path: C:\Temp\Networkdrivers\PRO1000\Winx64\NDIS68. Then click OK.


Now select the Intel(R) Ethernet Connection I219-LM driver. Then click Next.

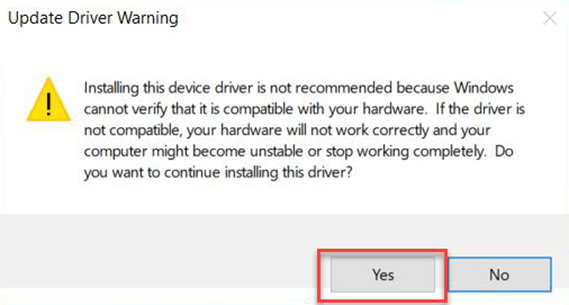
In the Update Driver Warning pop-up box, choose Yes to proceed with the installation of the device driver.
Following these steps, the driver should now be installed successfully, granting you network connectivity.

Installing Windows Updates and Optional Updates
Ensuring the security of a new server is quite important, and one key step is installing Windows updates. These updates frequently contain patches that address vulnerabilities discovered since the operating system’s release.
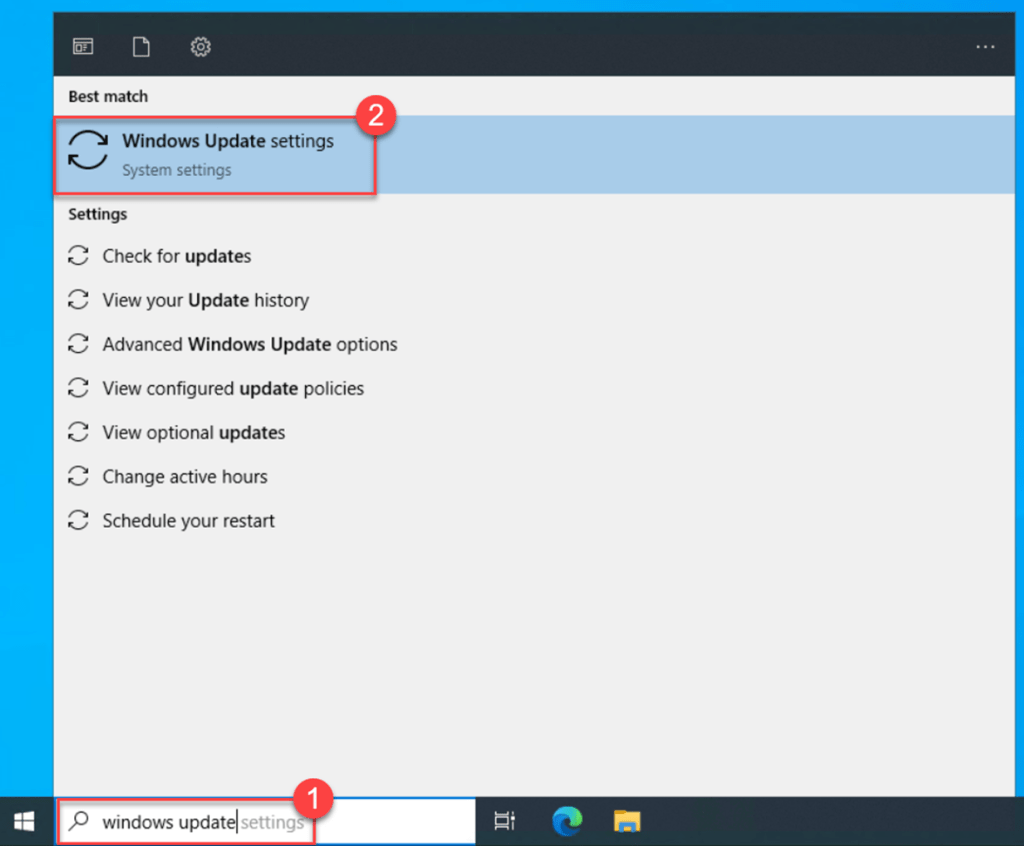
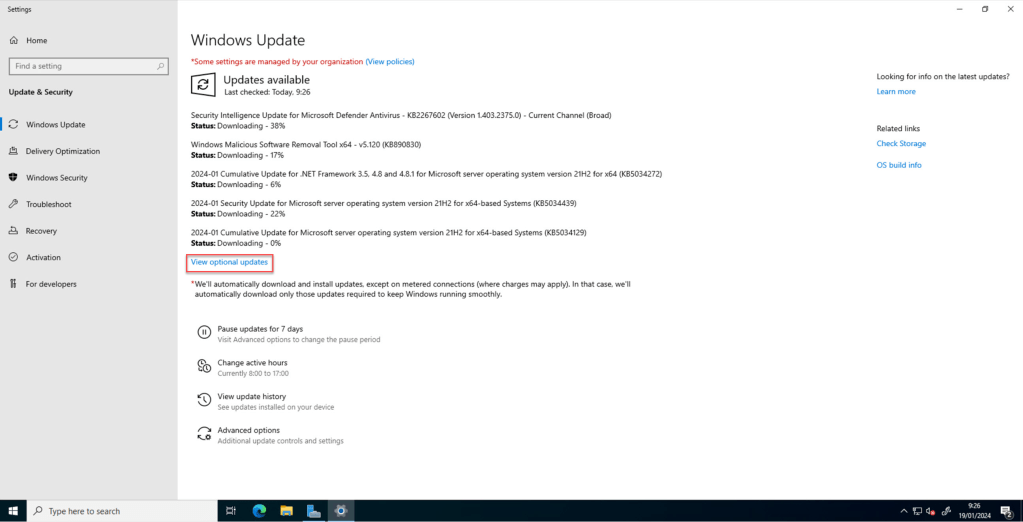
To access Windows Update, simply type “Windows Update” into the search bar and click on “Windows Update settings” from the search results.
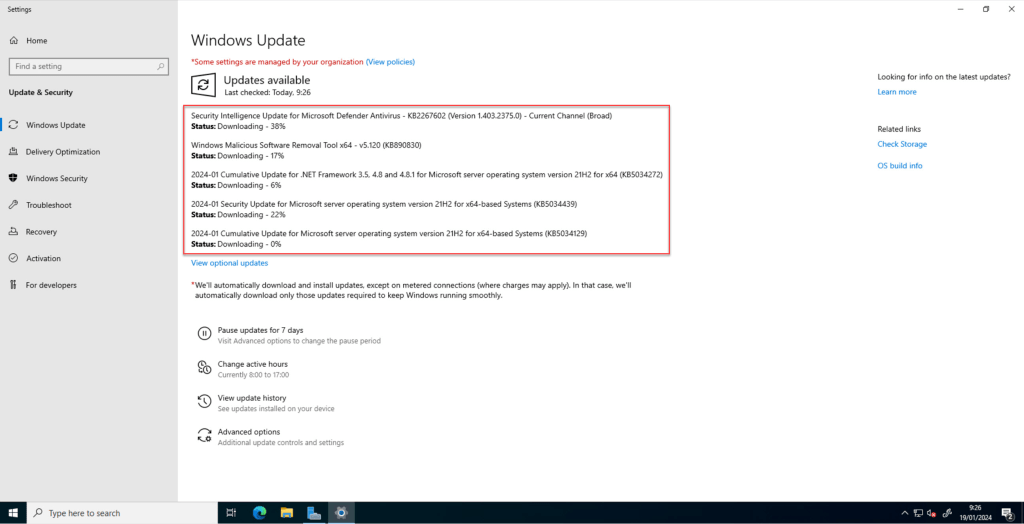
Once you do that, you’ll be directed to the Windows Update page. Here, you can check for updates and easily install them.
Next, install all the available updates; you might need to reboot during this process. After the reboot, initiate the update process once again until all updates are successfully implemented.
As noticed during the manual installation of the network adapter driver, you may have observed that some other devices are missing the necessary drivers.
To install almost all of these, reopen Windows Update and click on “View optional updates.” Within the Driver Updates section, select all the drivers, and click on the “Download and Install” button to complete the installation. Following this, a server reboot will be required once again.
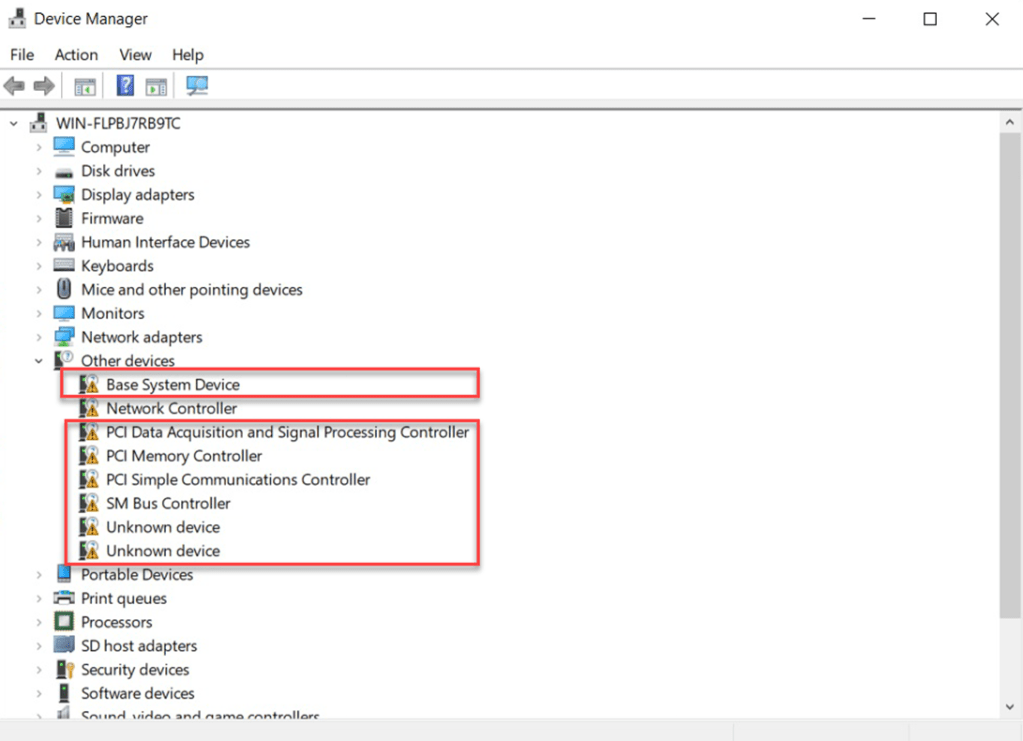
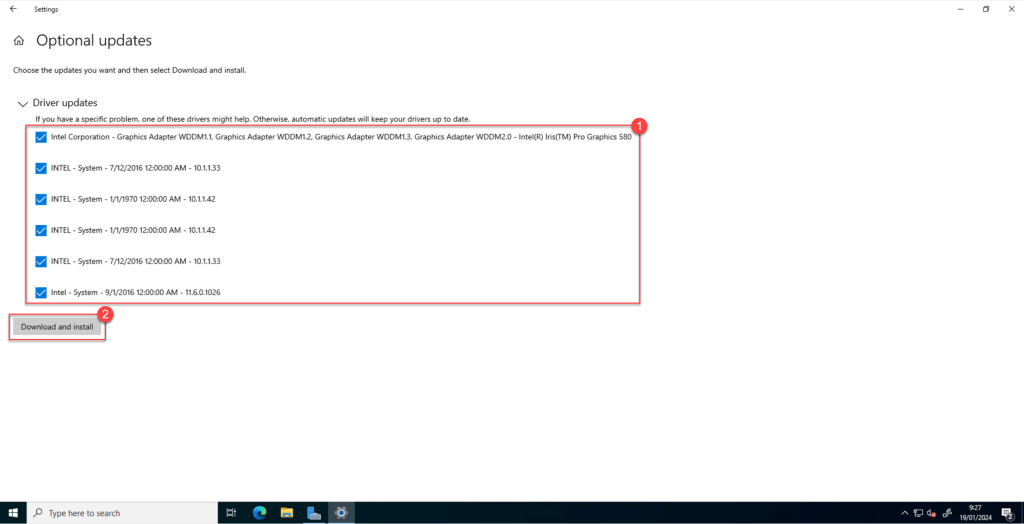
Once completed, the installation will cover almost all the other missing drivers, except for three. Notably, one of these is the wireless network driver, which, in my opinion, may not be essential for a NUC running a server OS.
Configure your Windows Server
Configuring your server following your own best practices and following Microsoft best practices is also an important step in the configuration of your NUC.
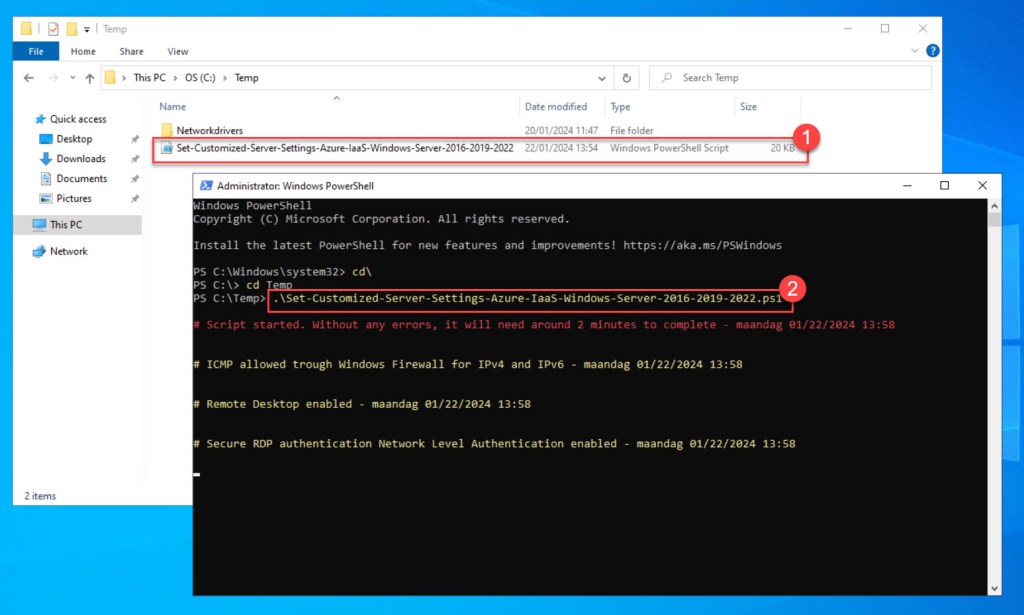
To enhance the efficiency and consistency of the process while minimizing errors and eliminating repetitive configuration changes, I’ve developed a PowerShell script.
Originally created for customizing server settings on Azure Windows VMs running Windows Server 2016, Windows Server 2019, or Windows Server 2022, you can also use this script (after adding your own customizations) for configuring some settings for the Windows Server 2022 deployed on your NUC.
To utilize the script, simply copy and save it as “Set-Customized-Server-Settings-Azure-IaaS-Windows-Server-2016-2019-2022.ps1” in the C:\Temp folder on your NUC.
Next, customize any variables or settings as needed to suit your preferences, and then execute the customized script with administrator privileges in Windows PowerShell.
Remember that your server will either undergo a reboot or require a manual reboot once the script has been executed.
Install and configure Windows Sever Hyper-V role with PowerShell
Once you’ve completed the installation of all Windows and optional updates and fine-tuned your server settings, the next step is to install and configure the Hyper-V role.
This process can be seamlessly accomplished using PowerShell.
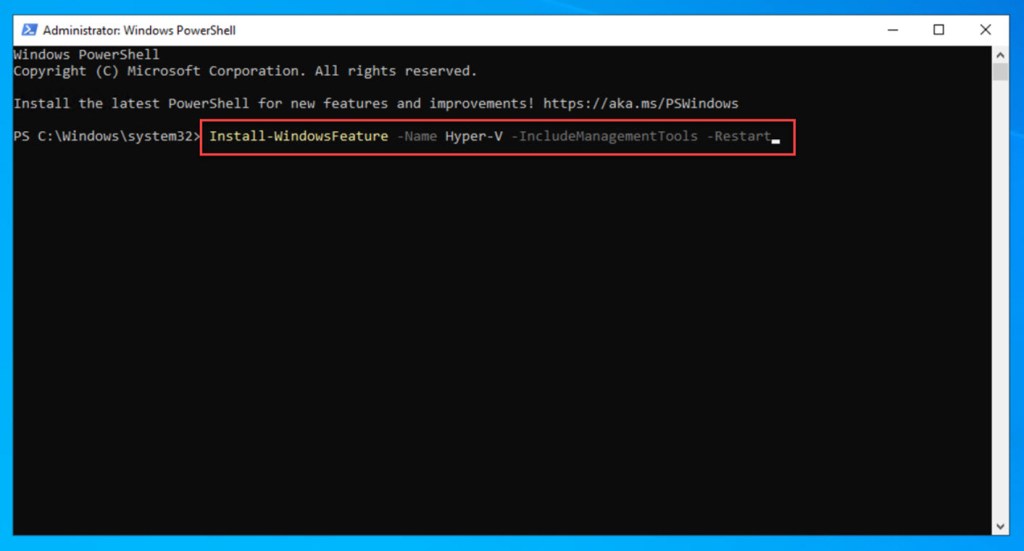
To install the Hyper-V Windows Server role, simply execute the following Windows PowerShell command as administrator:
Install-WindowsFeature -Name Hyper-V -IncludeManagementTools -Restart

Use a USB 3.0 to Gigabit Ethernet Adapter to add an extra Virtual Switch for your VM-LAN network
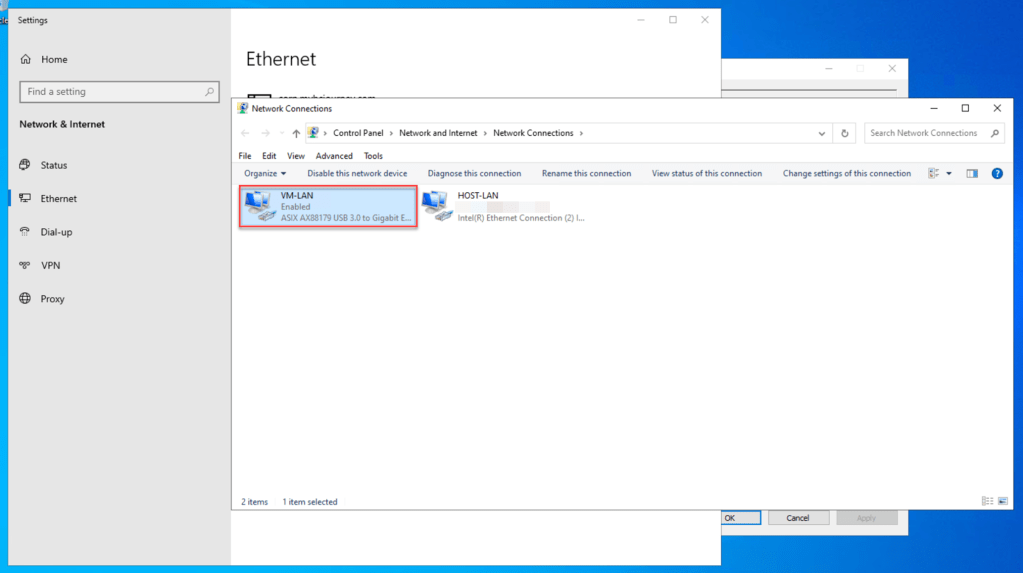
If your NUC doesn’t have dual network adapters, such as the NUC 2.3, it might be a good idea to buy and add a USB 3.0 to Gigabit Ethernet adapter to your NUC.

This will enable you to set up a dedicated virtual switch dedicated to your VM LAN. This way, you can effectively segregate the networking traffic between your host and the traffic associated with your virtual machines (VMs).
To get started, plug the USB 3.0 to Gigabit Ethernet adapter into an available USB 3.0 port on your NUC.

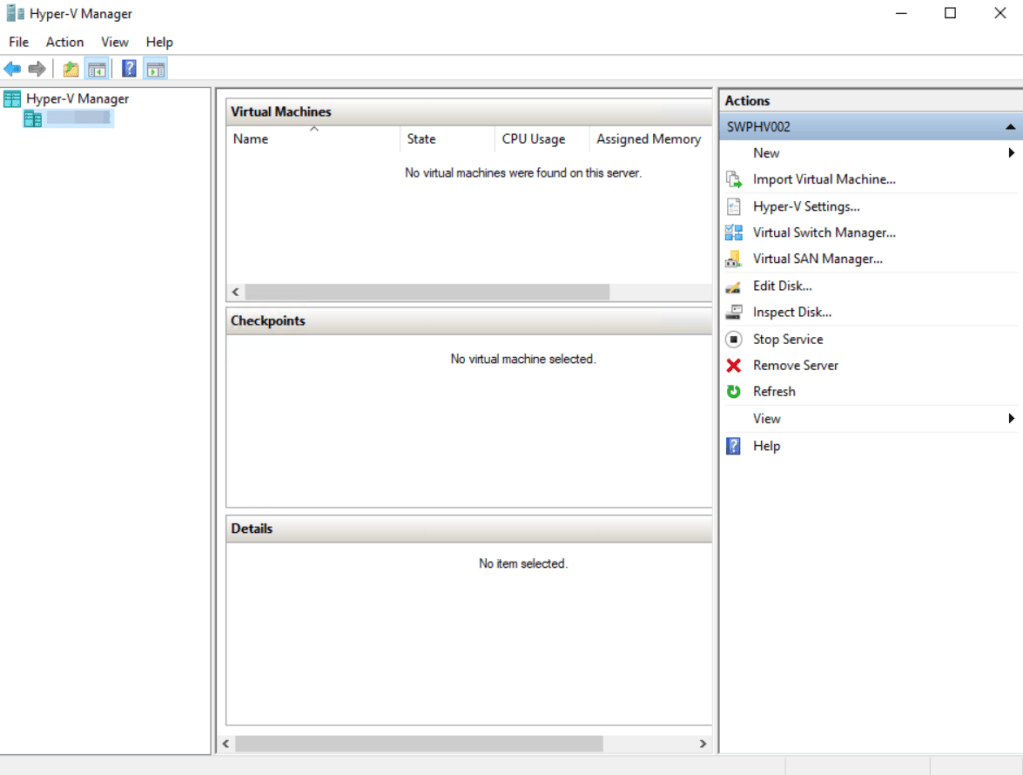
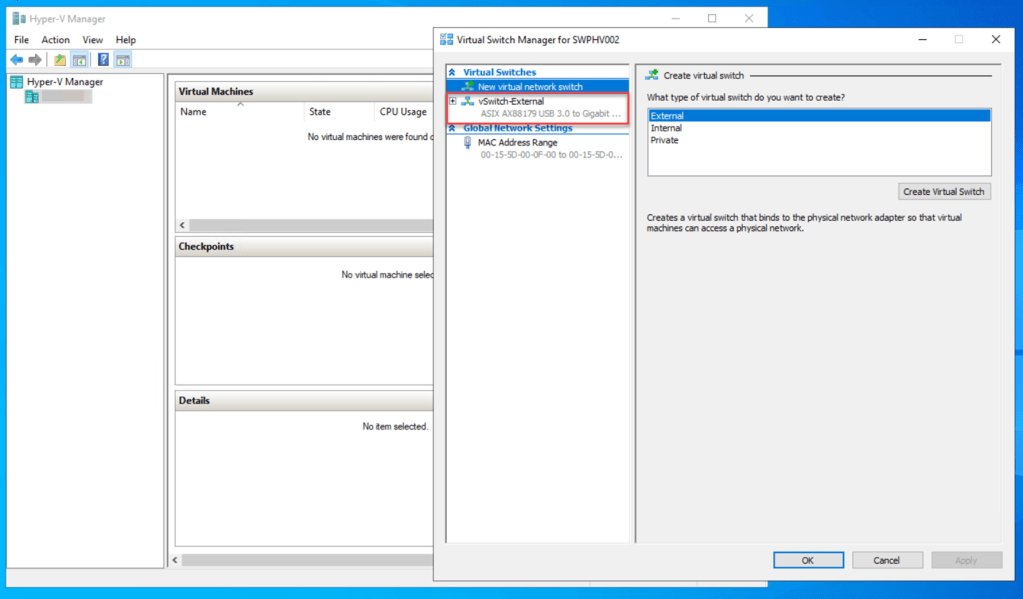
Next, launch Hyper-V Manager. Within Hyper-V Manager, navigate to “Virtual Switch Manager…” by selecting it from the “Actions” menu on the right.

Within the “Virtual Switches” section, select “New virtual network switch.” Under “What type of virtual switch do you want to create?,” choose “External.” Finally, click on the “Create Virtual Switch” button.

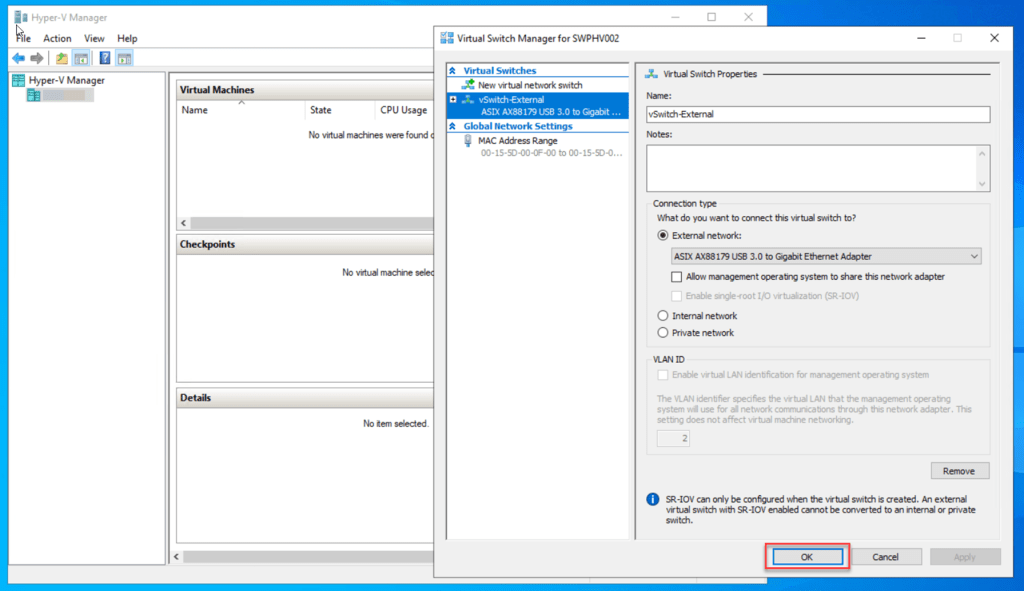
Under “Virtual Switch Properties“, give the new switch a name such as vSwitch-External.
In the “Connection Type” section, verify that “External Network” is selected. Choose the physical network card you want to associate with the new virtual switch, in this case, the USB 3.0 to Gigabit Ethernet Adapter. Additionally, make sure to uncheck “Allow management operating systems to share this network adapter.”
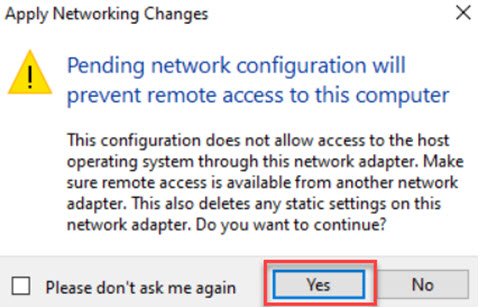
Then select Apply to create the virtual switch.

When the “Apply Networking Changes” dialog box appears, click “Yes” to move forward.
Click OK to close the Virtual Switch Manager Window.
At this point, you’ve successfully added a virtual switch that your VMs can utilize.
Don’t forget to check for new drivers through the Optional Update in Windows Update to ensure you’re using the latest ones for the USB 3.0 to Gigabit Ethernet Adapter you’re currently using.
Add an extra NVMe M.2 disk to store virtual machines
As a best practice and to enhance your NUCs Hyper-V host’s performance, you can store your VMs on a dedicated NVMe M.2 disk.

This practice isolates disk I/O, preventing performance bottlenecks and ensuring smoother operations. With improved performance, managing and organizing the VM’s data becomes more straightforward, simplifying backup procedures and enabling easier scalability.
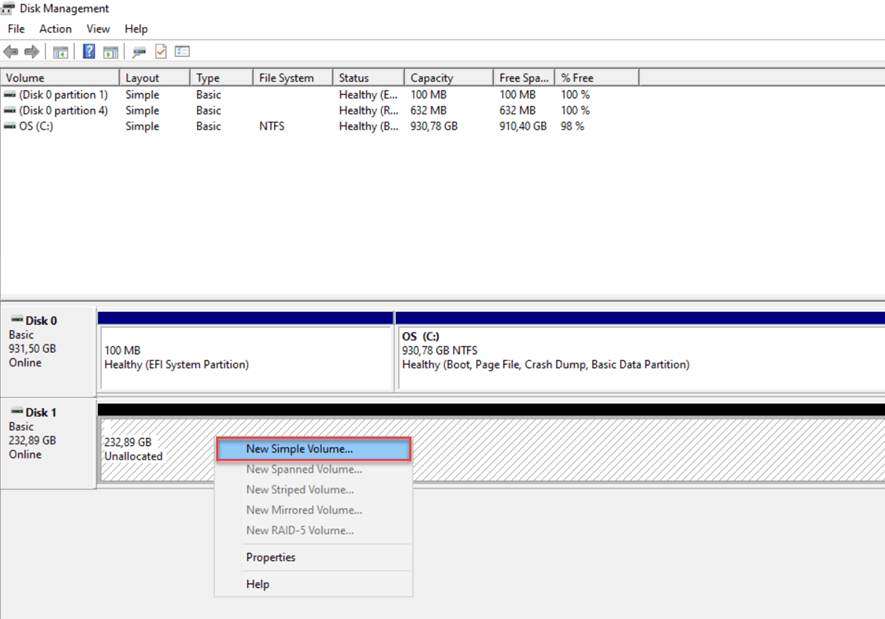
Once you’ve installed your new NVMe M.2 disk and restarted your server, navigate to disk management. Identify the disk you want to initialize, right-click on it, and choose the “Initialize Disk” option.
Following the initialization, right-click on the unallocated space within the drive. From there, select the “New Simple Volume…” option to proceed.
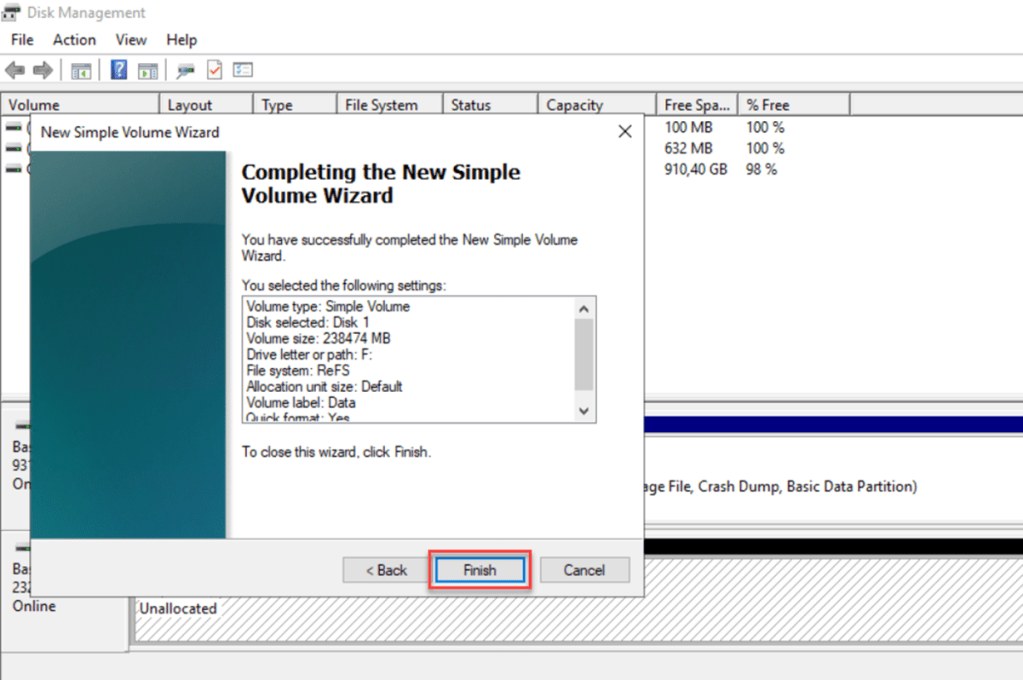
Select “Next,” specify the volume size, and proceed by clicking “Next” once again. Then, assign a drive letter (e.g., F) and click “Next” once more.

As file system, I prefer to use ReFS, but the choice between NTFS and ReFS may vary based on your specific use case or personal preferences. Additionally, provide a name for the volume label and proceed by clicking “Next“.

To finalize the setup of your new disk, click on “Finish” to complete the New Simple Volume Wizard. This step concludes the configuration process for your newly added disk.

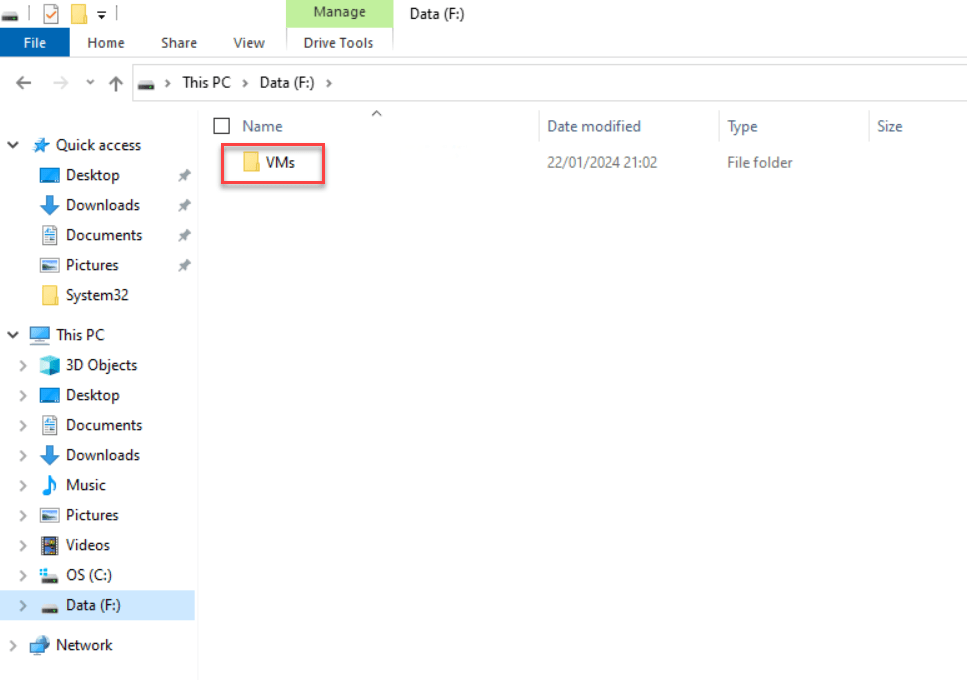
Next, create a folder on the newly allocated drive; I mostly name it “VMs.” This designated folder will serve as the storage location for all your VM data files.
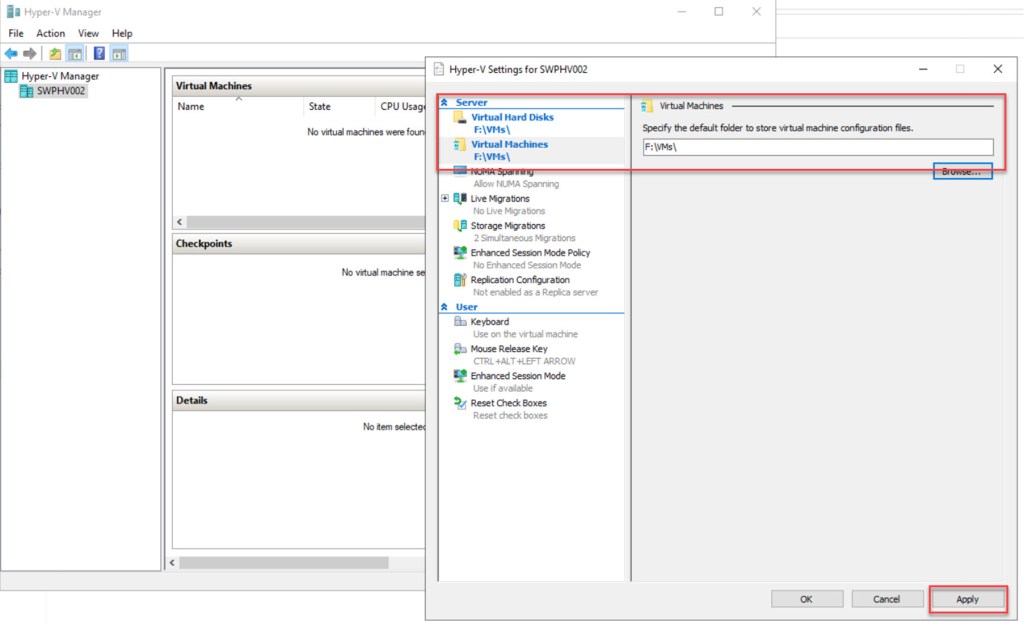
By default, Hyper-V will store the Virtual Hard Disks and Virtual Machines in the “C:\ProgramData\Microsoft\Windows\Virtual Hard Disks” and “C:\ProgramData\Microsoft\Windows\Hyper-V” folders.
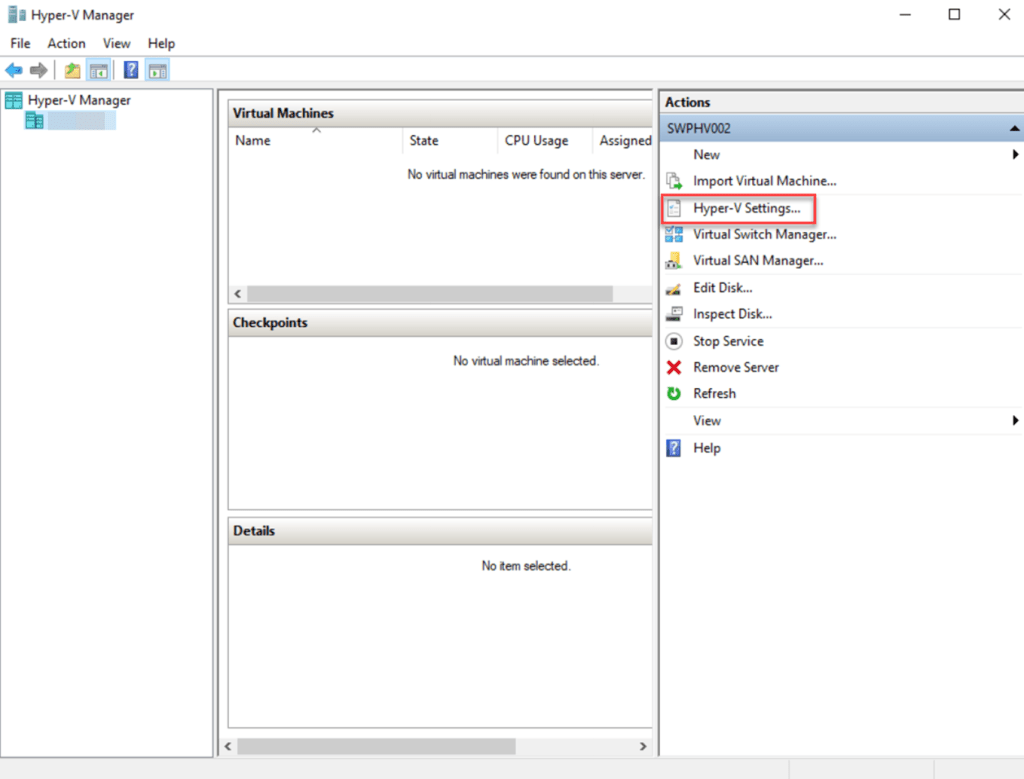
To modify these settings, open Hyper-V Manager and choose Hyper-V Settings…
Then specify the newly created folder on the newly added drive for the Virtual Hard Disks and for the Virtual Machines, click “Apply,” and then close the screen by clicking “OK.” This adjustment ensures your VM data is stored in the desired location.
Conclusion
An Intel NUC, currently under the Asus brand, can serve as a straightforward and reasonably priced Hyper-V home lab.
While there are a few steps to follow, I hope that this blog post provides clear explanations for each.
If you have any questions or suggestions about utilizing an NUC for a Hyper-V home lab, don’t hesitate to contact me via my X handle (@wmatthyssen) or leave a comment. I’m more than happy to assist you.

Pingback: How to combine two USB 3.0 Gigabit Ethernet adapters as an external virtual switch in Hyper-V with PowerShell – Wim Matthyssen
Hi Wim, thank you so much for the detailed article!
I’m currently trying to do the same setup with a Intel Nuc 12 Pro (NUC12WSKI50Z), but I’m stuck on installing the network driver (Error Code 10: Device could not start).
Any advice is much appreciated! 🙂
LikeLike