

In this blog post you will learn how you can change the location of the Microsoft Azure Recovery Services (MARS) agent cache (scratch) folder to another disk on a Windows Server.
With the MARS agent, also know as the Azure Backup agent, you can back up files, folders, entire volumes, and the system state of on-premises Windows server, or even specific files and folders within an Azure Windows Virtual Machine (VM), to an Azure Backup Recovery Services vault.
If you are not familiar with installing and registering the MARS agent, you can always follow the procedure explained on this Microsoft Docs page.
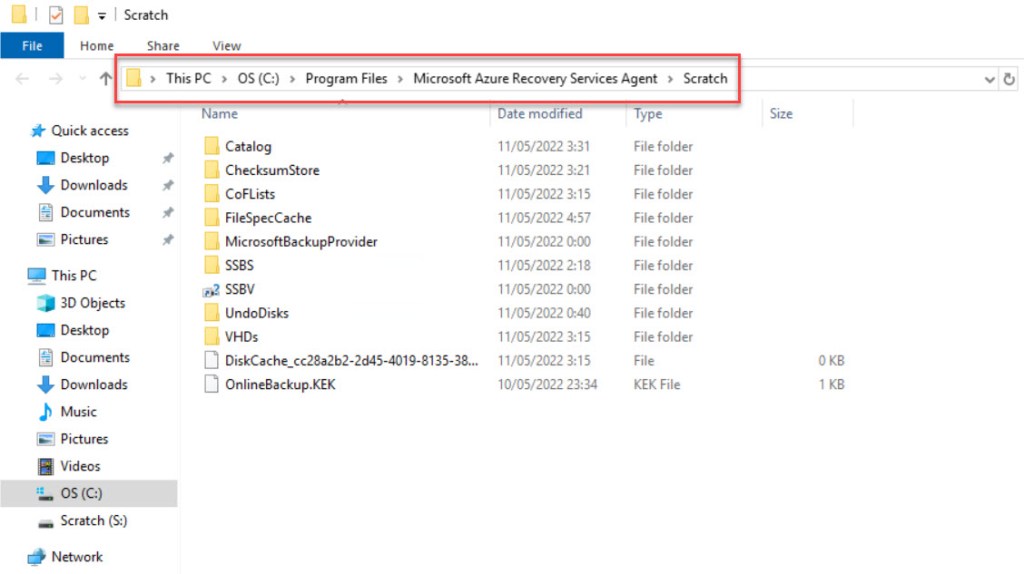
The MARS agent uses a cache or scratch location to store backup data (data snapshots) before sending them to Azure. By default, the scratch folder is created on the local C: drive at the following path:
%ProgramFiles%\Microsoft Azure Recovery Services Agent\Scratch\
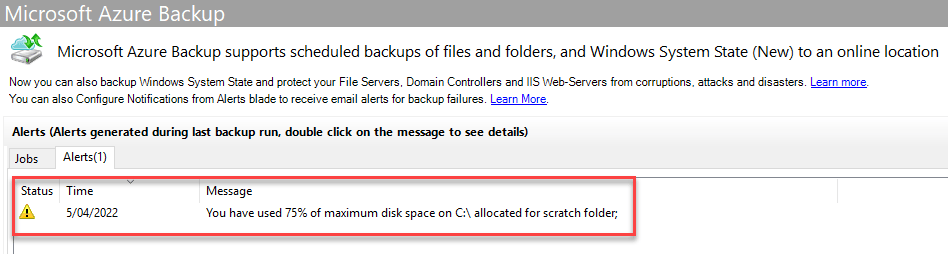
The recommendation is that this scratch location should have at least 5% (advised 10 %) of free space available of the total amount of data that you want to back up. Most of the time, when installing MARS calculating the required space is quite simple, however, as data and backups beginning to grow on the server, this initial calculated free space can quickly shrink, and even resulting in the drive running out of space, as shown on the Microsoft Azure Backup Alert screenshot below.
Luckily whenever this occurs, there is a procedure you can follow to move the scratch folder to another drive (disk) with sufficient space available, which I will explain below.
You can follow all steps and copy all required PowerShell cmdlets or Command Prompt (CMD) commands from here, or you can download them all in one file available from GitHub. When you download the file, keep in mind that you need to adjust all variables to your use before you run them on any Windows server in your environment.
Change the location of the scratch folder to another disk
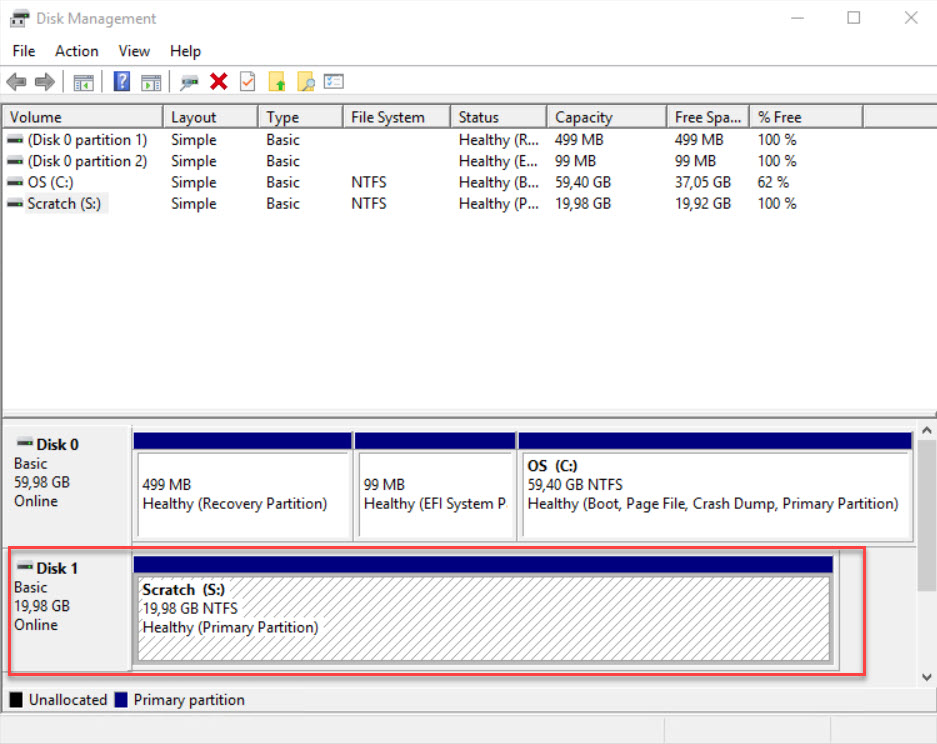
After you added and extra disk (physical or virtual) to your Windows Server, login with and administrator account (local or domain).
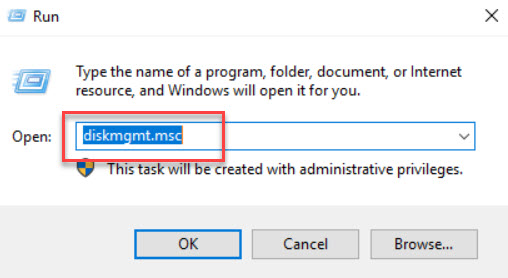
Then open Disk Management, by pressing the Windows key + R, to open the Run dialog box, where you type in diskmgmt.msc. Select your newly added disk and Format it with NTFS as the file system and 64K as allocation unit size.
Whenever I use a separated disk to store the Scratch folder, I always use S: as the drive letter.
Open an elevated CMD and and elevated PowerShell window.

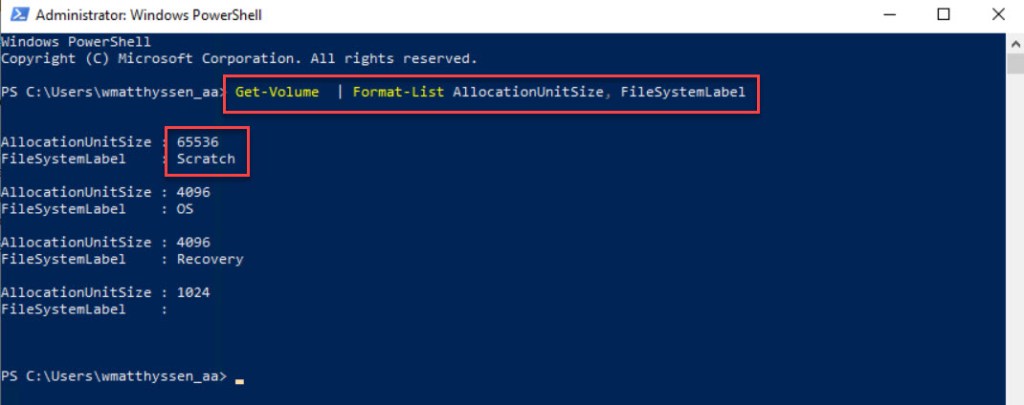
In the PowerShell window you can now validate the correct (64K) Allocation Unit Size by running the following PowerShell cmdlet.
Get-Volume | Format-List AllocationUnitSize, FileSystemLabel
In the same PowerShell window you then you run the following cmdlets to create the scratch folder location on the new disk. Adjust the $driveLetter variable to your own use:
## ---------------------------------------------------------------------------------------------------------------------------------------------------------------------------------------------

## Create Microsoft Azure Recovery Services Agent Scratch folder on S: drive

$driveLetter = "S:\" #Specify your drive letter here

New-Item -Path $driveLetter -Name "Microsoft Azure Recovery Services Agent" -ItemType "directory"

New-Item -Path "$driveLetter + Microsoft Azure Recovery Services Agent" -Name "Scratch" -ItemType "directory"

Write-Host `n "# Microsoft Azure Recovery Services Agent Scratch folder available" -foregroundcolor "Yellow"

## ---------------------------------------------------------------------------------------------------------------------------------------------------------------------------------------------


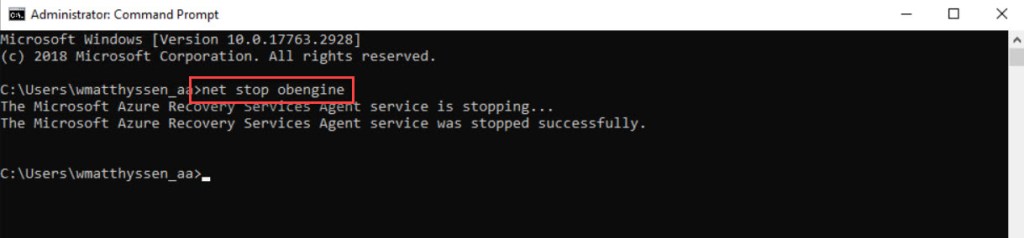
Then, in the elevated CMD window run the below command to stop the Backup engine.
net stop obengine
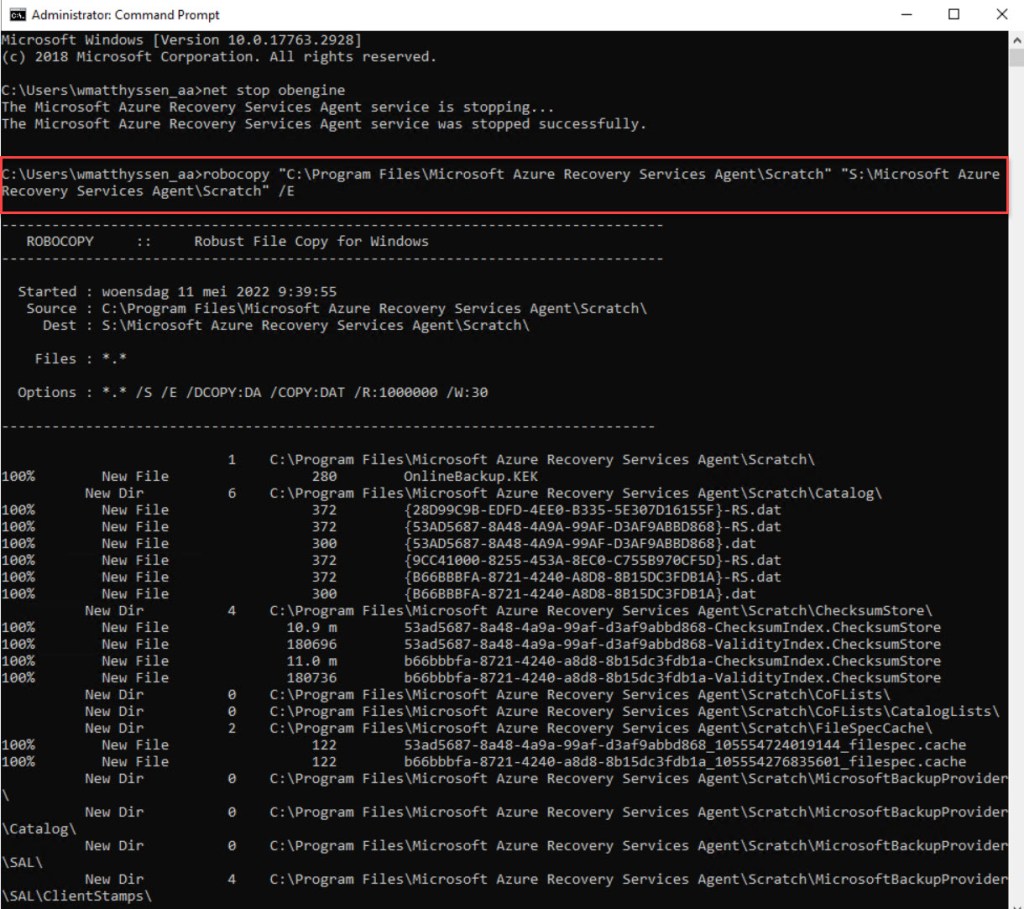
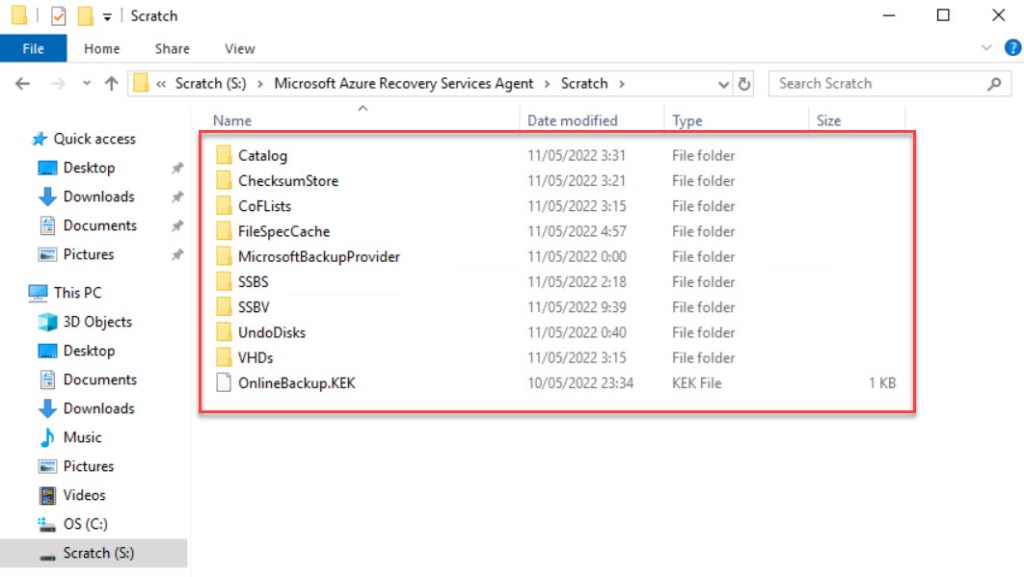
In the same elevated CMD window use the Robocopy command to copy all the data from the default scratch folder to the new scratch folder on the new disk. Ensure that all date is copied, and not moved.
:: Use Robocopy to move scratch folder data

robocopy "C:\Program Files\Microsoft Azure Recovery Services Agent\Scratch" "<yourdriveletterhere>:\Microsoft Azure Recovery Services Agent\Scratch" /E

:: Robocopy has finished
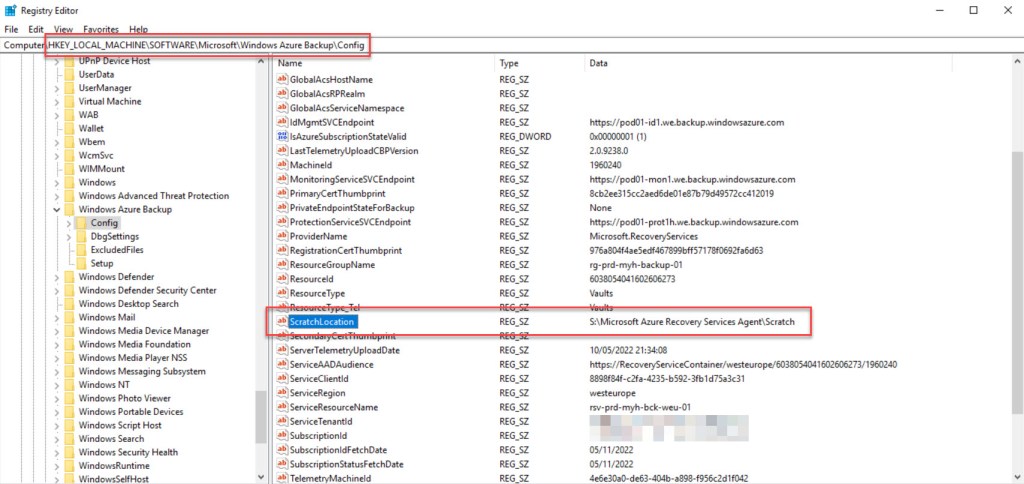
After the scratch data has been copied, you need to update the following registry entries with the path of the newly moved scratch folder:
HKEY_LOCAL_MACHINE\SOFTWARE\Microsoft\Windows Azure Backup\Config
HKEY_LOCAL_MACHINE\SOFTWARE\Microsoft\Windows Azure Backup\Config\CloudBackupProvider
You can to this by running the following PowerShell cmdlets in the already open elevated PowerShell window (adjust the drive letter to your own use <yourdriveletterhere>):
## ---------------------------------------------------------------------------------------------------------------------------------------------------------------------------------------------
## Update scratch folder regkey values with the path of the newly moved scratch folder
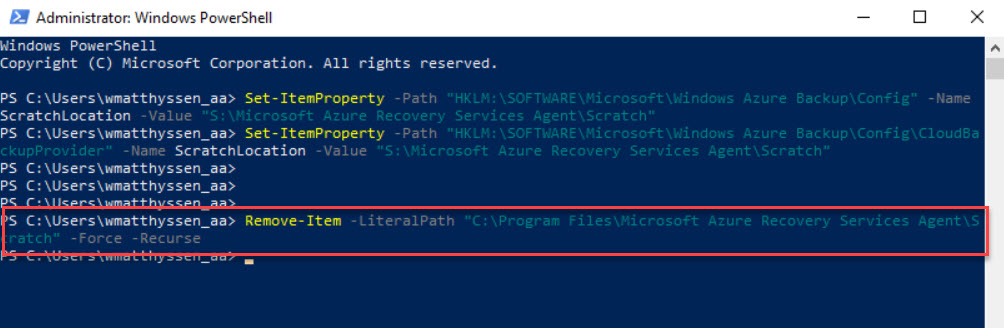
Set-ItemProperty -Path "HKLM:\SOFTWARE\Microsoft\Windows Azure Backup\Config" -Name ScratchLocation -Value "<yourdriveletterhere>:\Microsoft Azure Recovery Services Agent\Scratch"
Set-ItemProperty -Path "HKLM:\SOFTWARE\Microsoft\Windows Azure Backup\Config\CloudBackupProvider" -Name ScratchLocation -Value "<yourdriveletterhere>:\Microsoft Azure Recovery Services Agent\Scratch"
Write-Host `n "# Scratch folder regkey values are updated" -foregroundcolor "Yellow"
## ---------------------------------------------------------------------------------------------------------------------------------------------------------------------------------------------

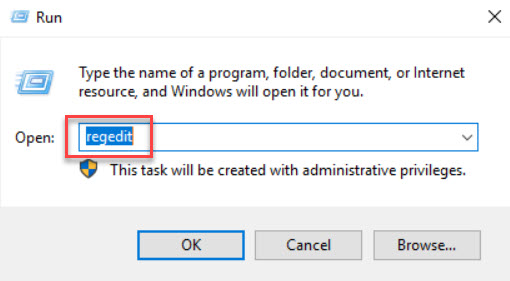
You can validate the correct new values of the regkeys by opening Run (Windows key + R) and by typing in regedit.

After this check, you may restart the Backup engine with running the below command in the opened elevated CMD window:
net stop obengine
net start obengine

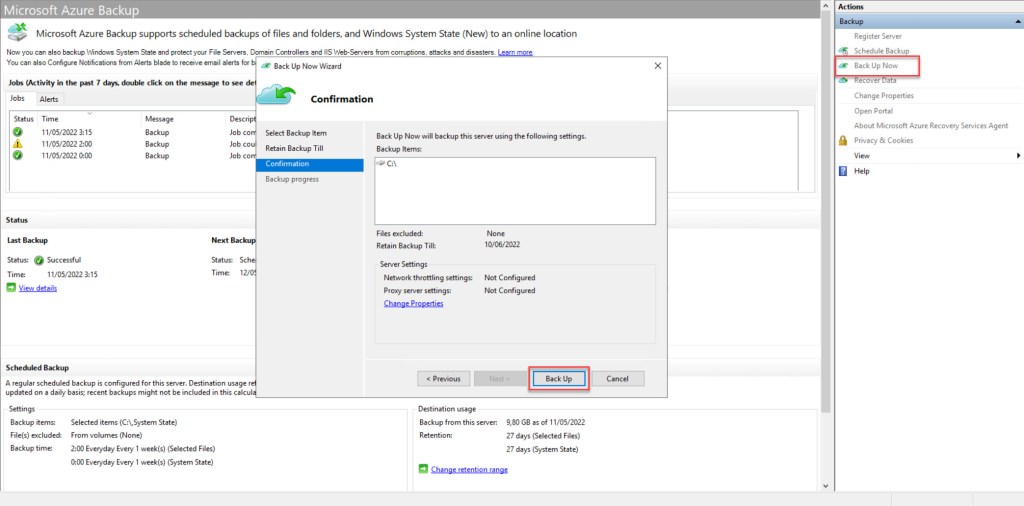
Then test all changes by running an on-demand backup.
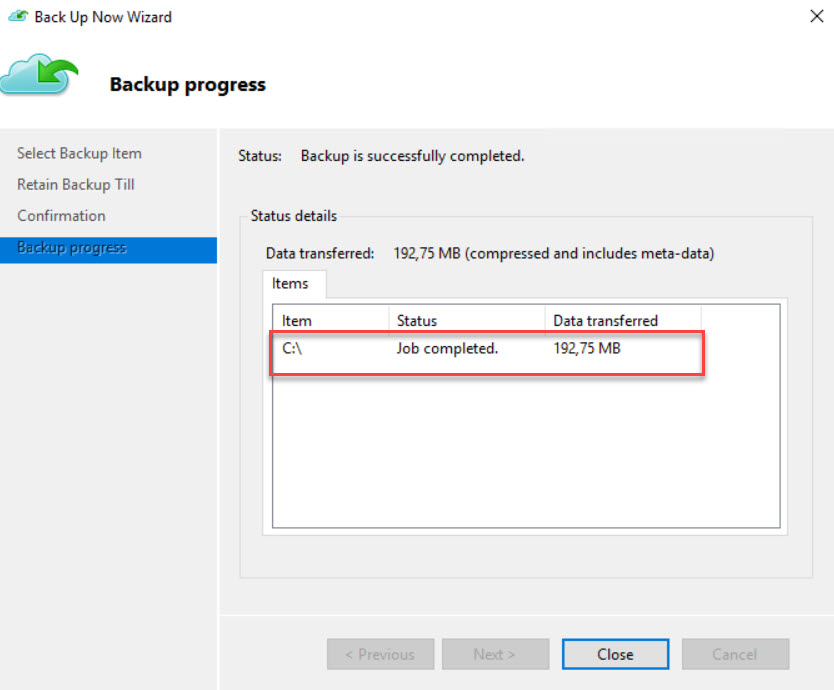
If the backup finishes successfully using the new scratch folder location, you can remove the original scratch folder and all its data by running the following PowerShell cmdlet in the elevated PowerShell window:
## ---------------------------------------------------------------------------------------------------------------------------------------------------------------------------------------------

## Delete original scratch folder and data

Remove-Item -LiteralPath "C:\Program Files\Microsoft Azure Recovery Services Agent\Scratch" -Force -Recurse

## ---------------------------------------------------------------------------------------------------------------------------------------------------------------------------------------------
After running this cmdlets you have successfully changed the location of the scratch folder.
Conclusion
Azure Backup uses the MARS agent to backup files, folders, and the system state from on-premises VMs and it can even foresee backups for specific files and folders on an Azure VM that runs side by side with the Azure VM backup extension. All these kind of backups are stored in a Recovery Services vault in Azure.
In some cases you need to change the location MARS agent scratch folder to another disk on a Windows Server. To do this without any backup data loss you can follow the procedure shown in this blog post.
If you have any questions or recommendations about it, feel free to contact me through my Twitter handle (@wmatthyssen) or to just leave a comment.

0 comments on “Azure Backup: Change the location of the MARS agent cache (scratch) folder to another disk on a Windows Server”