

You can use Azure resource locks to prevent unexpected or malicious changes, modifications or even worse, accidental deletion of your Azure resources. When losing some critical resources that are key in your Azure environment or Hybrid infrastructure, recovery can be dramatic. Therefore, as part of your Azure Governance strategy, you should always use resource locks to better protect your cloud resources.
There are two types of resource locks that you can apply:
- CanNotDelete (displayed as Delete in the Azure Portal), where an authorized user can read and modify the resource, but cannot delete the resource.
- ReadOnly (displayed as Read-only in the Azure Portal), where an authorized user can only read the resource, but cannot modify or delete the resource. Applying this lock is similar to restricting all authorized users with the permission granted by the role-base access control (RBAC) reader role.
Keep in mind that when you apply two locks, one CanNotDelete and one ReadOnly on the same scope (subscription, resource group or resource), the most restrictive lock, the ReadOnly lock, takes precedence.
Resource locks can be applied to different scopes, an Azure subscription, a resource group or to an individual resource, if required. When you apply a lock at a parent scope, all resources within that scope inherit the same lock. Moreover, resources you add later, will also automatically inherit the lock from the parent.
When you apply a resource lock at the subscription level (scope), all resources in that specific subscription, including the ones deployed later, inherit the same lock. On the other hand when you apply a lock on a resource group, all resources within that resource group (scope) will inherit that same lock. Once applied, these locks will foresee a restriction which will impact all Azure users regardless of their roles.
As a best practice, and also to provide more flexibility and control, it is best to apply resource locks at the resource group level. In this way, the applied locks will not become a restricting or even a blocking factor when managing your Azure environment(s) on a daily basis.
Watch out with applying a ReadOnly lock on a resource group containing a storage account(s) because this will prevent all users from listing any keys. Also never place a CanNotDelte lock on a resource group containing an Azure Backup Recovery Services vault(s) or related resources, because this will cause backups to fail.
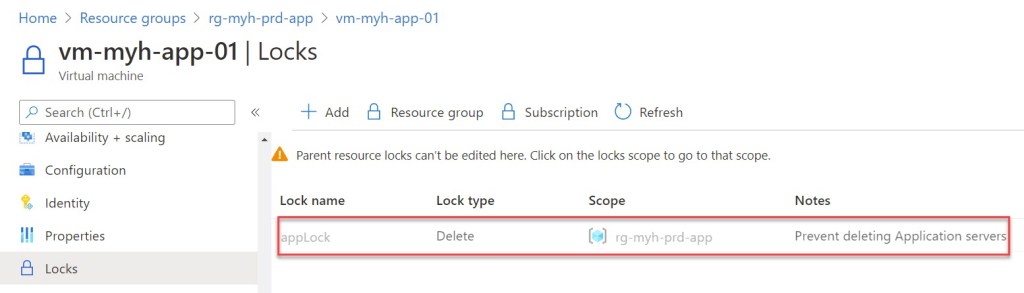
When you try to delete a resource, in the example an Azure virtual machine (vm-myh-app-01), which is locked by a resource lock, a notification similar to the screenshot below will be shown.

In this example the VM with name vm-myh-app-01 is locked by a parent resource rock on the resource group (scope) rg-myh-prd-app.
Before you can delete the VM, or any other resource in that resource group (rg-myh-prd-app), the resource lock will have to be removed first. To be able to remove resource locks more easily, I usually use Azure PowerShell, run in Azure Cloud Shell, Visual Studio Code or Windows Terminal.
Keep in mind that you will need to have access to Microsoft.Authorization/* or Microsoft.Authorization/locks/* to create, change or delete locks. By default, only the build-in RBAC roles Owner and User Access Administrator have these permissions.
Delete a resource lock with Azure PowerShell
First you should check if the user has the proper RBAC role of Owner or User Access Administrator to be able to delete the resource lock. You can check this by running the below Azure PowerShell commands (change the variable $signInName, to fit your needs).
## List role assignments for a user by DisplayName, RoleDefinitionName and Scope

$signInName = "wim.matthyssen@mydomain.com"

Get-AzRoleAssignment -SignInName $signInName | Format-List DisplayName, RoleDefinitionName, Scope

To know which resource locks are applied on which resource groups within a specific subscription, you can run the below Azure PowerShell commands. This will give you an overview of all applied resource locks.
## List all resource locks in an Azure subscription by Name, applied Resource Group and Properties

Get-AzResourceLock | Format-List ResourceName, ResourceGroupName, Properties

To remove a resource lock from a specific resource group, you can use the below Azure PowerShell commands (change the $rgName variable, to fit your needs).
## Remove a resource lock

$rgName = "rg-myh-prd-app"

Get-AzResourceLock | Where-Object ResourceGroupName -eq $rgName | Remove-AzResourceLock -Force


After removing the resource lock, you will be able to delete the resource group with all it’s child resources, by running the below Azure PowerShell commands (change the $rgName variable, to fit your needs).
## Remove a resource group and all child resources after removing the resource lock

$rgName = "rg-myh-prd-app"

Get-AzResourceGroup -Name $rgName | Remove-AzResourceGroup -Force


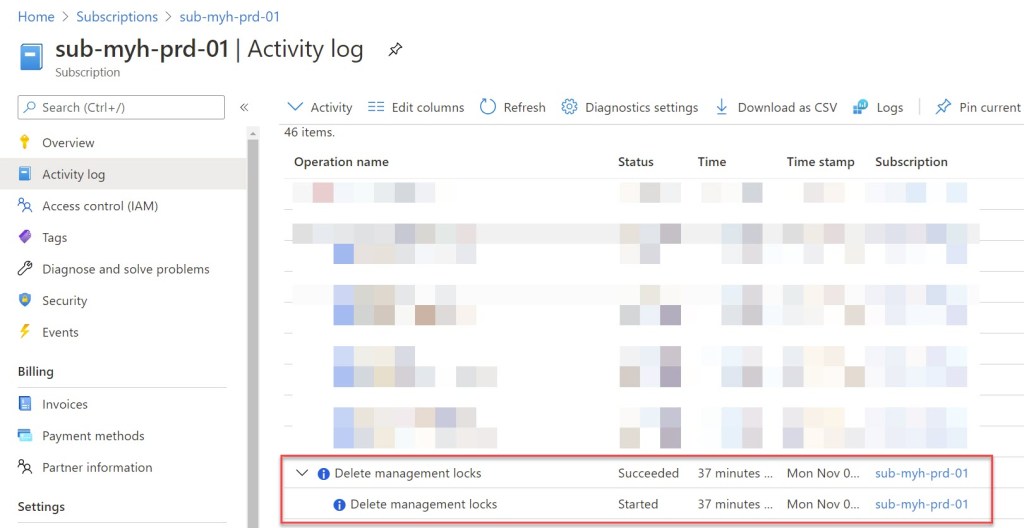
To delete all resource locks from all scopes within a subscription, you can run the below Azure PowerShell commands.
## Remove all resource lock from all scopes

Get-AzResourceLock | ForEach-Object {Remove-AzResourceLock -ResourceId $_.ResourceId -Force -Confirm:$False}

Conclusion
Locking critical Azure resources can prevent you from accidental and hard to recover downtime. As a best practice you should apply resource locks at the resource group level. Also, keep in mind that applying resource locks can sometimes lead to unexpected behavior because some operations require actions that are blocked by the applied type of lock, such as Azure Backup operations.
To remove a resource lock you can use the Azure Portal or Azure CLI. But I always use Azure PowerShell ran from within Azure Cloud Shell, Visual Studio Code or Windows Terminal.

0 comments on “Delete an Azure resource lock with Azure PowerShell”