
Azure Bastion session recording provides a powerful capability for security auditing and compliance, but only if it is configured correctly.
In this blog post, I will walk through the complete setup, show the feature in action, and cover the best practices needed to keep your environment secure.
A key part of this setup is configuring a managed identity for Azure Bastion, which allows it to authenticate to the storage account where recordings are saved without the need for any stored credentials or connection strings.
Table of Contents
- What is Azure Bastion Session Recording?
- Prerequisites
- Configure CORS settings on the storage account
- Configure session recording on the Bastion host
- Test session recording with a Windows VM
- Test session recording with a Linux VM
- Conclusion
What is Azure Bastion Session Recording?
Think of it as a “security camera” for your administrative sessions. When a user connects to a virtual machine (VM) via Azure Bastion, the service records the entire RDP or SSH session and saves it directly to a blob container in a storage account for auditing and review.
Why this matters:
Beyond logs: Unlike traditional resource logs, which primarily capture session metadata such as timestamps, source IPs, and connection success, session recording provides a visual audit trail of the actual actions performed by capturing every frame of an RDP desktop or every command typed in an SSH terminal.
Compliance and forensics: Whether you need forensic evidence after a security incident or must meet strict compliance requirements such as PCI-DSS, DORA, or the NIS2 Directive, you have a complete visual record of every command, click, and configuration change performed during the session.
Operational troubleshooting: Session recordings provide invaluable context when diagnosing configuration issues or reproducing problems reported by administrators.
Because the recording process is handled natively by the Azure Bastion service, there is no additional resource overhead on the target VM. Your workloads continue to run at full speed while auditing happens seamlessly in the background, entirely transparent to the guest operating system.
💡 While session recording is included with the Azure Bastion Premium SKU at no additional feature cost, the recordings themselves are stored as binary files (application/octet-stream) in an Azure Storage account, and storage is not free. These files use a proprietary Azure format designed exclusively for playback through the Azure Portal.
Prerequisites
- At least one active Azure subscription. If you are following the Cloud Adoption Framework (CAF) enterprise-scale architecture, ensure you have access to your Connectivity subscription (where Bastion usually resides) and your Management or Landing Zone subscriptions.
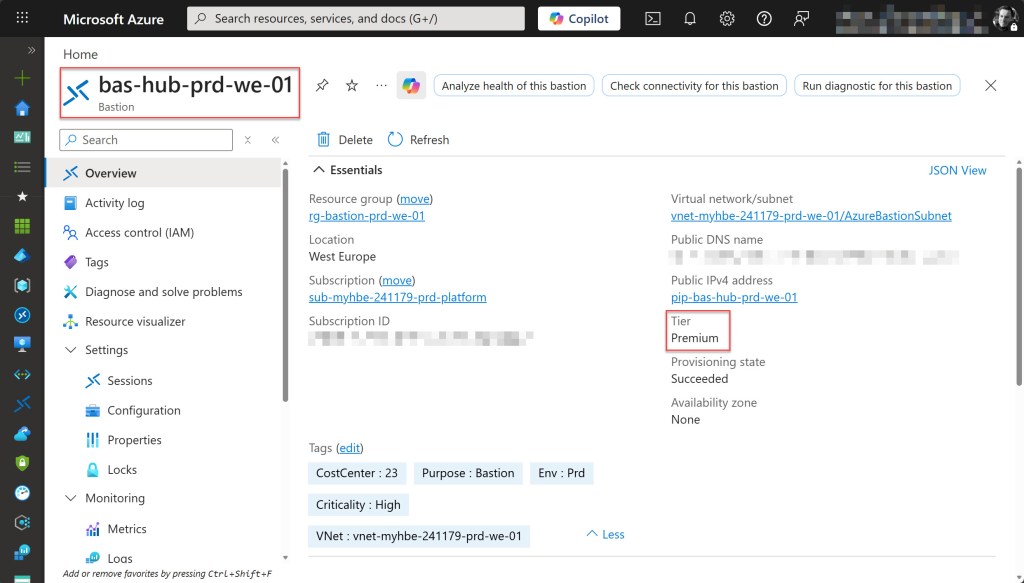
- An Azure Bastion host running the Premium SKU, as session recording is not available in the Basic or Standard tiers.
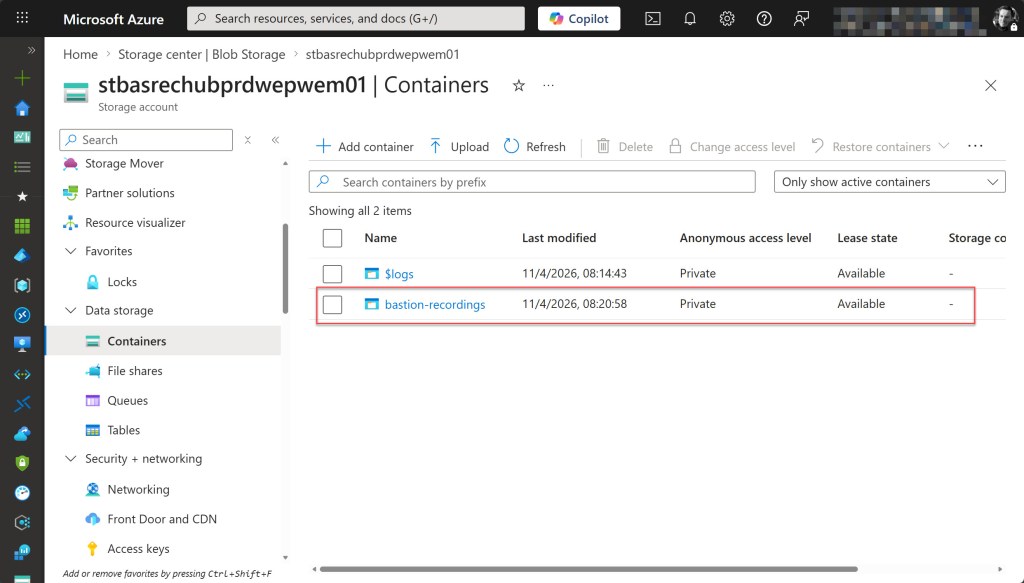
- A general purpose v2 storage account with a dedicated blob container for session recordings must be deployed in the same region as the Azure Bastion host to ensure optimal performance and avoid cross-region egress costs. The container’s public access level must be set to Private (no anonymous access) to ensure sensitive data is only accessible via Azure RBAC.
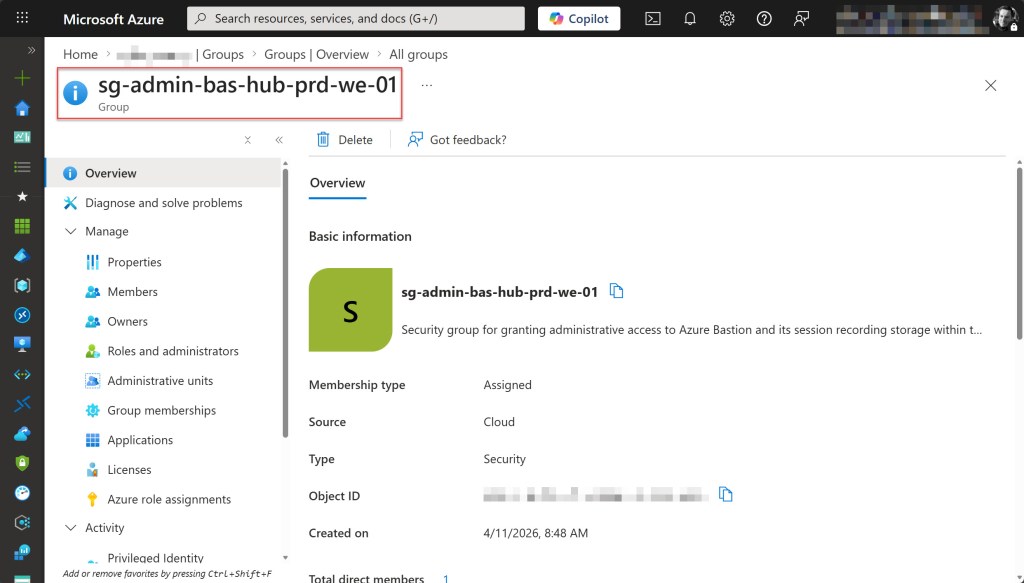
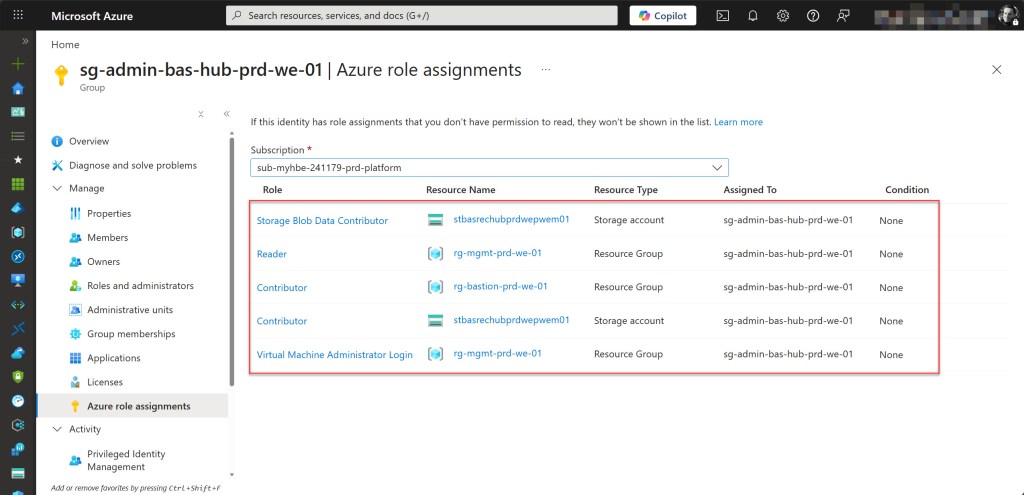
- An Azure account with the Contributor role (preferably assigned via a Security Group) to create the Storage Account and modify Azure Bastion settings, as well as the Storage Blob Data Contributor role* to manage and view the recorded session data. Additionally, the Virtual Machine Administrator Login (or Virtual Machine User Login) and Reader roles are required on the resource group containing the VMs to enable Bastion connectivity.
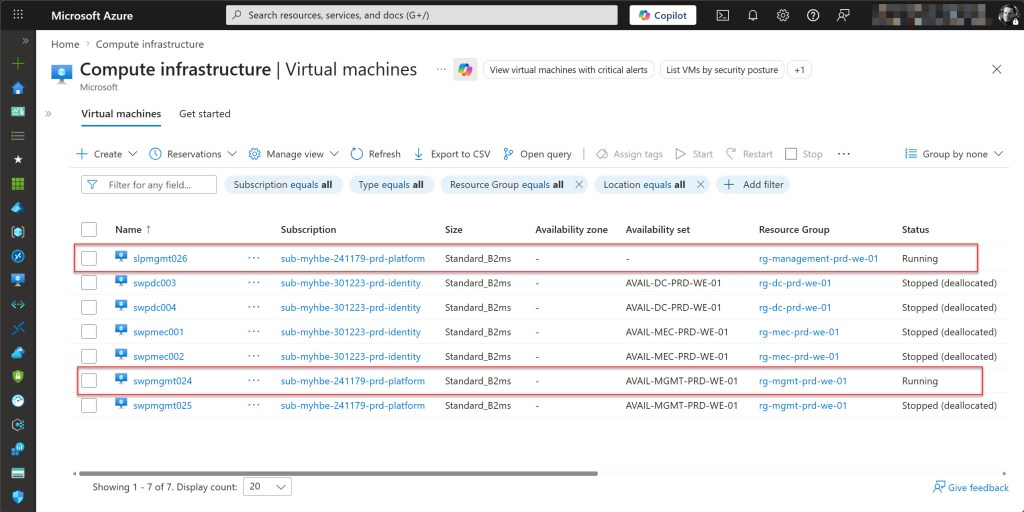
- Ensure that at least one Azure Windows virtual machine and one Azure Linux virtual machine are deployed and accessible through the Bastion host.
*During configuration, you’ll also grant the Azure Bastion resource itself Storage Blob Data Contributor access to the storage account so it can write recordings.

Configure CORS settings on the storage account
Before you can enable session recording on Azure Bastion, you must configure Cross-Origin Resource Sharing (CORS) settings on the storage account. CORS allows the Azure Bastion service to write session recordings to your blob container.
Retrieve the Azure Bastion DNS Name
First, you need to obtain the full DNS name of your Azure Bastion resource, as this is required for the CORS configuration.
Sign in to the Azure Portal and open your Azure Bastion resource. On the Overview page, locate the Public DNS name and copy it. The DNS name follows the format bst-xxxxxxxx-xxxx-xxxx-xxxx-xxxxxxxxxxxx.bastion.azure.com.
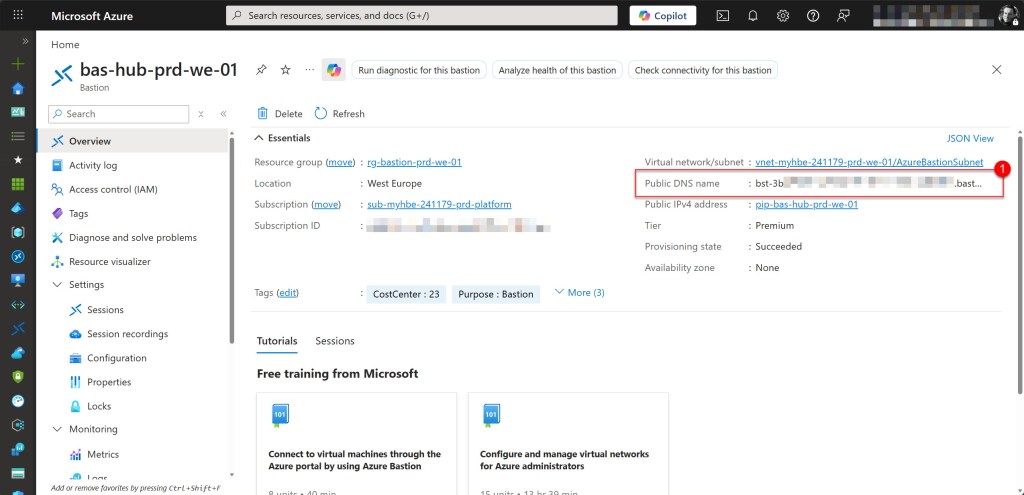
💡Copy the DNS name exactly as shown on the Overview page. This value is required for the CORS configuration.
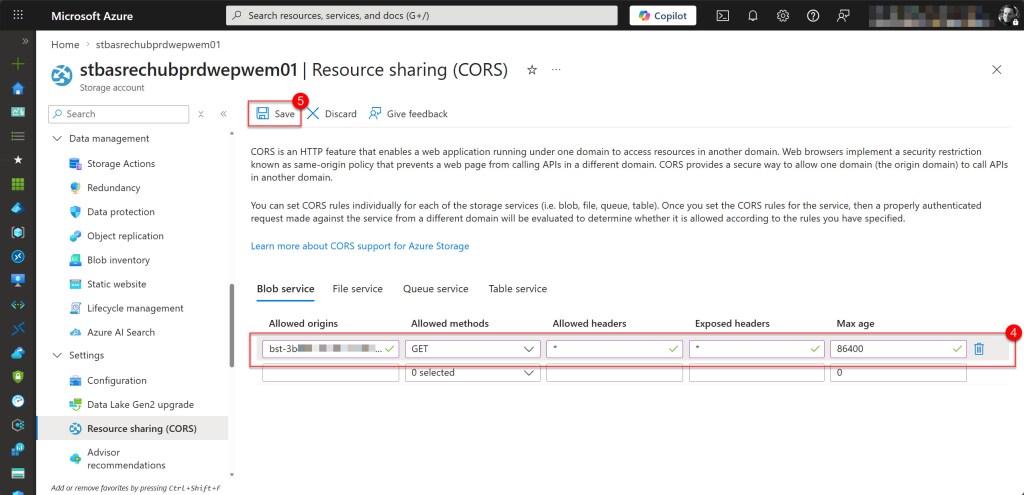
Configure the CORS Policy
Now you can configure the CORS policy on your storage account. In the Azure portal, navigate to your storage account. In the left-hand navigation pane, under Settings, select Resource sharing (CORS), then open the Blob service tab.
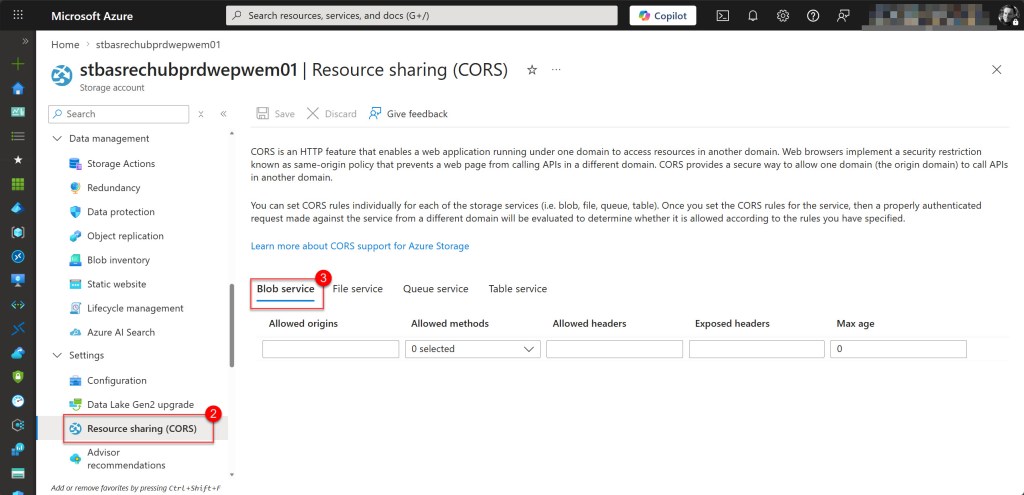
Create a CORS rule using the values below. Then click Save at the top of the page to apply the policy.
- Allowed origins: Copied Bastion resource Public DNS name
- Allowed methods: GET
- Allowed headers: *
- Exposed headers: *
- Max age: 86400
💡 The CORS configuration remains the same regardless of whether you use a Shared Access Signature (SAS) or managed identity for authentication. CORS defines whether cross-origin requests are allowed, while the authentication method determines how Azure Bastion accesses the storage account.
Once the CORS policy has been successfully saved, your storage account is ready to receive session recordings from Azure Bastion.
Configure session recording on the Bastion host
Once the storage account and CORS settings are configured, you can enable session recording on your Azure Bastion host using a managed identity for authentication.
This approach is more secure than using Shared Access Signatures (SAS), as it relies on Azure RBAC-based authentication and eliminates the need for secret management. It also aligns with the principle of least privilege, making it the recommended approach for production deployments.
Enabling session recording involves three main steps: assigning a managed identity to the Bastion resource, granting the required storage permissions, and configuring the session recording settings.
💡Managed identity support for Azure Bastion session recording is currently in Preview at the time of writing. As this is a preview feature, it is recommended to test this in a non-production environment first
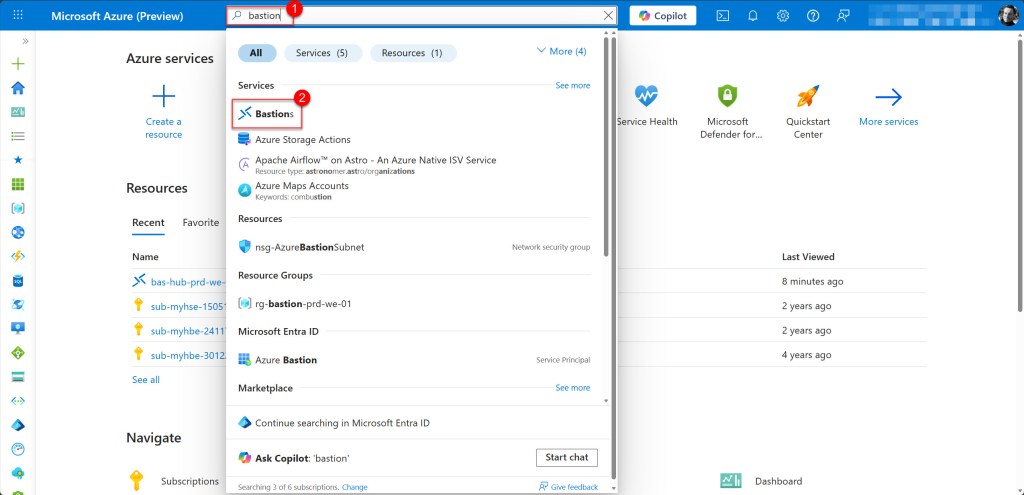
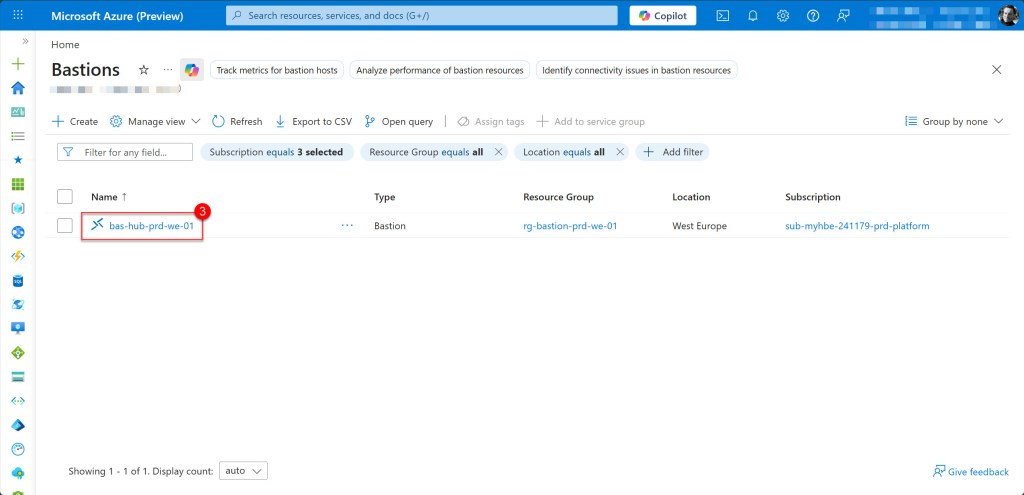
Because the Azure Preview Portal is required, open preview.portal.azure.com and sign in. Navigate to your Azure Bastion resource by searching for Bastion in the search bar.
Enable managed identity on Bastion resource
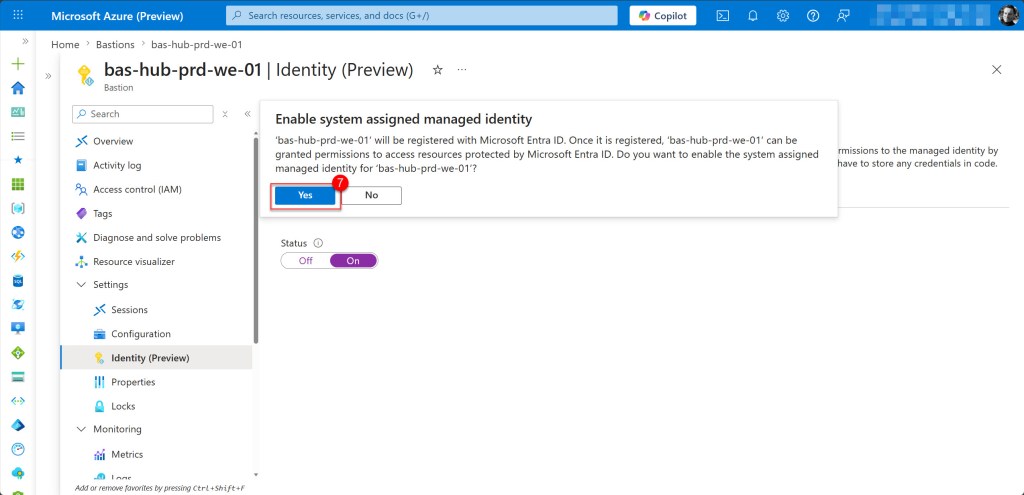
On the Bastion page, first enable a system-assigned managed identity on your Bastion resource. To do this, in the left-hand navigation pane under Settings, select Identity (Preview). On the System assigned tab, set the Status to On and click Save.
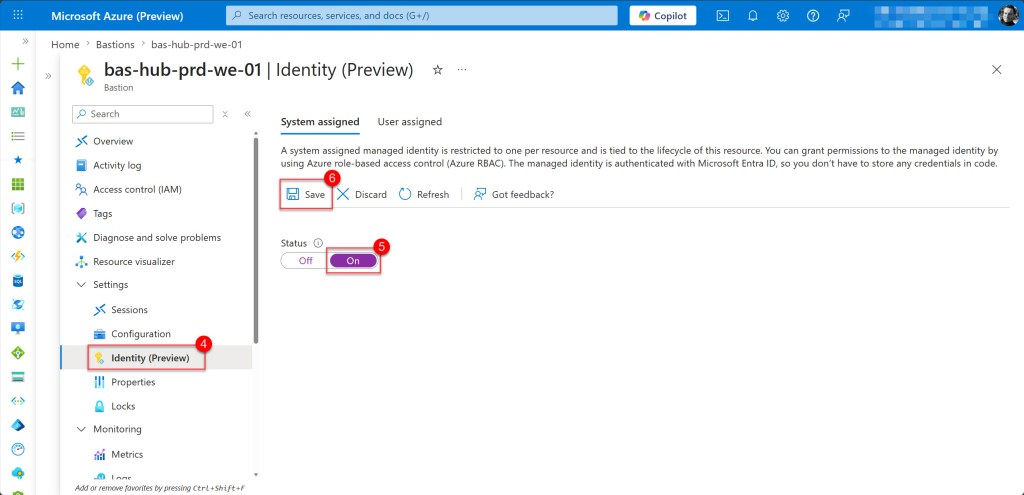
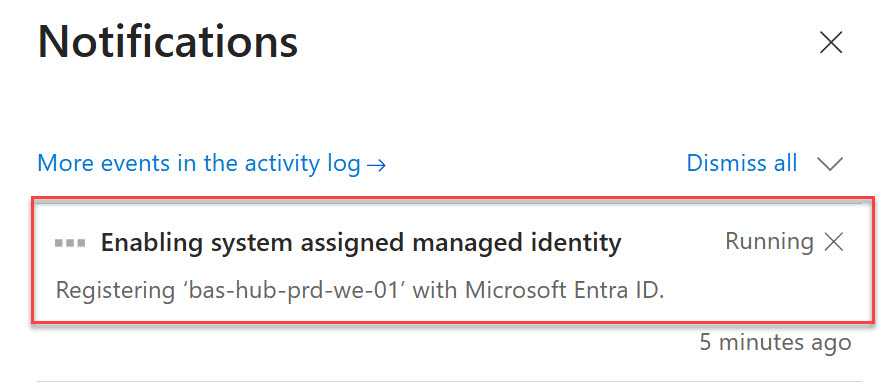
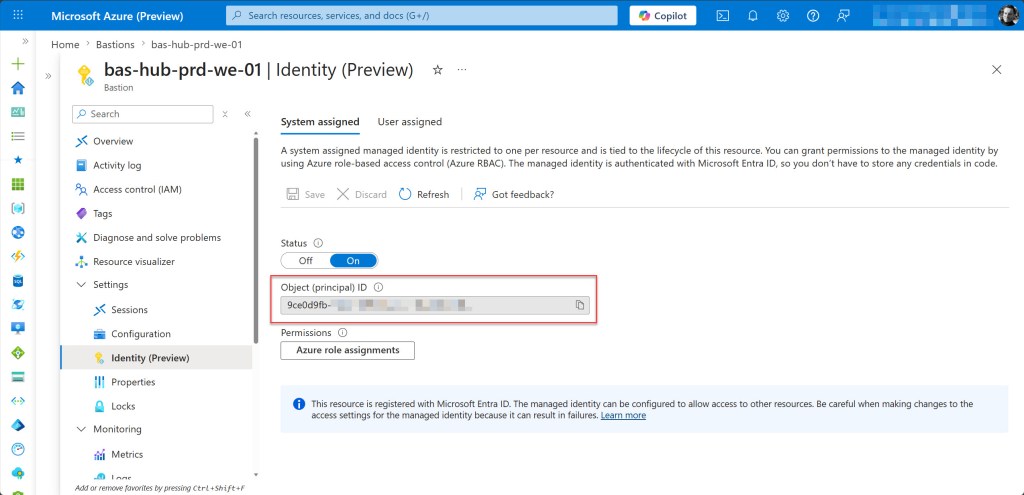
Then click Yes to confirm Enable system assigned managed identity. Keep in mind that the registration can take some time. Once enabled, an Object (principal) ID will be displayed. This represents the managed identity that will be used for authentication.
Grant storage permissions to the managed identity
Now that the managed identity exists on the Bastion resource, you need to assign it the Storage Blob Data Contributor role on the storage account. This gives the Bastion service the necessary permissions to write session recordings to the blob container.
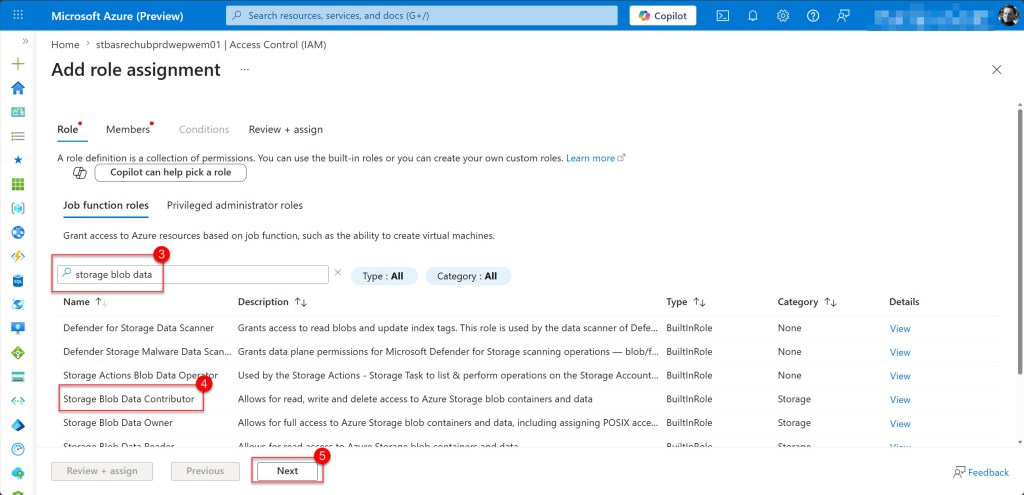
To do this, navigate to your storage account and select Access Control (IAM) in the left navigation pane, then select Add and click on Add role assignment.
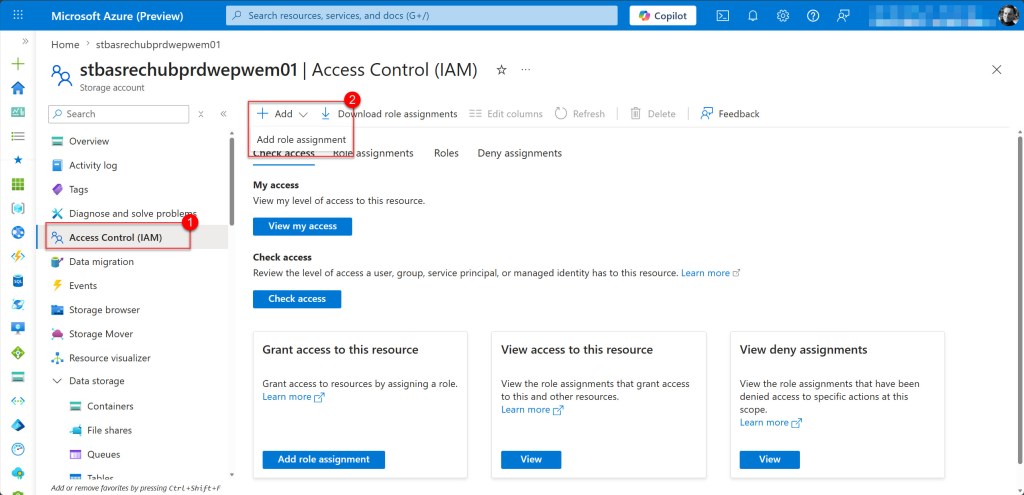
On the Add role assignment page, search for Storage Blob Data Contributor in the search box. Select it from the results to highlight it, then click Next to proceed to the members page.
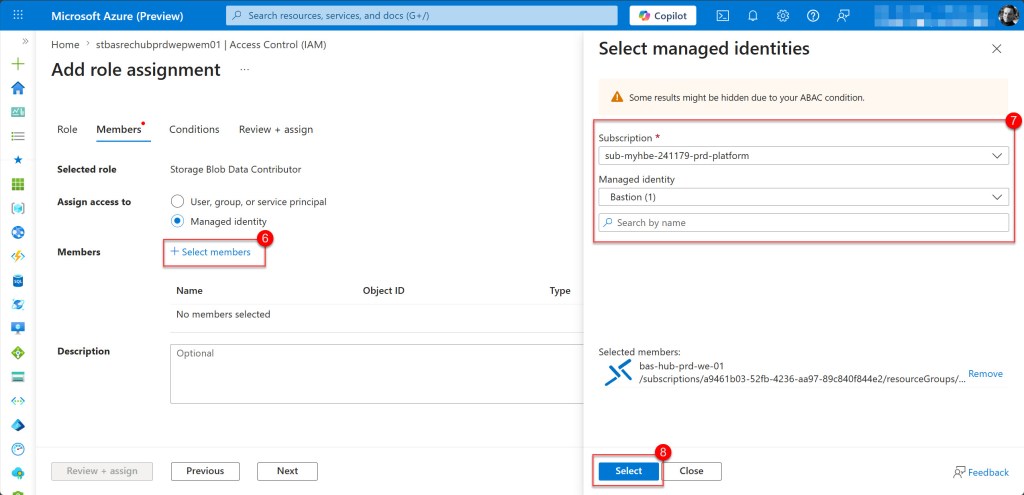
On the Add role assignment page, select Managed identity as the assignment type, then click Select members. On the Select managed identities panel that opens on the right, locate and select your Bastion managed identity, then click Select to confirm. Finally, click Review + assign to proceed.
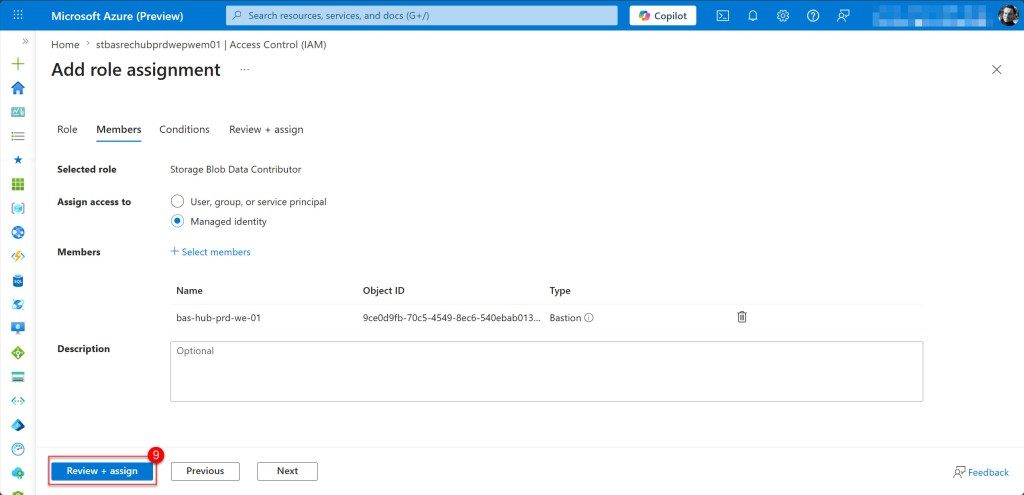
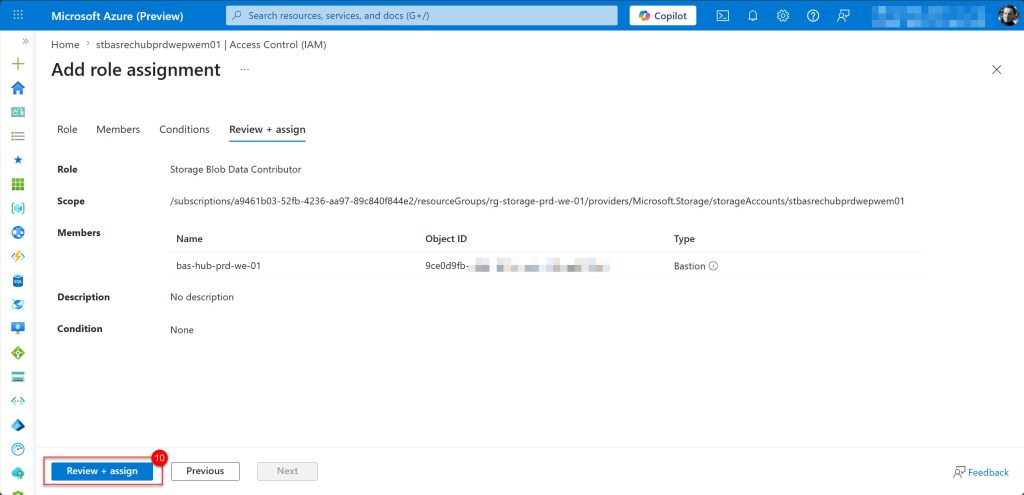
Then review the configuration, and if everything looks correct, click Review + assign to apply the role assignment.
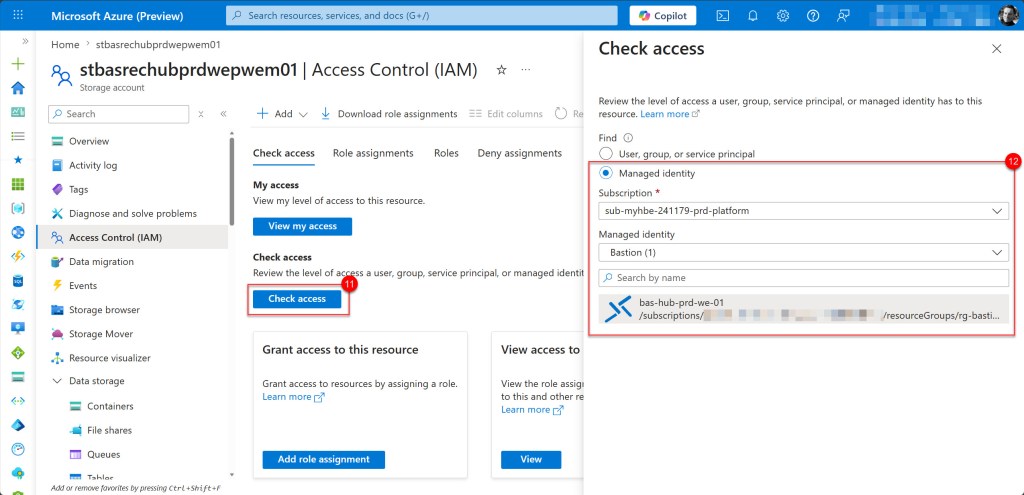
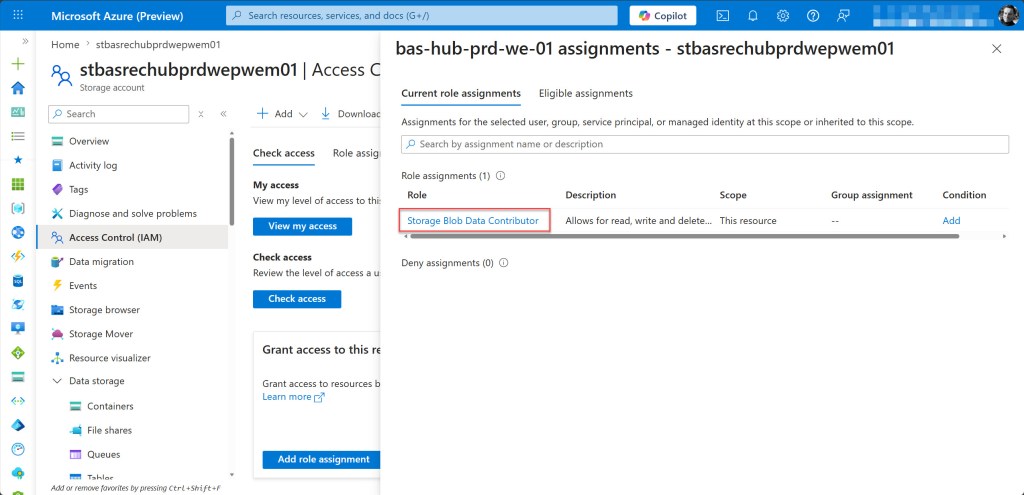
You can verify that the correct permissions have been added to the Bastion managed identity by clicking on the Check access tab.
In the search box, select Managed identity, then select the correct subscription and the Bastion managed identity.
Select your Bastion host from the search results and on the opened page, review the access to confirm that Storage Blob Data Contributor is listed under Assigned roles.
Enable session recording on the Bastion host
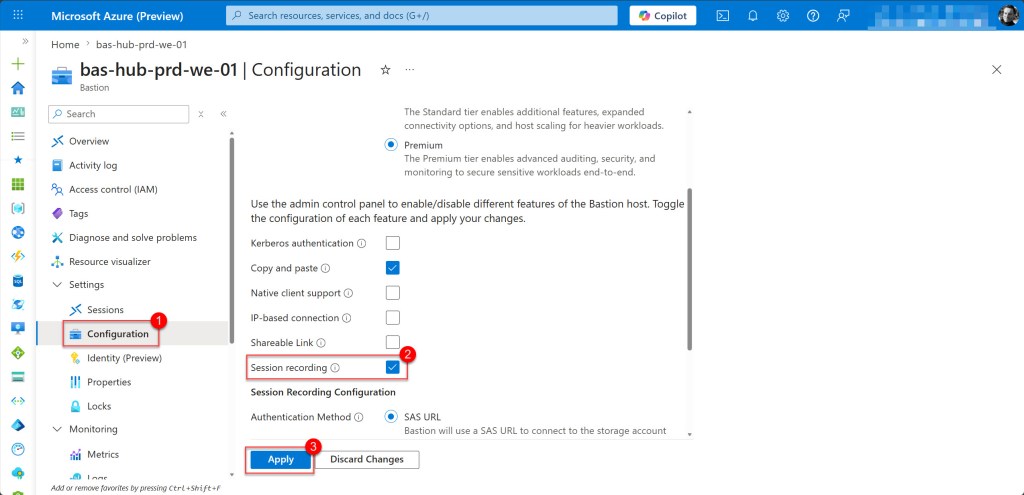
Still in the Azure Preview Portal, navigate to your Bastion host and in the left navigation pane, under Settings, select Configuration.
On the Configuration page, locate the Session recording section and toggle Session recording to Enabled if it is not already enabled.
If you still need to enable it, wait for the process to complete, as this can take up to 10 minutes. If it is already enabled, you can proceed to the next step.
Once enabled, additional fields will appear on the Bastion Configuration page.
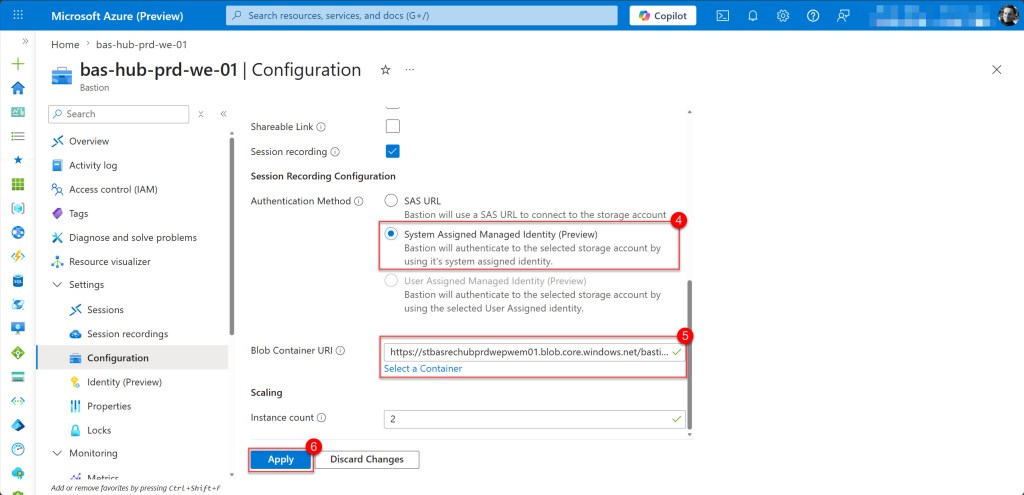
Scroll down until you see the Session Recording Configuration section, then select System Assigned Managed Identity (Preview) as the Authentication Method.
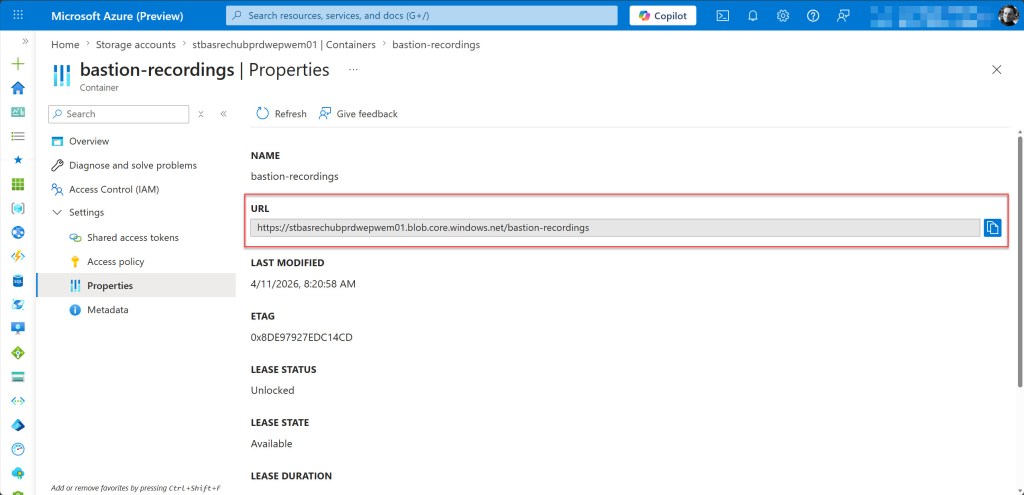
In the Blob Container URI field, specify the URI which you can find under the Container Properties in the URL section. Copy that and paste it into the empty field.
Then click Apply at the top of the page to save your changes.
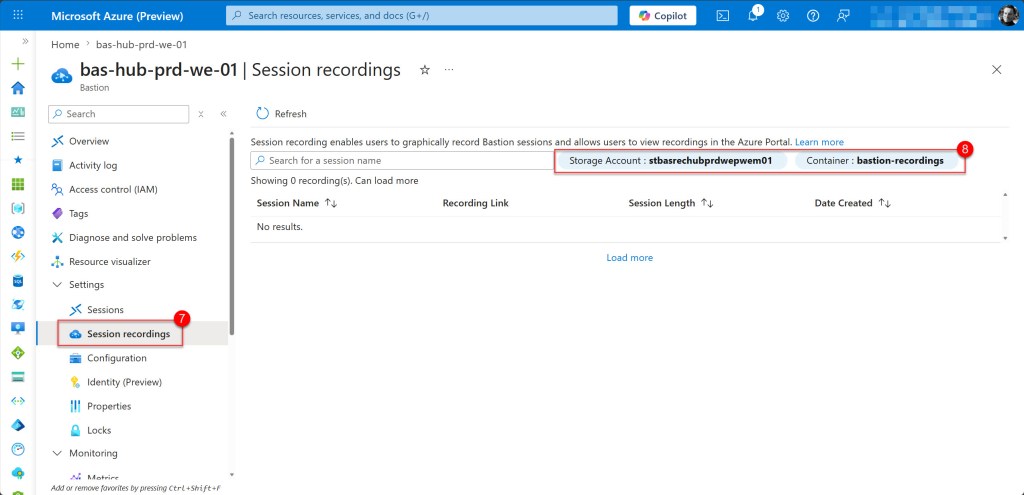
After the new configuration is applied, which can take a few minutes, you will see under the Session recording tab that the Storage Account and Container are shown.
Test session recording with a Windows VM
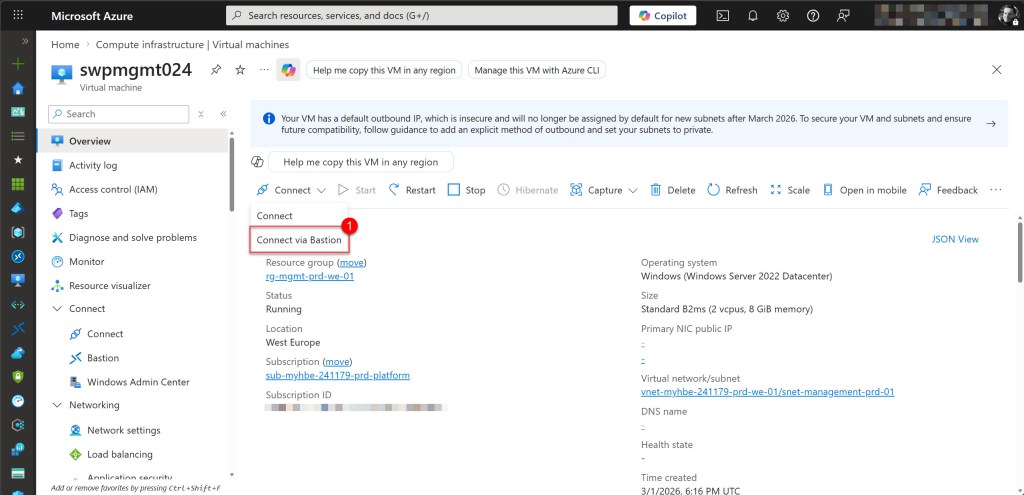
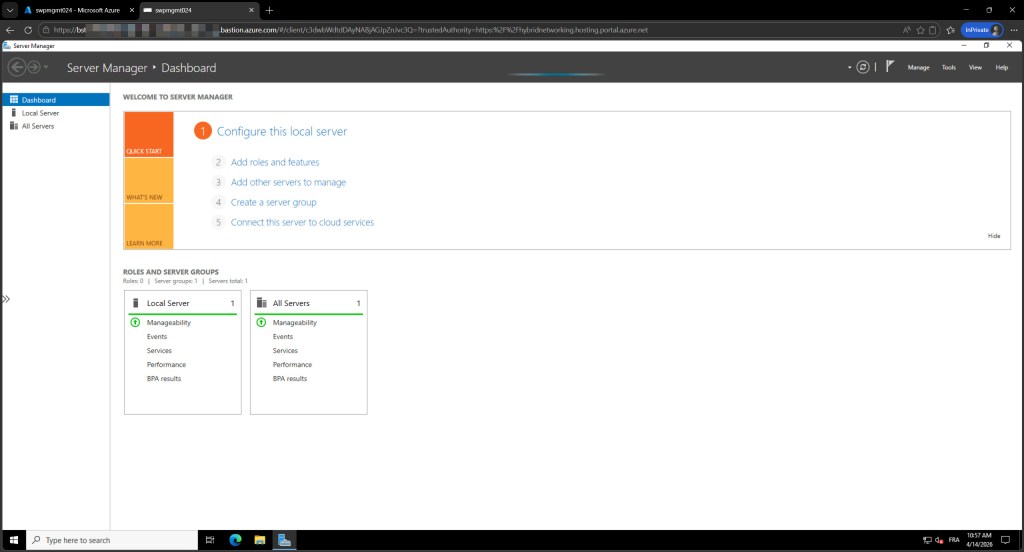
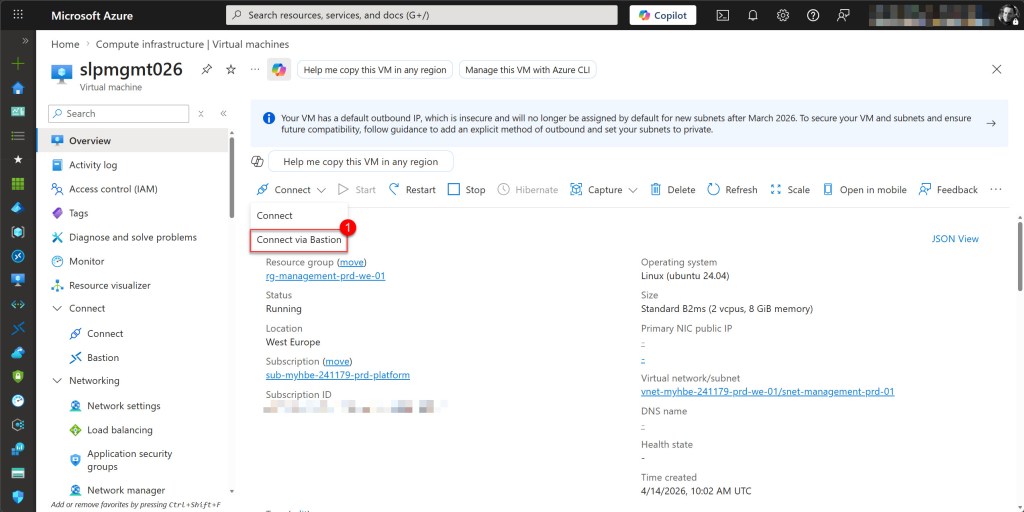
With session recording now configured on your Azure Bastion host, it is time to validate the setup by connecting to a Windows virtual machine. As soon as you establish a connection through Bastion, session recording begins automatically, capturing all activity during the RDP session.
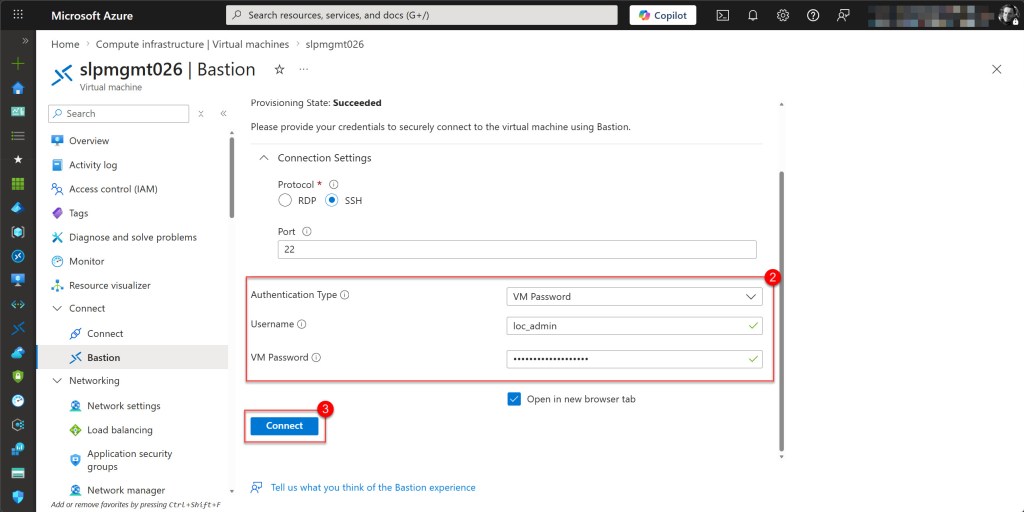
In the Azure Portal (you can use the normal Azure Portal again), navigate to your Windows virtual machine, click Connect, and select Bastion as the connection method. Enter your VM credentials, then click Connect to establish the session.
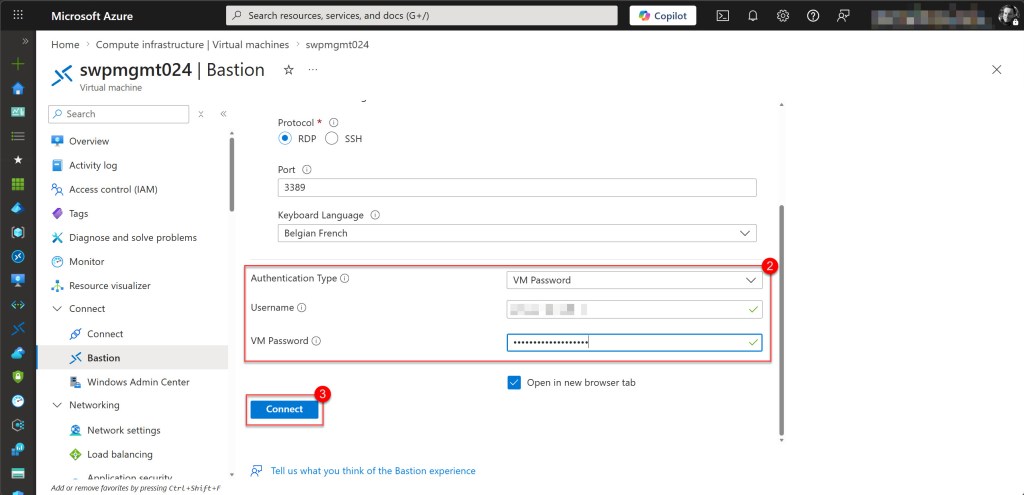
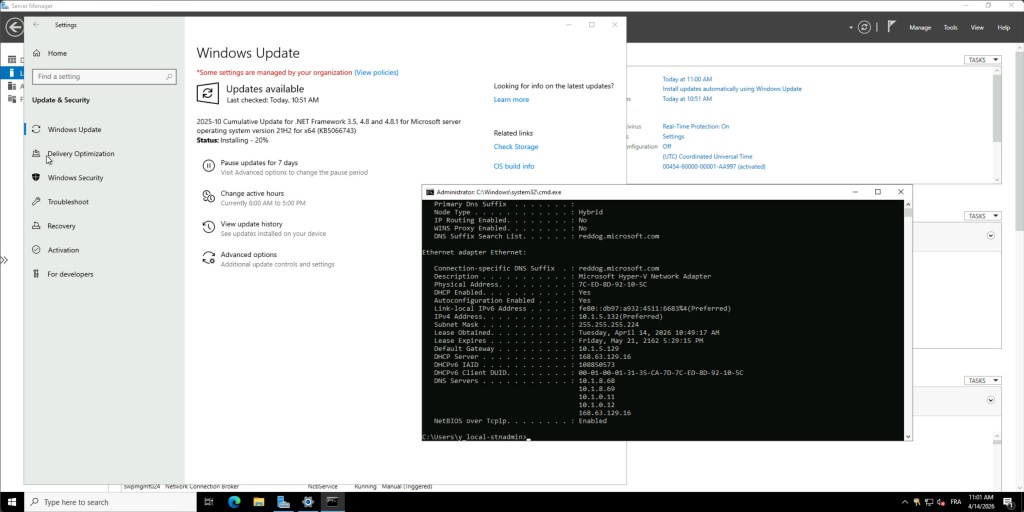
Once connected, perform some activity inside the VM, such as opening an application or browsing files, then close the session when you are done.
Once the session is closed, wait 1-2 minutes for the recording to be processed and uploaded to the storage account. Then there are two ways to verify that the recording was captured successfully.
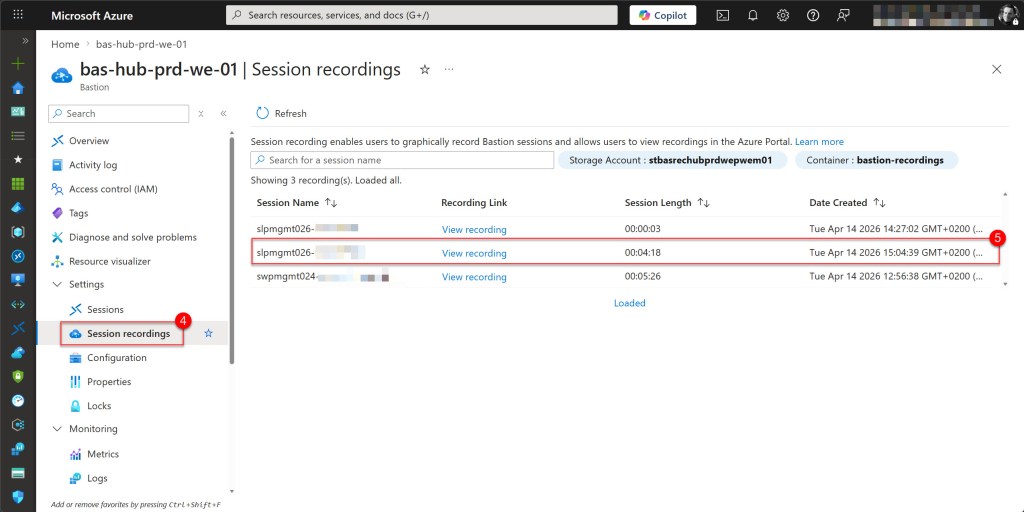
The most user-friendly option is to navigate to Session recordings from the left navigation menu under Settings.
This page displays all captured sessions in a clear list format, showing key details such as the session date and start time, session duration, target virtual machine, and the username that connected, along with a direct link to view the recording.
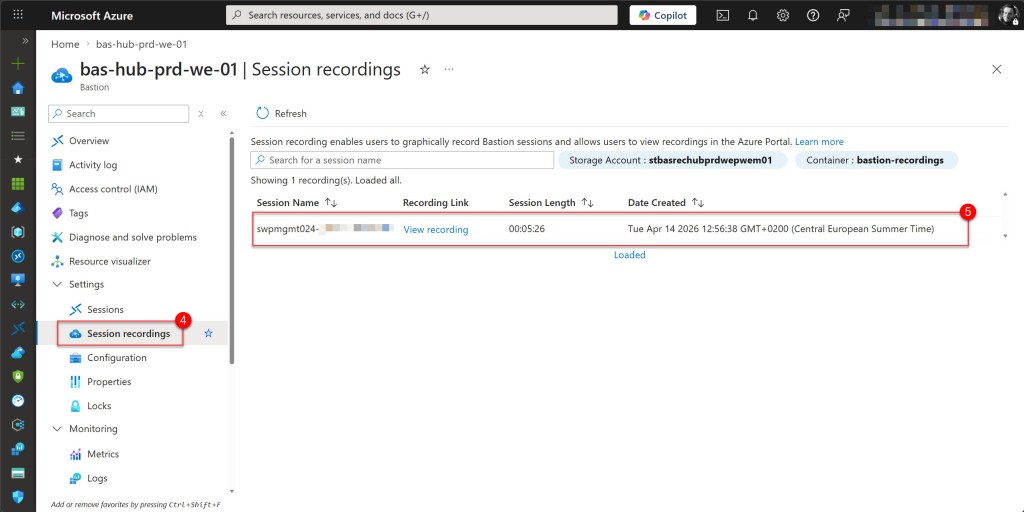
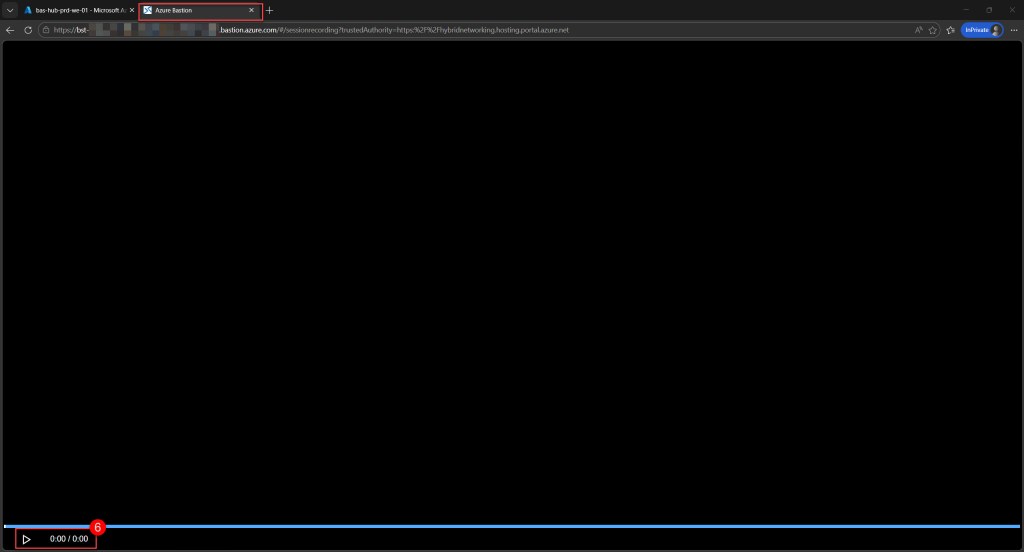
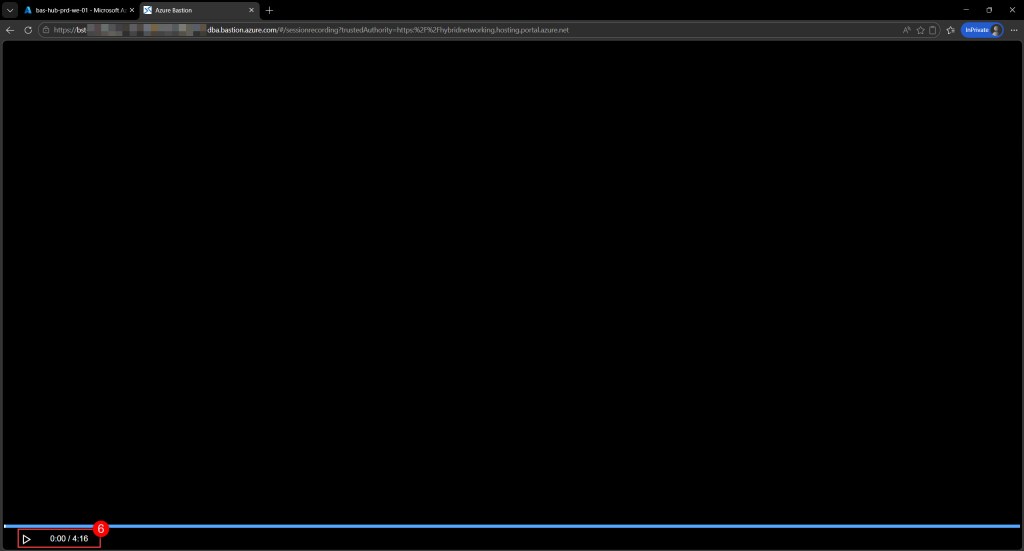
When you click the View recording link, a new tab will open where you can replay the complete recording and see exactly what that specific user did on the VM.
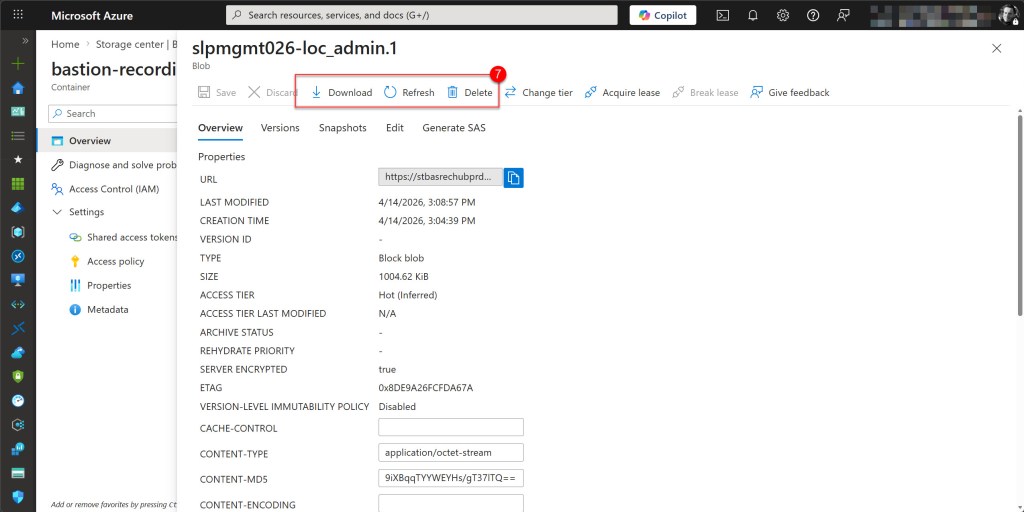
Alternatively, you can navigate directly to your storage account and open the recordings container to access the raw recording files, which are stored as blobs.
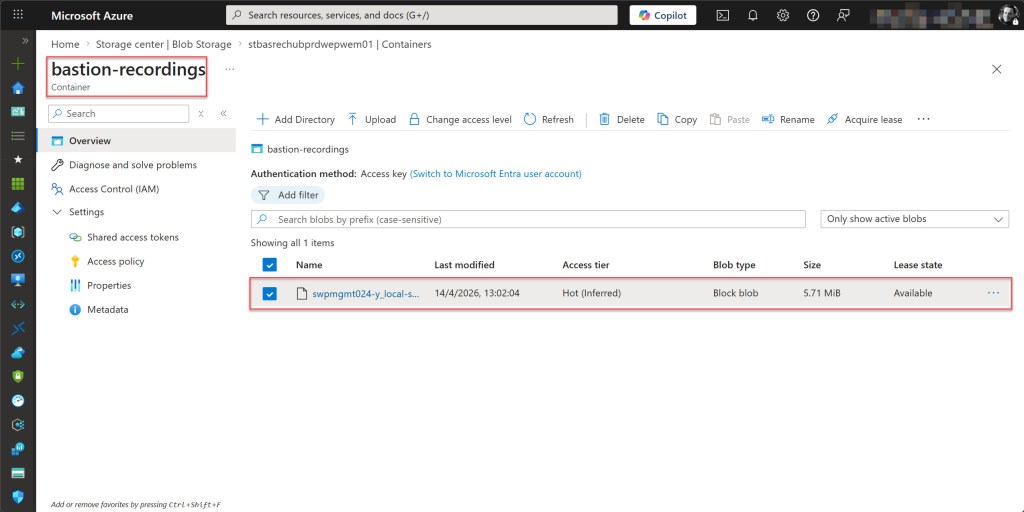
When you click on the name, you can delete or download a specific recording file .

💡 Azure Bastion session recordings cannot be played locally after download. The recording files have no file extension and use a proprietary format stored as generic binary data, rather than a standard video format. To view recordings, you must use the built-in player on the Session recordings page of your Azure Bastion resource, as mentioned above.
Test session recording with a Linux VM
Just like with the Windows VM, in the Azure Portal navigate to your Linux virtual machine, click Connect, and select Bastion as the connection method. Enter your VM credentials, or connect with an SSH private key stored locally or in Key Vault, then click Connect to establish the session.

Once connected, just like with the Windows VM, perform some activity inside the Linux VM, such as installing updates or browsing files, then close the session when you are done.

Once the session is closed, wait 1-2 minutes for the recording to be processed and uploaded to the storage account.
Then, just as with the Windows VM, there are two ways to verify that the recording was captured successfully.
First, via the Session recordings page where you can view the recording directly.
Alternatively, by navigating to the recordings container in the storage account, where you can perform tasks such as deleting or downloading the raw recording files.
Conclusion
Azure Bastion session recording is a powerful capability for improving visibility and accountability across your virtual machine environment. By configuring a managed identity, setting up the correct RBAC permissions, and enabling session recording on your Bastion host, you now have a fully auditable trail of all VM access for both Windows and Linux virtual machines.
Whether you are meeting compliance requirements, investigating a security incident, or simply monitoring who is accessing your infrastructure, session recording provides the evidence you need, all stored securely in your own storage account.
If you have any questions or suggestions about this blog post or the steps described, feel free to reach out to me on X (@wmatthyssen) or leave a comment below. I’ll be happy to help.

0 comments on “Azure Bastion: How to configure and use session recording”