This blog post will guide you through configuring advanced settings, such as the DHCP and NTP roles, for your pfSense running within a Hyper-V virtual machine (VM).
In previous blog posts, I demonstrated how to create a Hyper-V virtual machine (VM) to run pfSense using a PowerShell script. Additionally, I’ve covered the installation and basic configuration of pfSense within that Hyper-V VM.
You can access the links to those blog posts here:
- Create a Hyper-V VM to run pfSense with a PowerShell script
- How to install and configure pfSense within a Hyper-V VM
However, in this blog post, let’s explore how you can configure some more advanced configurations of pfSense.
Table of Contents
Prerequisites
- A Hyper-V host running Windows Server 2019 or 2022.
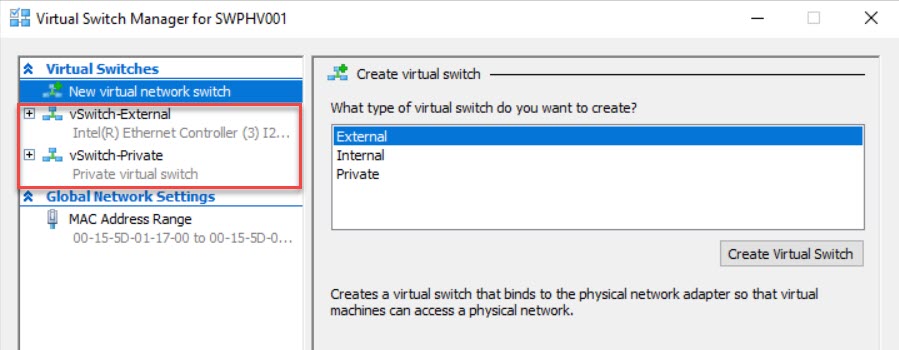
- Two Hyper-V virtual switches, one for your internal LAN connections (Private) and the other for your WAN connections (External).
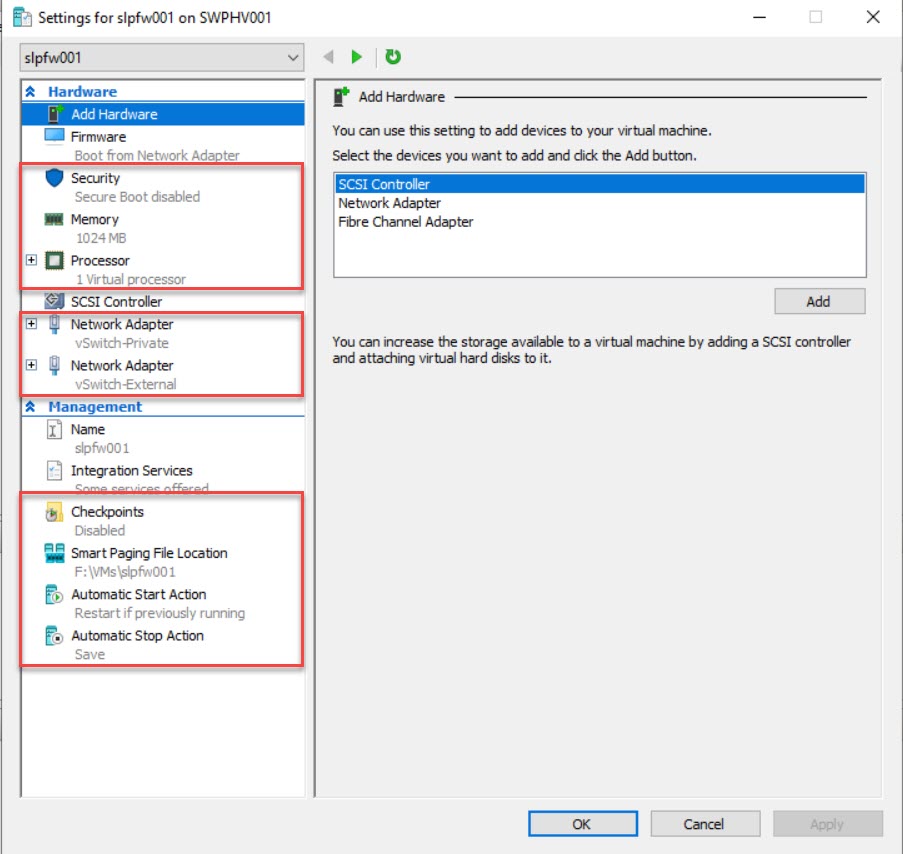
- A Hyper-V VM with all the necessary settings and pfSense already configured via the web configuration wizard, as demonstrated in the previous blog posts.
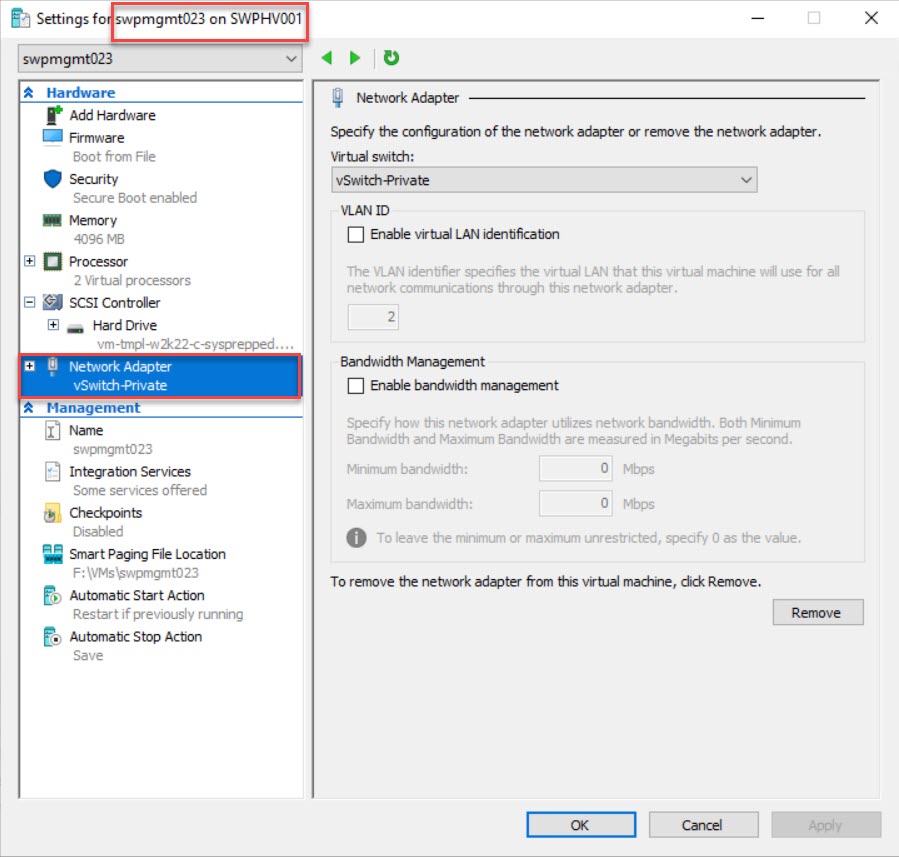
- A Hyper-V VM, running Windows Server 2019 or 2022 and serving as a management server, that is utilizing the same vSwitch for LAN connectivity as the pfSense VM and relies on the pfSense VM as both its default gateway and DNS server.
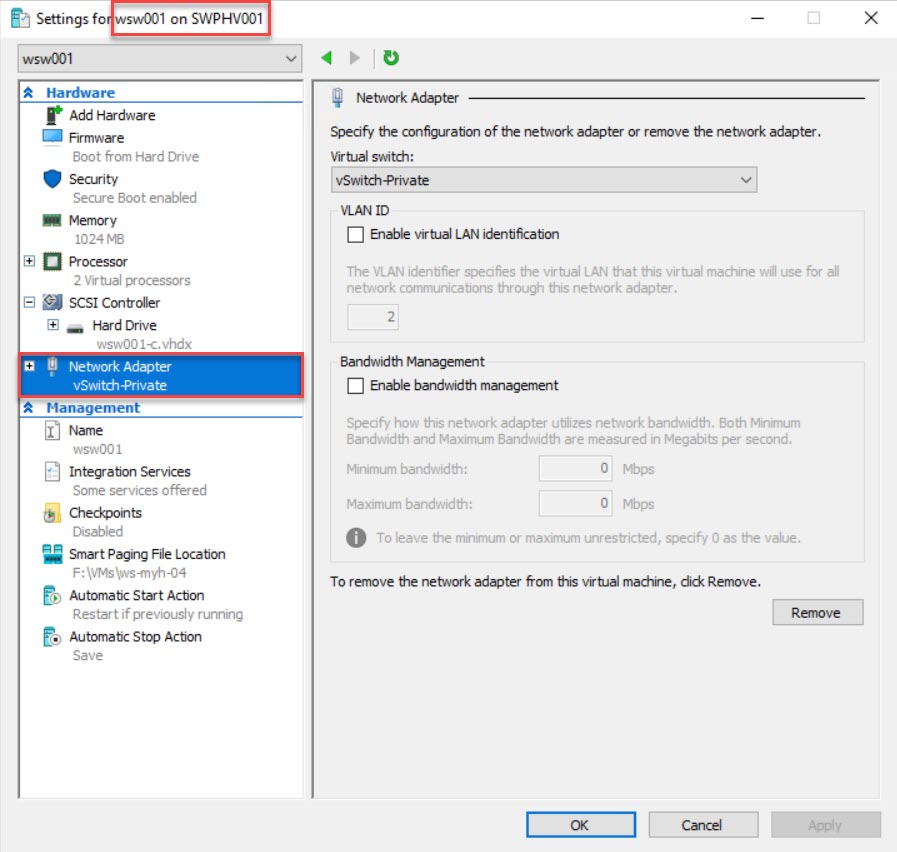
- A Hyper-V VM running Windows 10 or 11, serving as a workstation, and that is connected to the same vSwitch for its LAN connectivity, just like the pfSense VM.
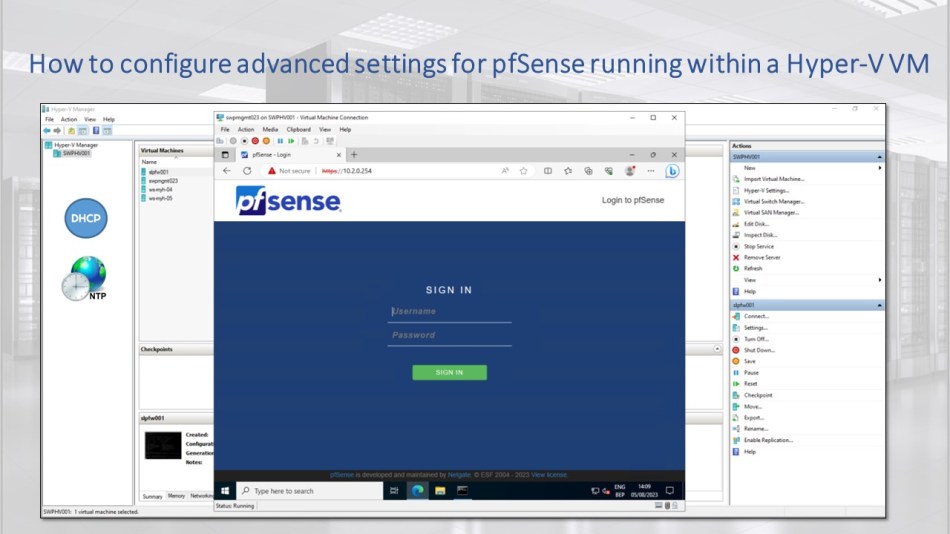
Sign in to the pfSense web configurator
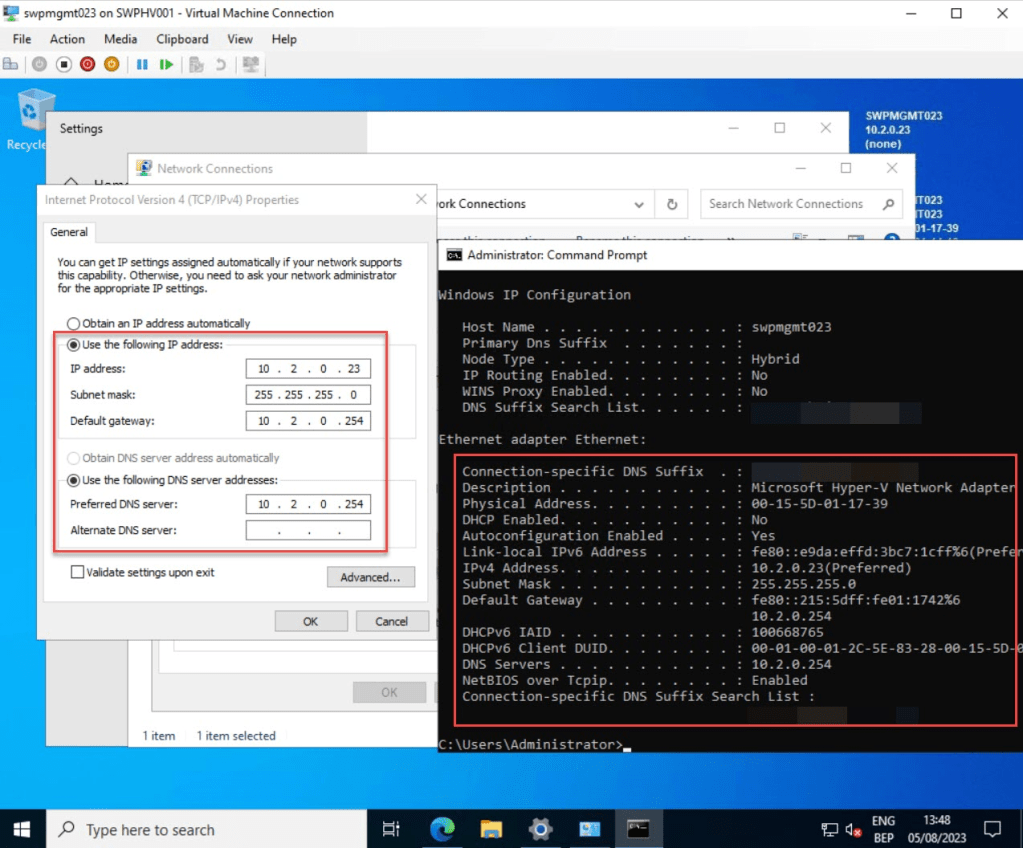
Login to the Hyper-V management VM using an account with administrator privileges and launch the Edge browser within this VM.
Next, access the pfSense GUI (webconfigurator) by entering the URL, in my case, https://10.2.0.254, which exists out of https, followed by the LAN IP Address of my pfSense (default: https://192.168.1.1), in the address bar.
You will likely encounter a certificate error. Simply click on “Advanced” and choose “Continue to x.x.x.x (unsafe)” to proceed.
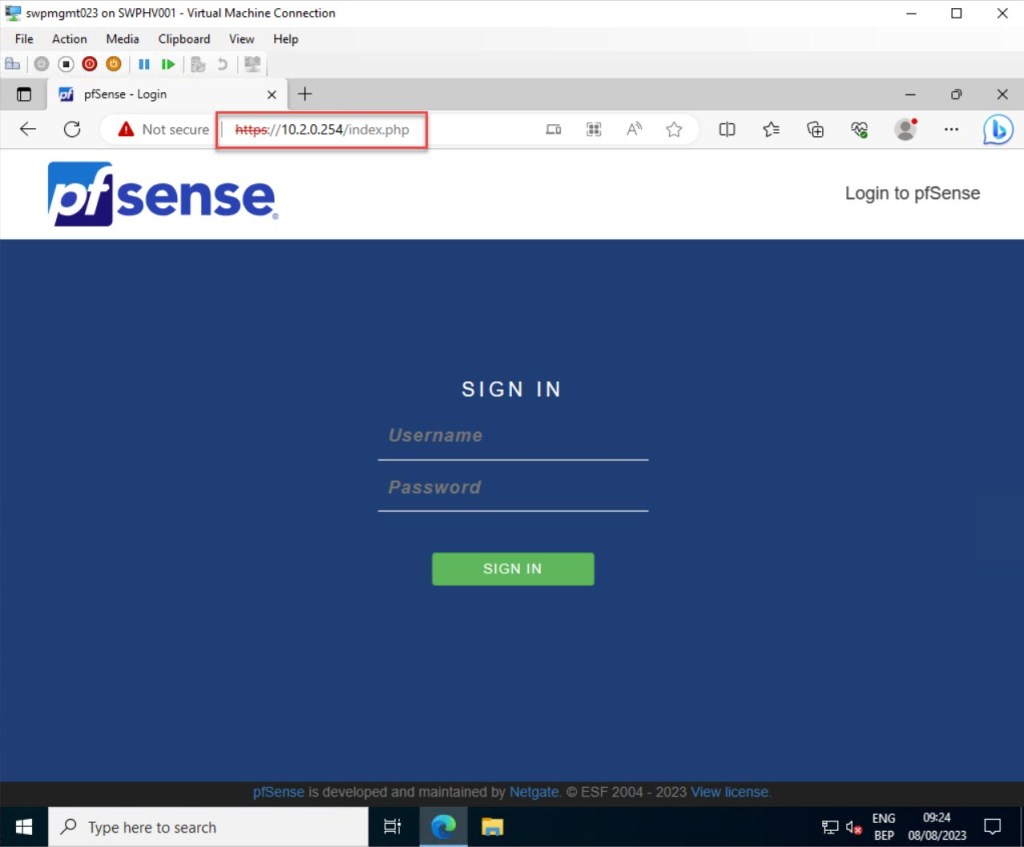
At the login screen, use the correct credentials to log in. If you didn’t already change them, the defaults are:
- username: admin
- password: pfsense

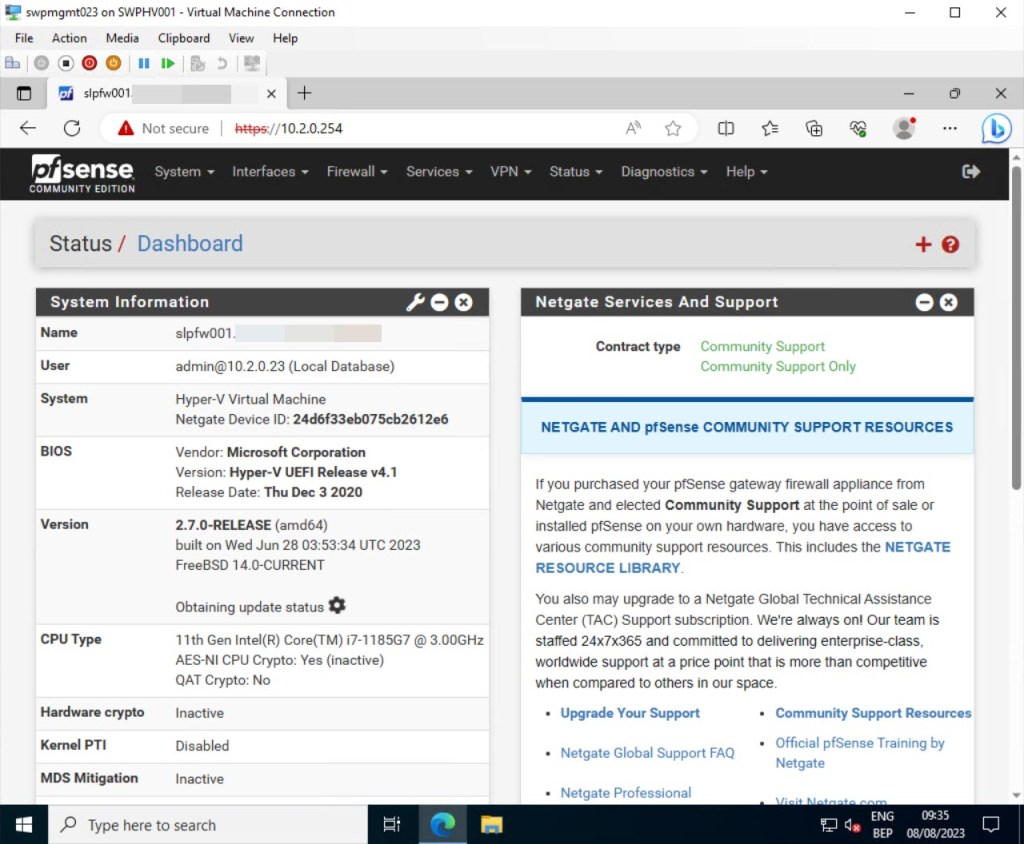
When successfully logged in, the pfSense dashboard will be shown, where you can start configuring.
Configure IPv4 DHCP server
Your pfSense can serve as a DHCP server, handling the automatic provisioning and assignment of IP addresses, default gateways, and various network parameters to client devices.
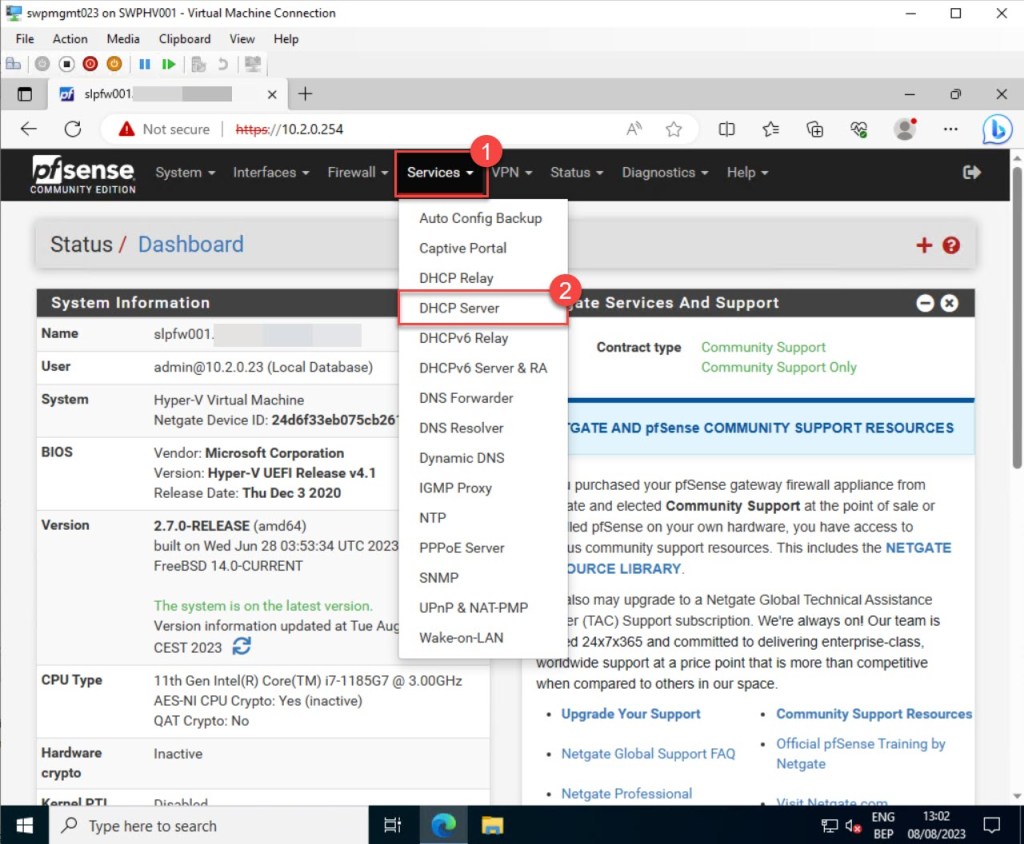
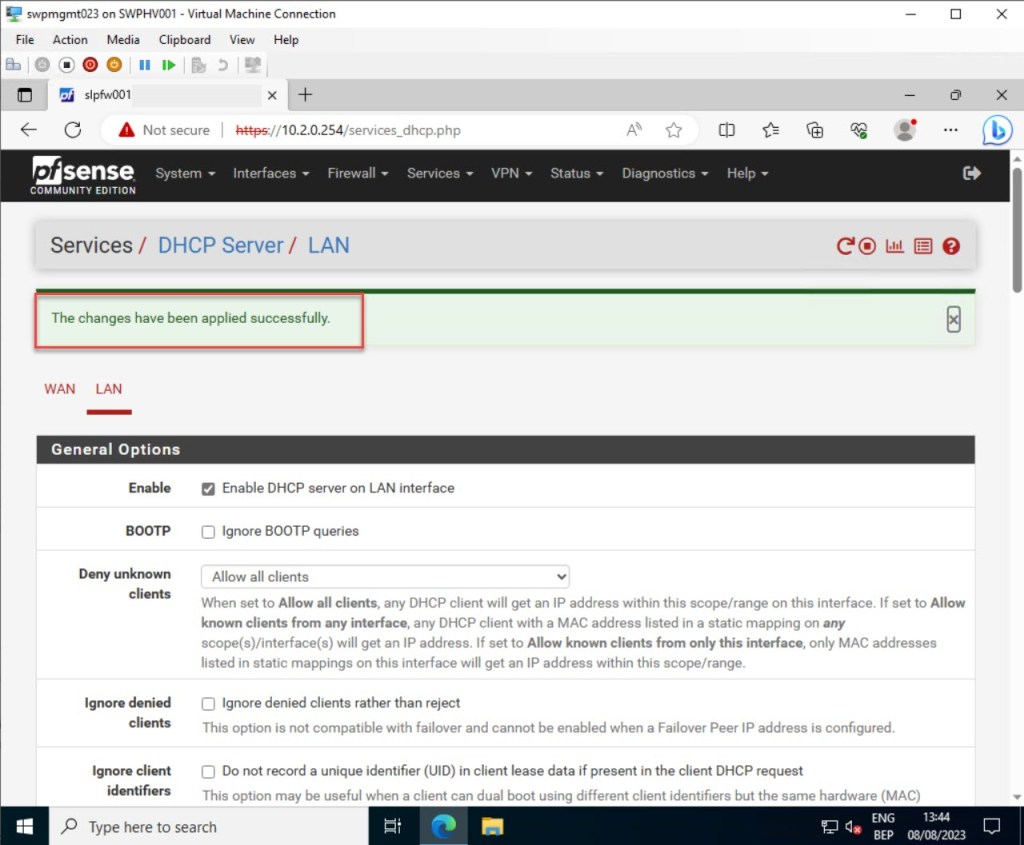
To configure pfSense as a DHCP server, follow these steps: After logging in, navigate to the pfSense dashboard toolbar, click on “Services,” and then select “DHCP Server.”
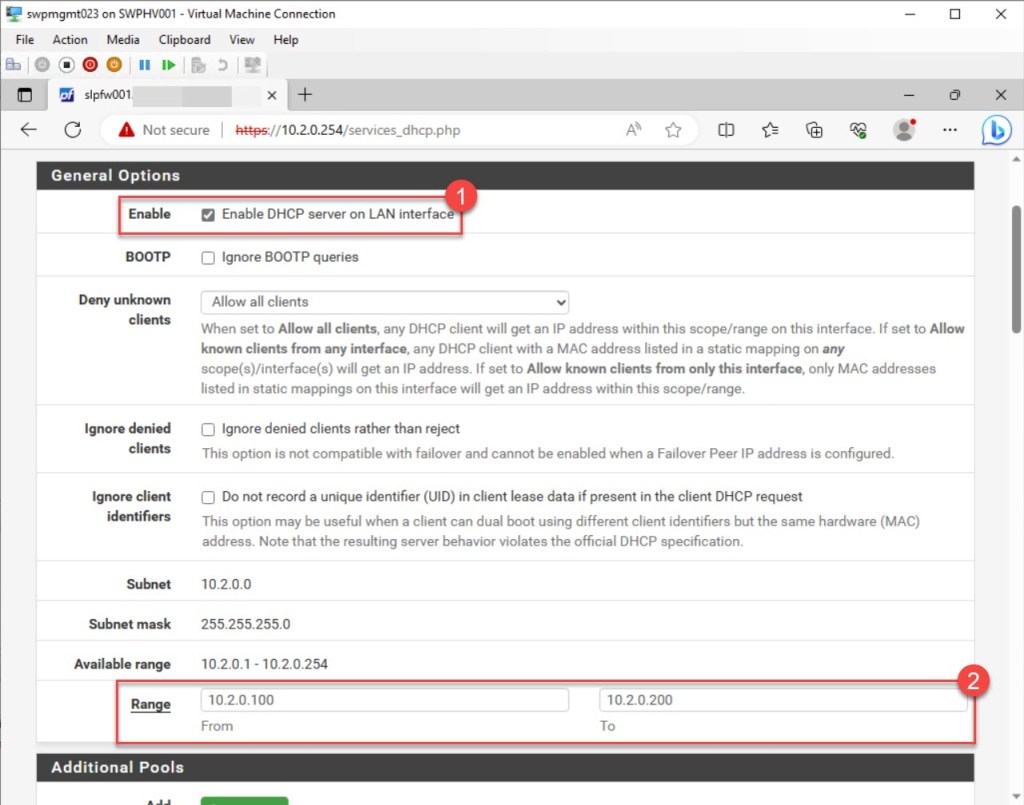
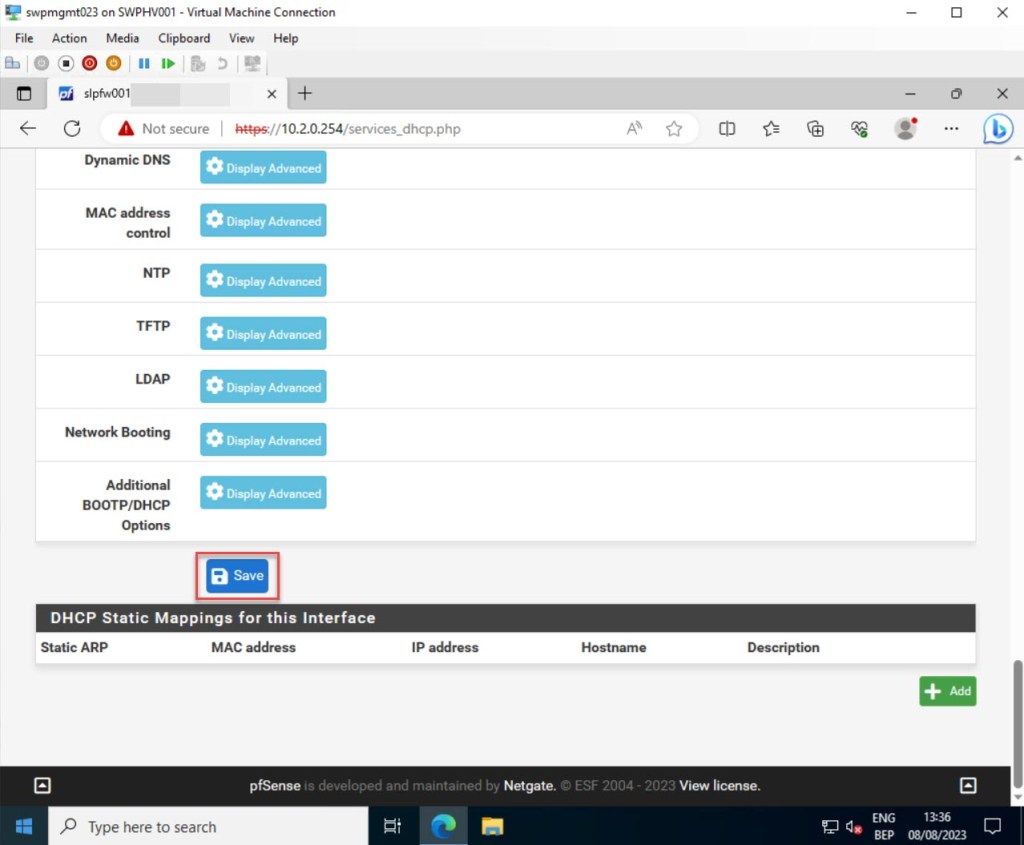
Check “Enable DHCP server on LAN interface” to enable pfSense as an IPv4 DCHP server. Afterward, it’s important to define the preferred range of available addresses within the interface subnet for the DHCP clients (scope). This range can be tailored to the network’s requirements, spanning from large to small, yet it must remain fully enclosed within the subnet of the configured interface.
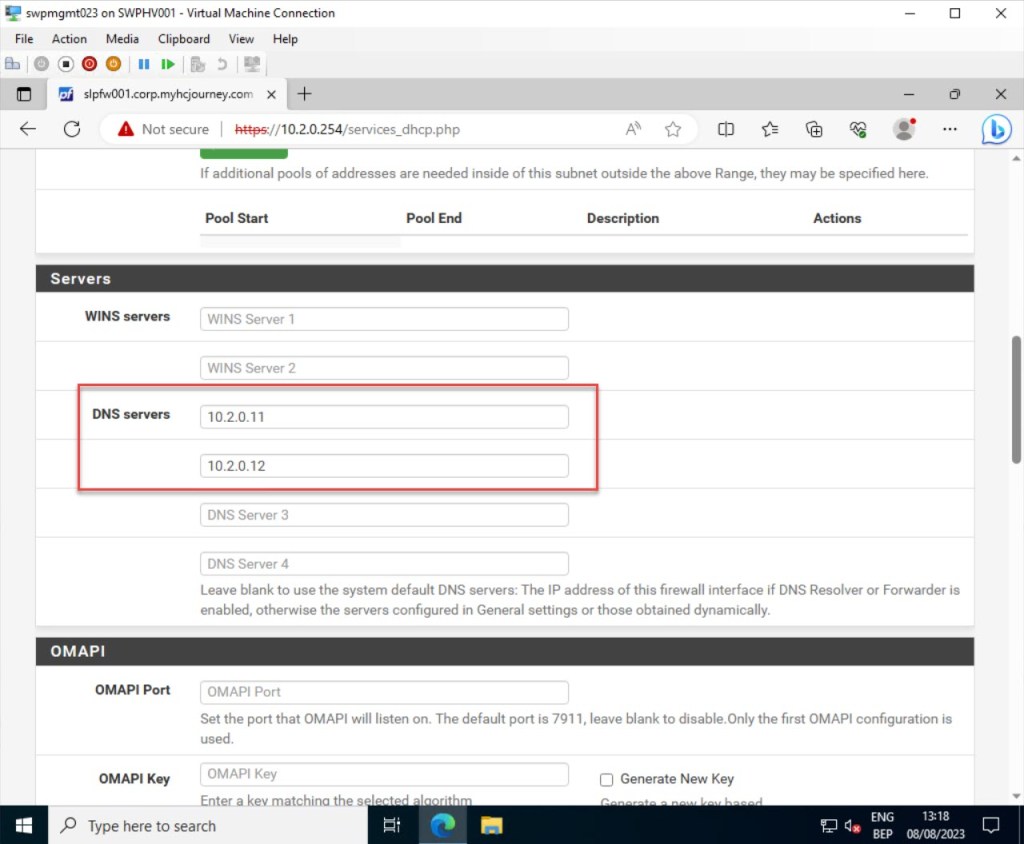
Filling in the DNS Servers may be necessary, depending on your firewall configuration. If you’re using the built-in DNS Resolver or DNS Forwarder to manage DNS, leave these fields empty, and pfSense will automatically become the DNS server for client PCs or servers without a static IP configured.
If you prefer using your own custom DNS Servers over the automatic settings, as shown in my example, you can input the IP addresses for up to four DNS servers here. In networks with Windows servers and clients, particularly those integrated with Active Directory, using those servers (mostly domain controllers) for client DNS is advisable.
You can further configure additional DHCP options, such as setting the default gateway and providing the domain name to the client to form its fully qualified hostname. Additionally, you have the ability to adjust settings like the default lease time (in seconds) and the maximum lease time.

Once you’ve made all the necessary adjustments, click “Save” to preserve your updated DHCP server settings.
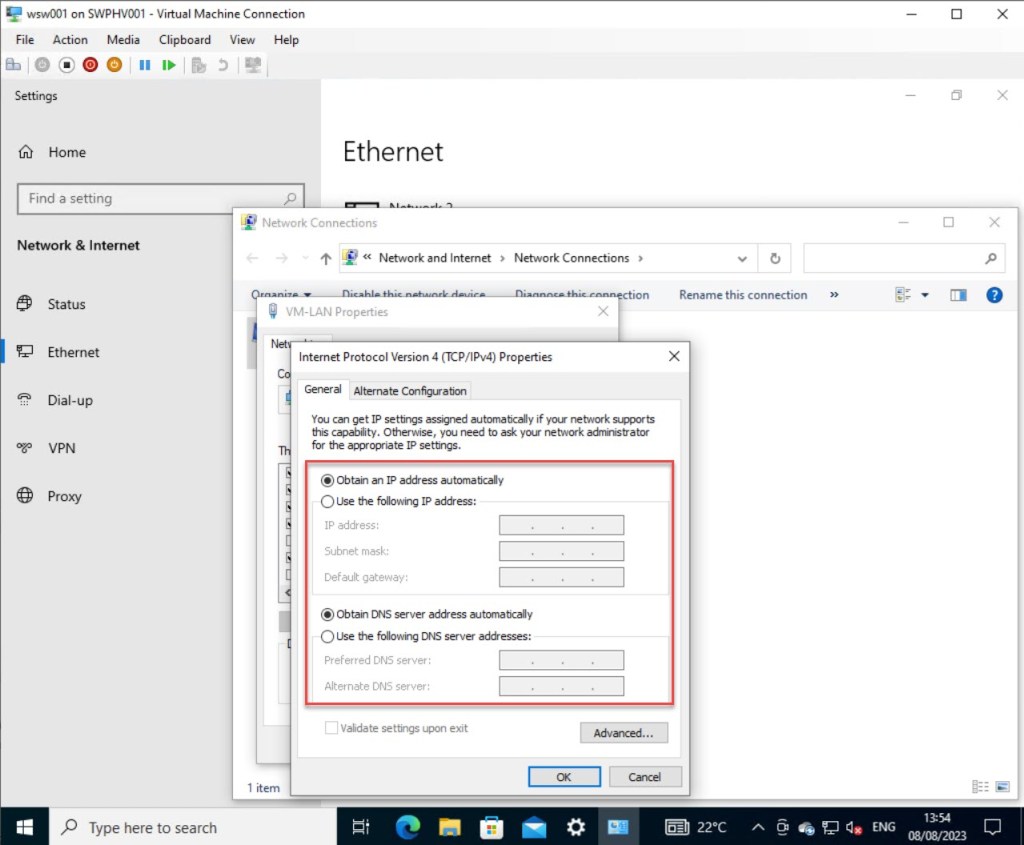
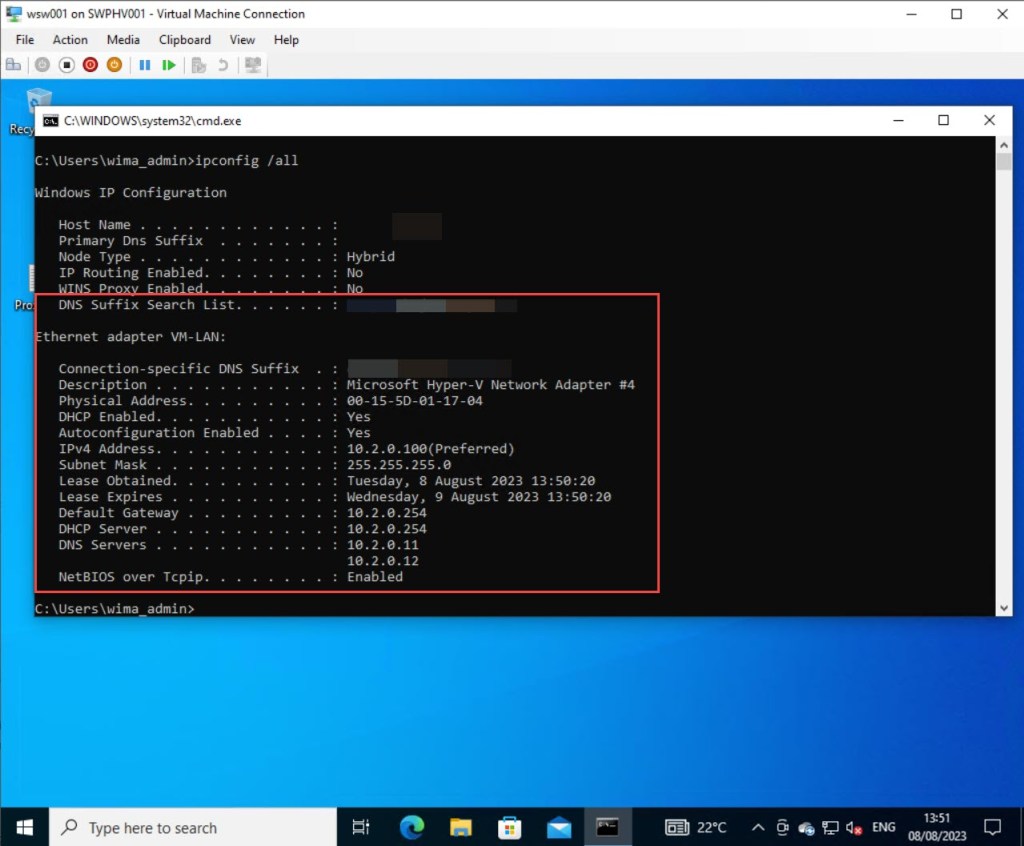
Next, log in to your client VM running Windows 10 or 11, and verify if all DHCP settings have been properly configured and that you can browse the Internet.
Configure NTP server settings
Out of the box, pfSense ships with the NTP daemon, which is responsible for synchronizing time with connected devices. This means that, with minimal setup, pfSense can serve as an NTP server.
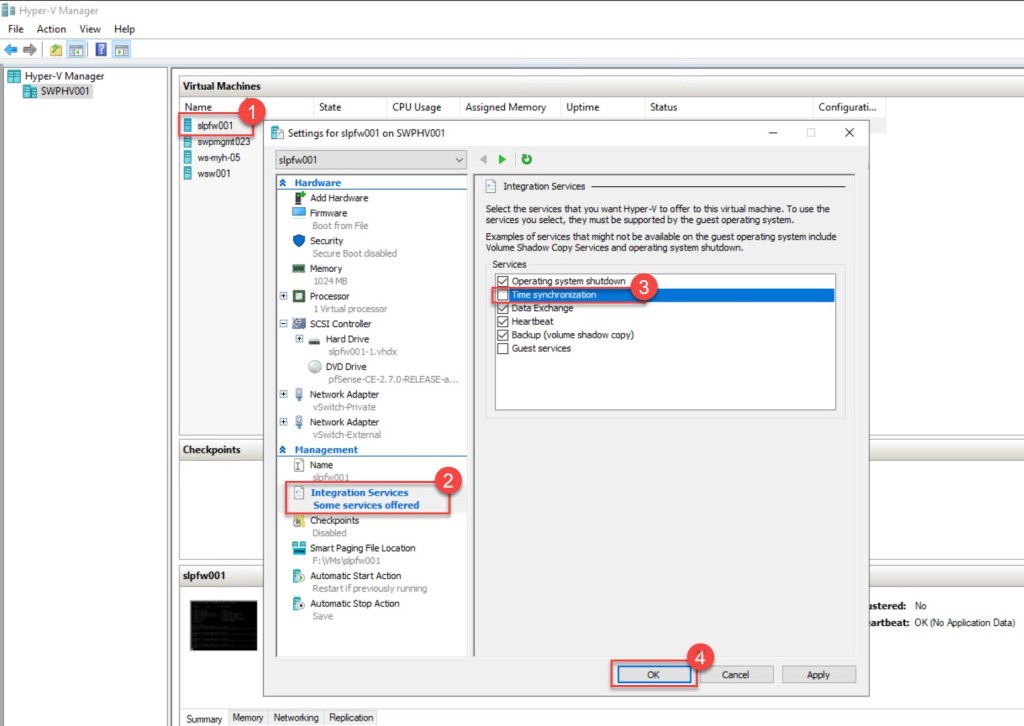
To begin, and because our pfSense is running as a Hyper-V VM, we first need to disable Hyper-V Time synchronization. This ensures that our VM doesn’t derive its time from the Hyper-V host.
To achieve this, simply right-click on your pfSense VM, choose “Settings…,” navigate to “Integration Services,” and then deselect “Time synchronization.” Remember to apply the changes by clicking “OK.”
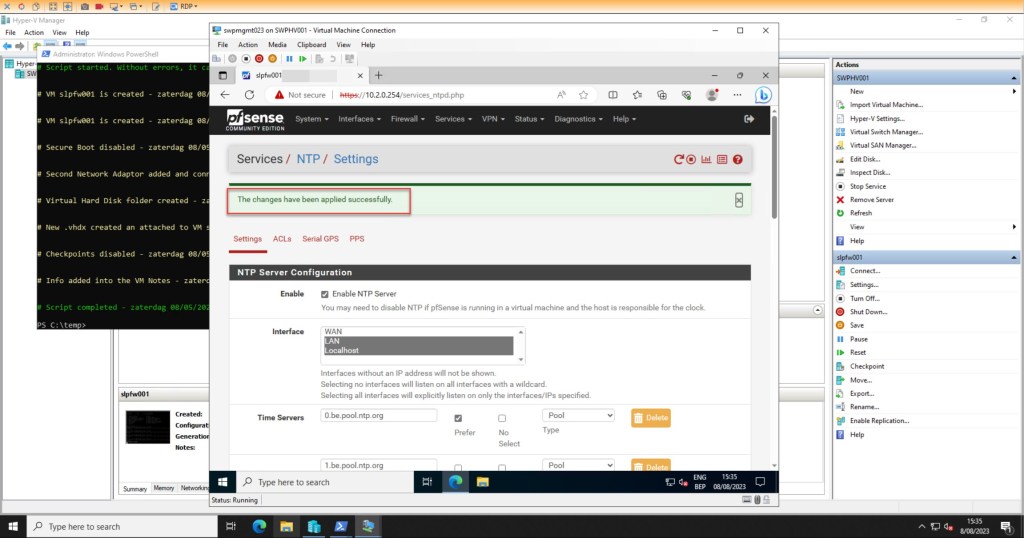
Then, to configure your pfSense NTP settings, after logging in to the web configurator, go to the pfSense dashboard toolbar, click on “Services,” and then choose “NTP.”
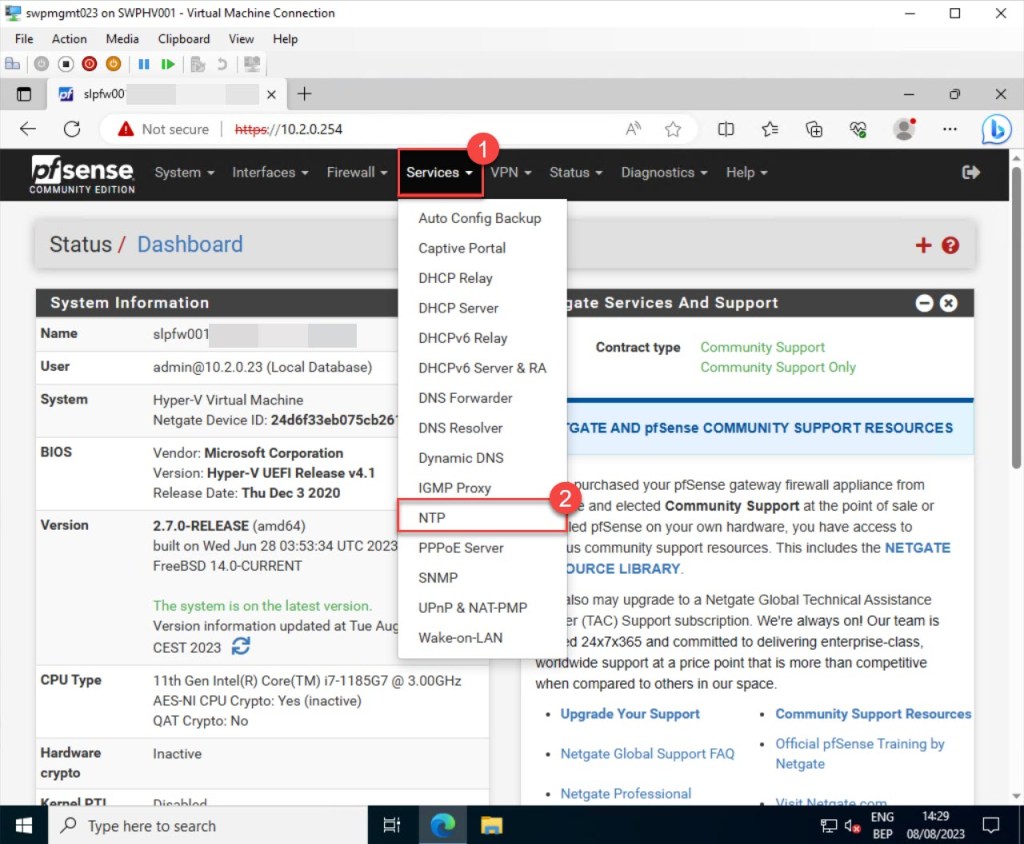
On the “Settings” tab, pick the Interface(s) that the NTP service daemon will use to listen to or bind. The selected interfaces will use the pfSense NTP server to send out time queries from remote hosts as well as serve the NTP clients. In my example, I select “LAN” and “Localhost“*.
*To choose multiple interfaces, hold down the “Ctrl” button while making your selections.
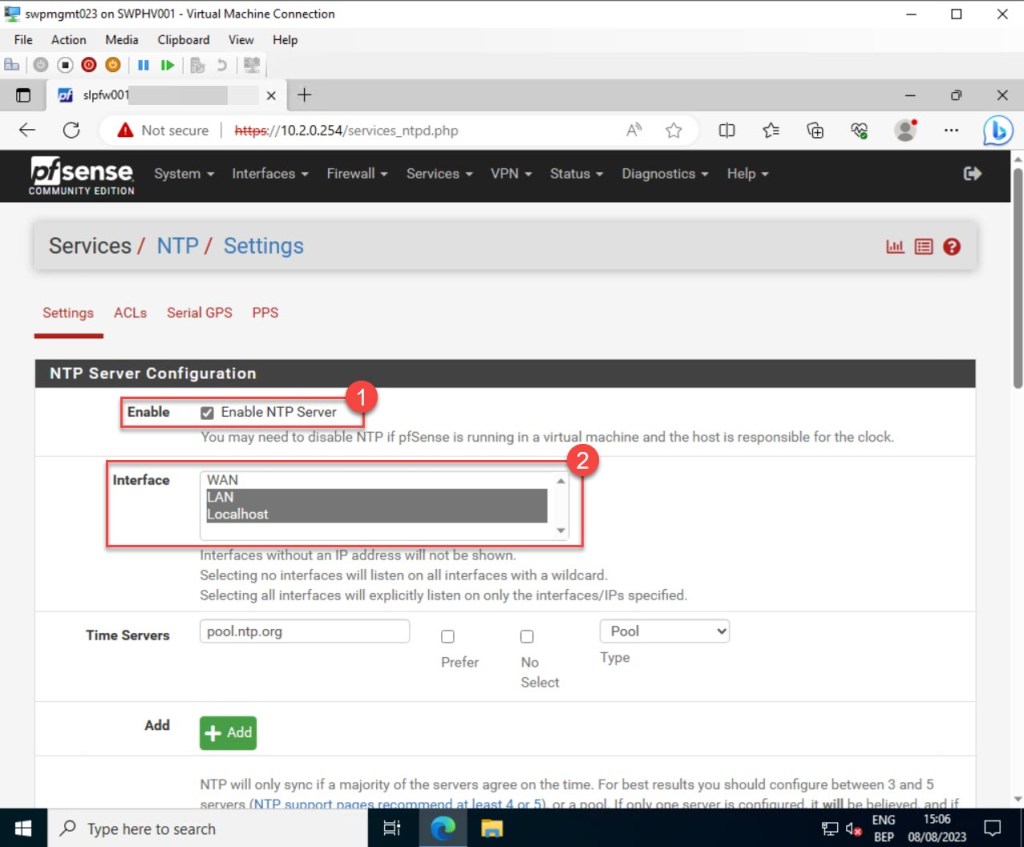
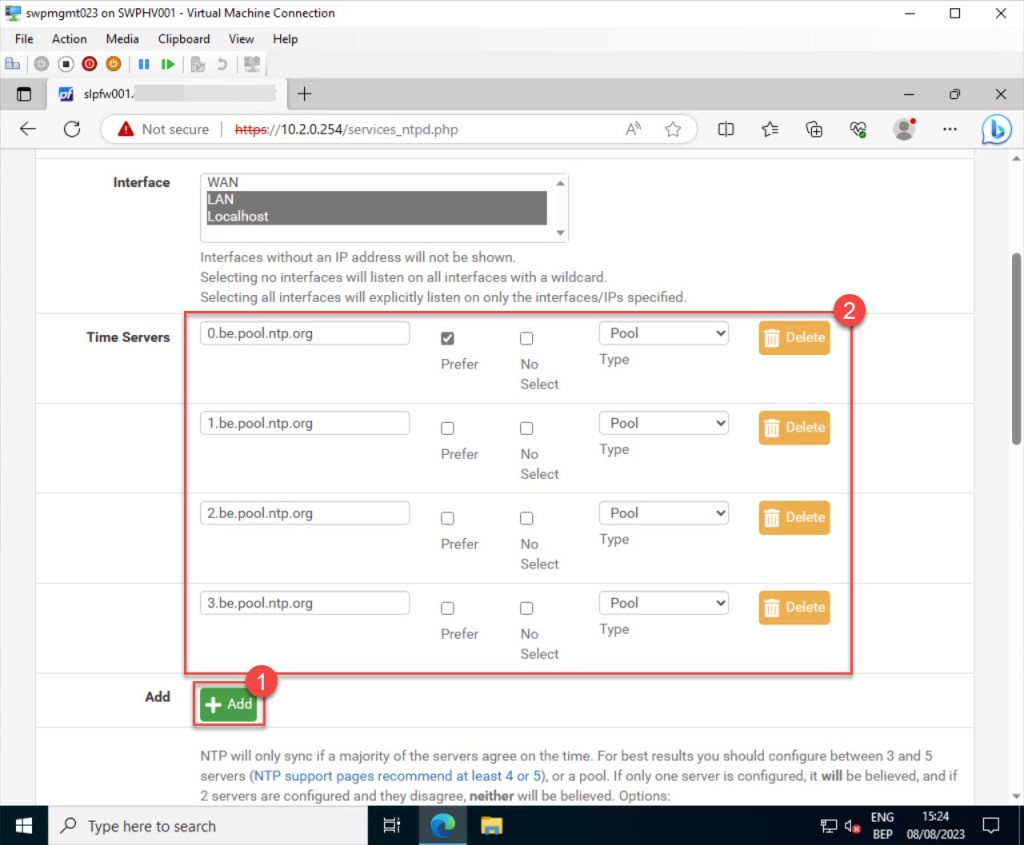
In the “Time Servers” section, you can set up the time servers that your pfSense NTP service will use to synchronize time. In my case, since my on-premises servers are located in Belgium, I opt for the pool zones specific to Belgium from pool.ntp.org. You can simply press “+Add” to include additional time servers.
While adding the time servers, there are options to either set your preferred time server over all defined servers (Prefer), disable the use of a specific time server (No Select), or determine whether the server is a Pool, Server, or Peer.
*For accurate timekeeping, it’s advisable to specify a minimum of three time servers.
For logging purposes, it’s recommended to activate “Enable RRD graphs for NTP statistics“, “Log peer messages“, and “Log system messages“.
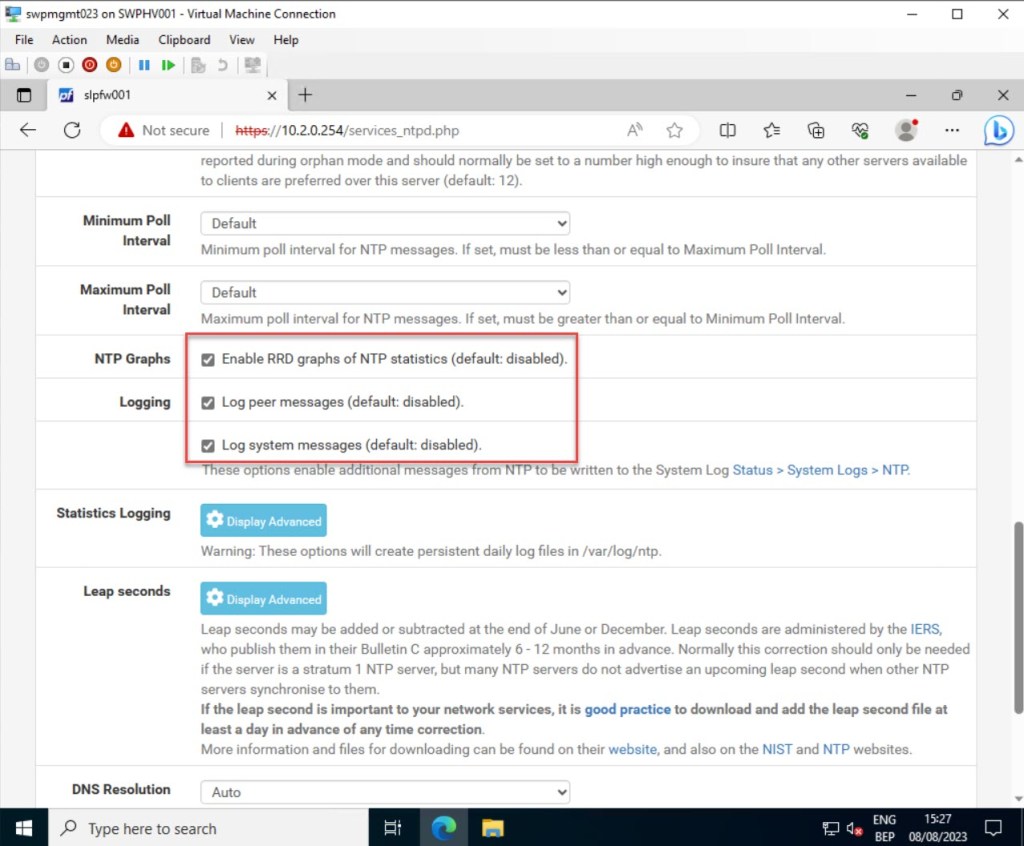
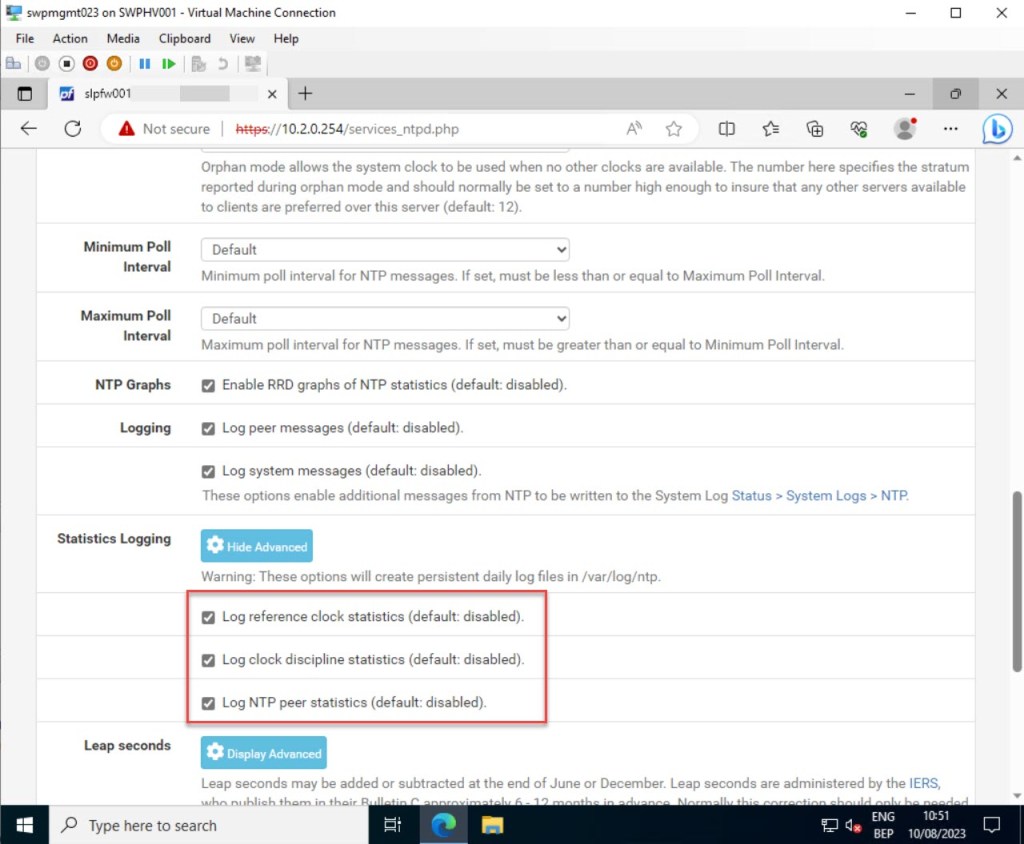
In addition to the logging settings mentioned earlier, you can also enable certain statistics logging settings, such as “Log reference clock statistics” and “Log clock discipline statistics.”
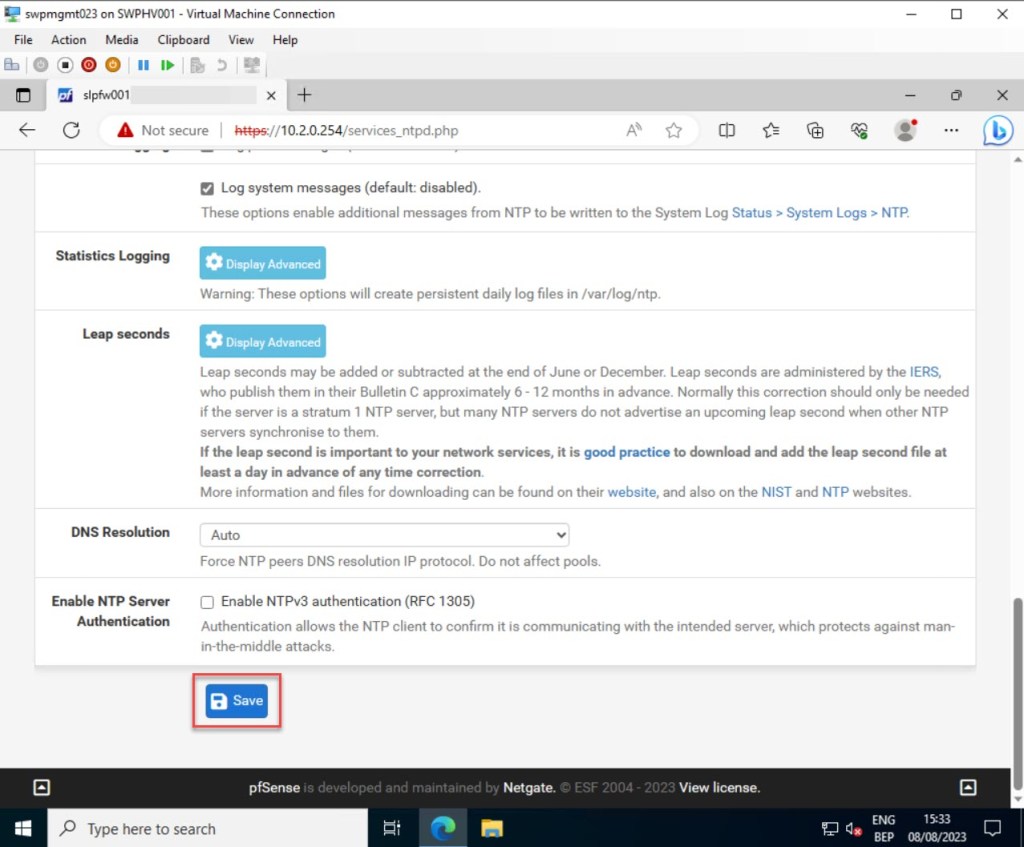
Once you’ve made all the necessary adjustments, click “Save” to preserve your updated NTP server settings.
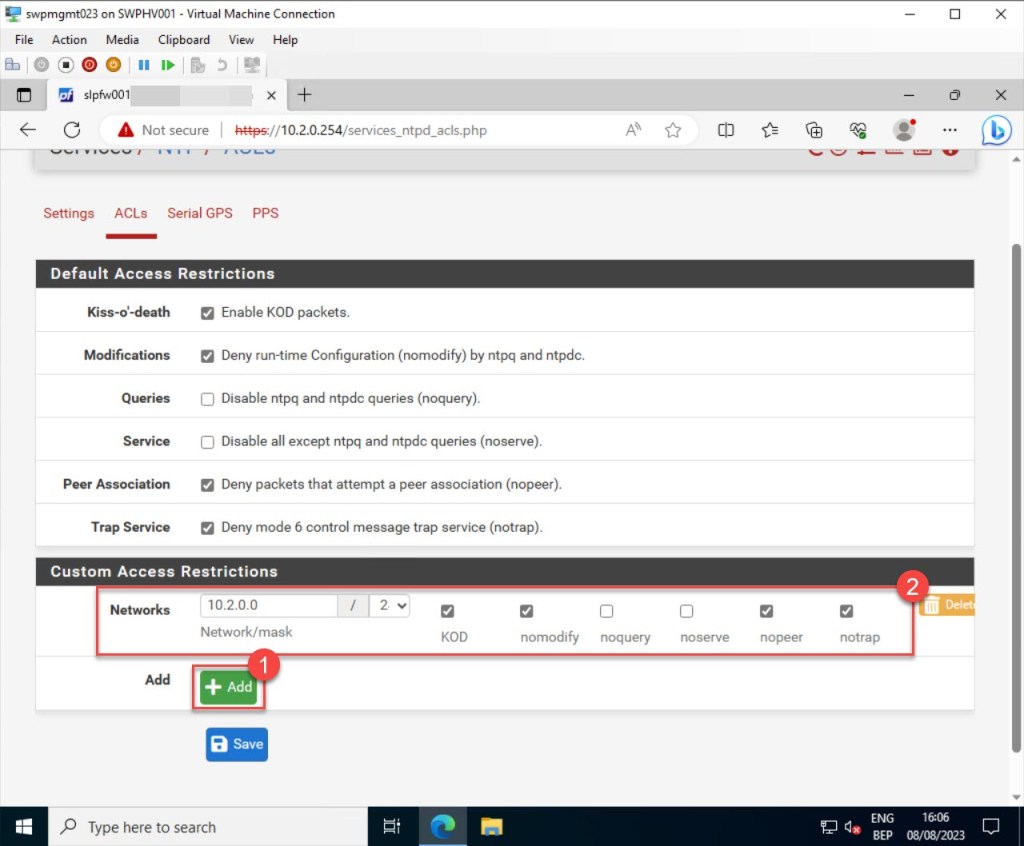
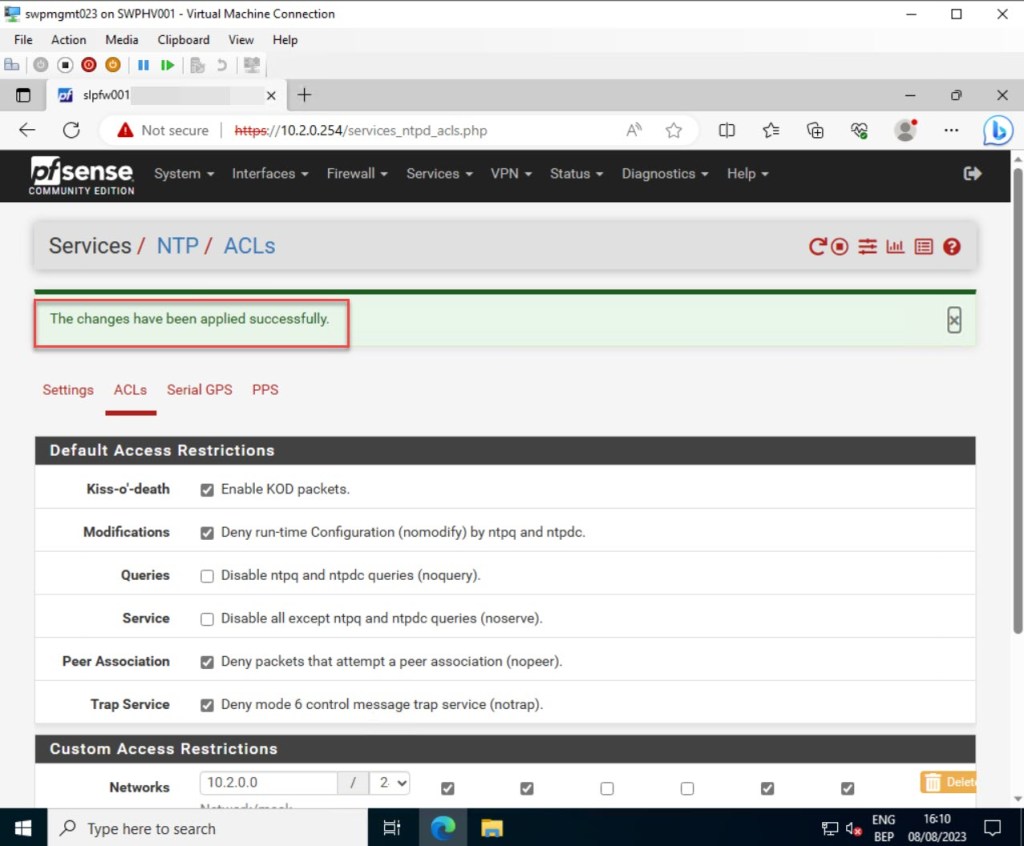
Next, navigate to the “ACLs” tab to configure how NTP clients can interact with the pfSense NTP server. You’ll notice that there are already some default access restrictions enabled, such as “Enable KOD packets” and “Deny run-time Configuration (nomodify) by ntpq and ntpdc.“
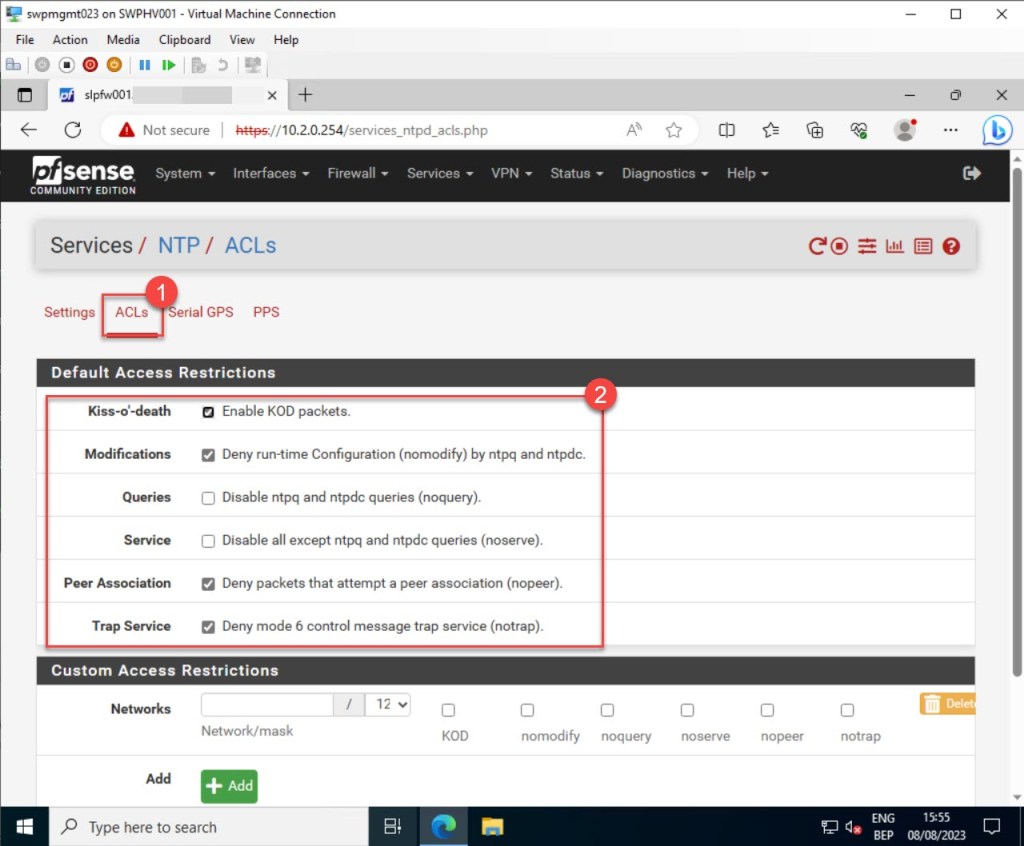
You also have the option to set up network access restrictions, permitting only a designated group of servers or clients to access time services from your pfSense NTP server. For instance, in my example, I included a specific IPv4 range. If you need to add more networks or hosts, just click the “Add” button.
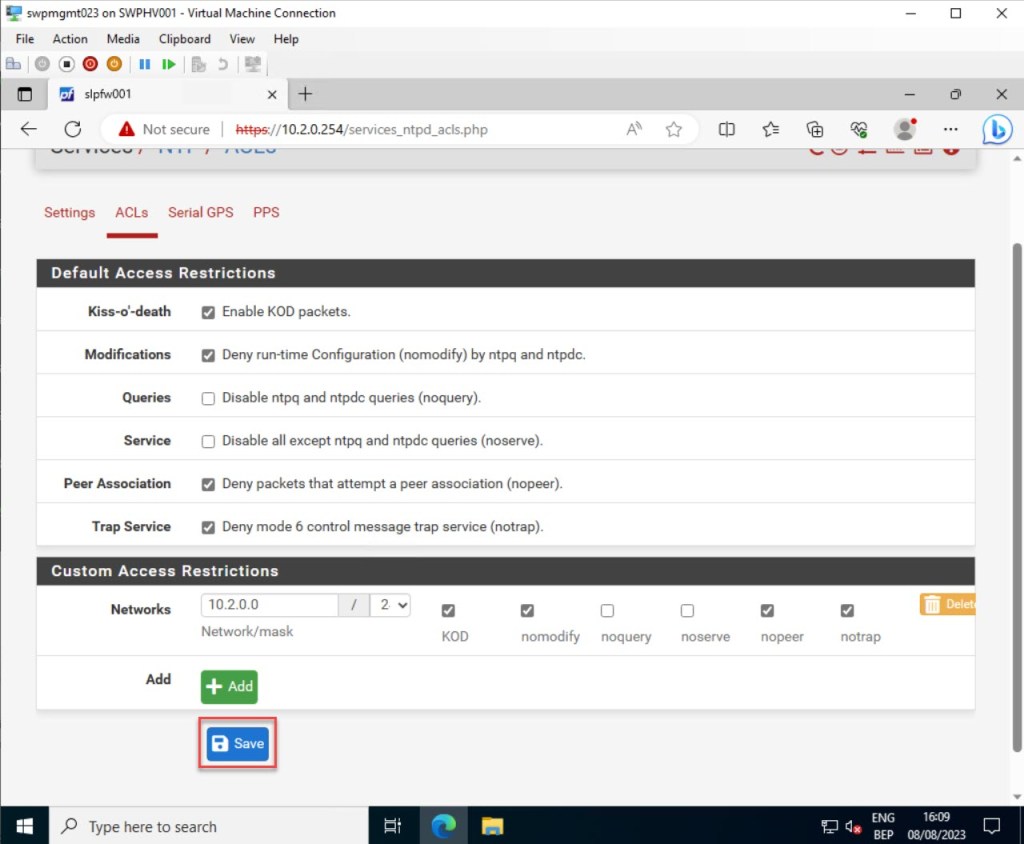
Once again, if you’ve made some adjustments, click “Save” to preserve your updated NTP server settings.
Once all your NTP settings are applied, make sure to validate that you have added at least one DNS server to your pfSense configuration. Without this, the NTP service on your pfSense won’t be able to resolve the addresses of the NTP pool servers you specified in the previous step.
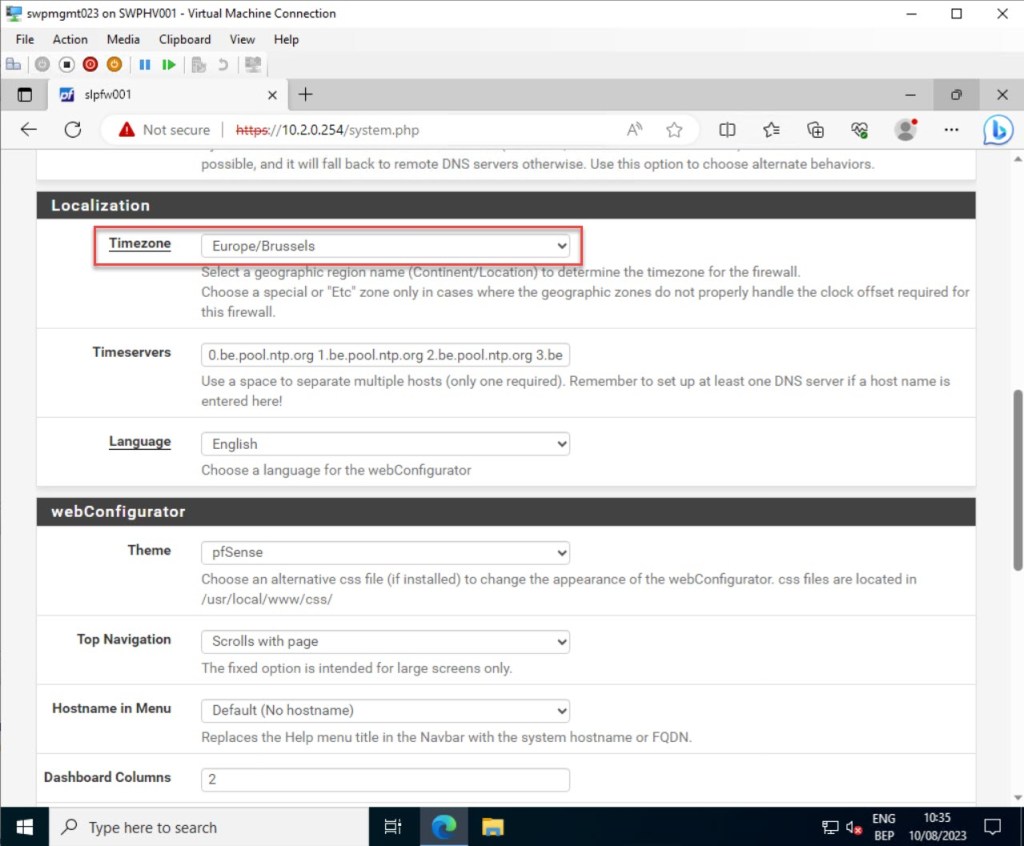
To verify this, access the “System” section in the pfSense dashboard toolbar and select “General Setup.”

On the same page, also ensure that your pfSense time zone is configured correctly.
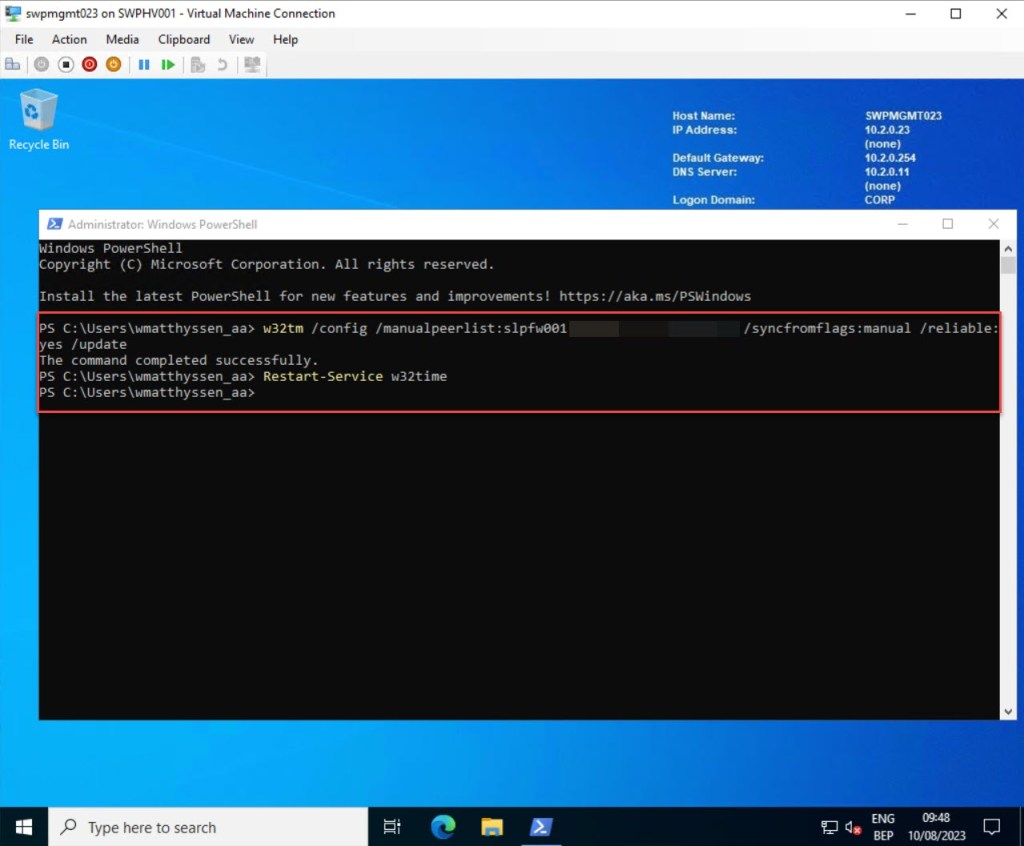
Then, to set the current time manually on your management server (with the Tim synchronization Integration Service disabled on the VM level) or on any other server with the NTP server running on your pfSense VM, simply execute the following command in a PowerShell window (with administrator privileges) on the management VM:
w32tm /config /manualpeerlist:<"FQDN of your pfSense here"> /syncfromflags:manual /reliable:yes /update

Restart-Service w32time
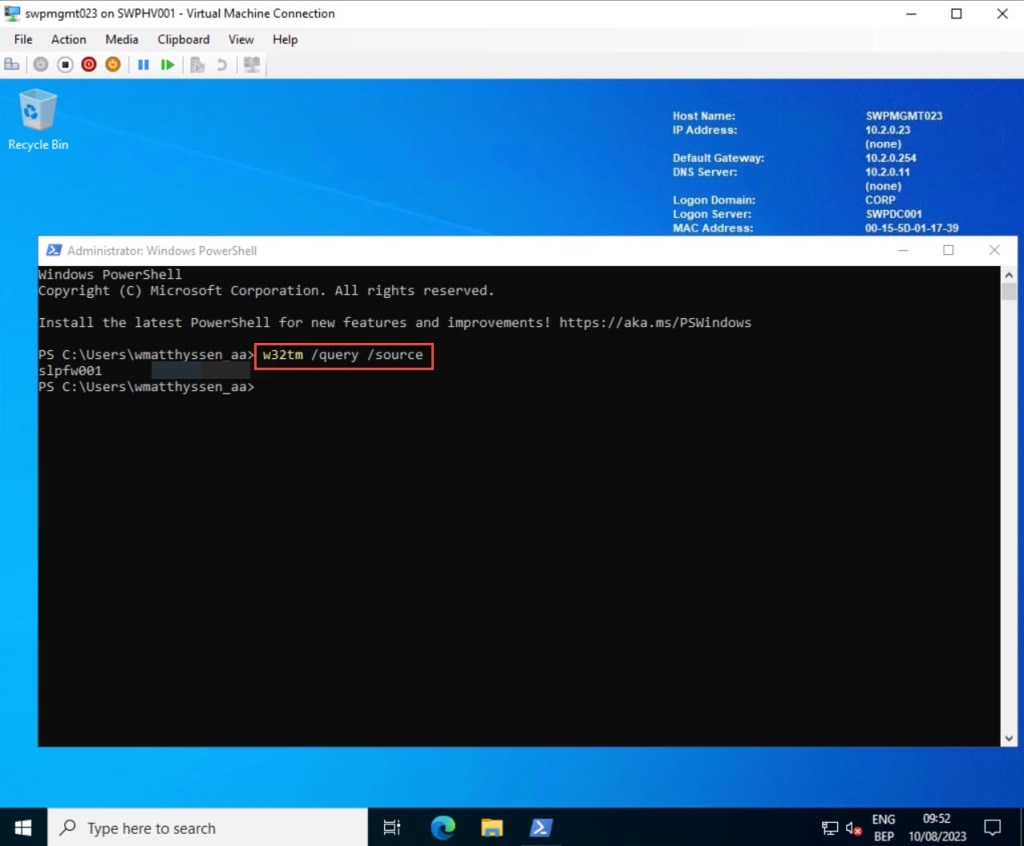
You can verify if the new NTP settings on the VM are applied successfully and ensure that the VM is using the correct NTP source by executing the following cmdlet:
w32tm /query /source
If you’re interested in learning more about configuring time synchronization in your Active Directory (AD) domain, you can find additional information in this blog post: “Hyper-V: Configure Time Synchronization for a Virtual Domain Controller“
Conclusion
Using the more advanced settings for pfSense within a Hyper-V VM allows you to use the full potential of your firewall and router. By fine-tuning features like NTP synchronization, DHCP server setup, and precise time zone configurations, you’re not only enhancing its performance but also ensuring effective management.
I hope this step-by-step guide can be of assistance to you as you configure the more advanced features of pfSense running on a Hyper-V VM within your on-premises environment.
Should you have any questions or suggestions regarding this blog post, feel free to reach out to me through my Twitter handle (@wmatthyssen) or simply leave a comment, and I’ll be more than happy to assist.

0 comments on “How to configure advanced settings for pfSense running within a Hyper-V VM”