

This blog post will show how you can configure just-in-time (JIT) VM access and how you can use it in combination with Azure Bastion to securely connect to your Azure virtual machines (VMs).
Azure Bastion is an Azure PaaS service that you provision inside a virtual network (VNet), ideally within the HUB VNet. It allows you to securely connect to your Azure virtual machines (VMs) via RDP or SSH, and this is done directly from the Azure portal over SSL. When you use Azure Bastion, your VMs do not need a Public IP Address (PIP), agent, or special client software to be able to connect to them.
Like you all know, security, least-privileged access, and defense in depth are hot topics these days. Therefore, and also to be aligned with these concepts, it is critical to minimize the attack surface for the connectivity that users create when they need to connect to VMs for any management or administrative purposes.
To do so, you can combine Azure Bastion with the JIT VM access feature of Microsoft Defender for Cloud. JIT provides just-in-time network-based access to VMs by locking down your VMs at the network level and blocking all unnecessary inbound traffic to specific management ports, like RDP or SSH. To be able to do this, it adds a deny rule to the Azure network security group (NSG), which protects the VM network interface or the subnet it belongs to.
When a user then requests access to the VM, the service adds a temporary allow rule to the NSG. Because the allow rule has a higher priority than the deny rule, the user can connect to the VM. The user can also only connect for a limited amount of time, with a maximum of 24 hours. This duration for which JIT remains active is determined during its configuration for a specific VM or VMs.
You can begin using JIT on any subscription where Microsoft Defender for Cloud has been enabled with Microsoft Defender for Server Plan 2*.
*When you enable the Defender for Servers Plan (Plan 1 or Plan 2), it applies to all supported resources in the subscription. Keep in mind that for the West Europe region, Plan 2 costs € 14.604 per server per month (including data at 500 MB per day). You can find the pricing for other regions and plans over here.

To configure JIT and use it in combination with Azure Bastion, you can follow the steps below.
Prerequisites
- An Azure subscription.
- An Azure Administrator account with the necessary RBAC roles.
- An existing Azure Bastion host.
- An existing virtual network (VNet) and a subnet with an associated network security group (NSG).
- An existing virtual machine (VM), connected to the above subnet.
Enable Defender for Servers Plan 2
Log in to the Azure Portal and search for “defender” in the Global search bar. Then click on Microsoft Defender for Cloud.

Then, on the Microsoft Defender for Cloud page (blade), select Environment settings. Navigate to the subscription you want to protect, click on the ellipsis menu (…) at the end of the row, and select Edit settings.

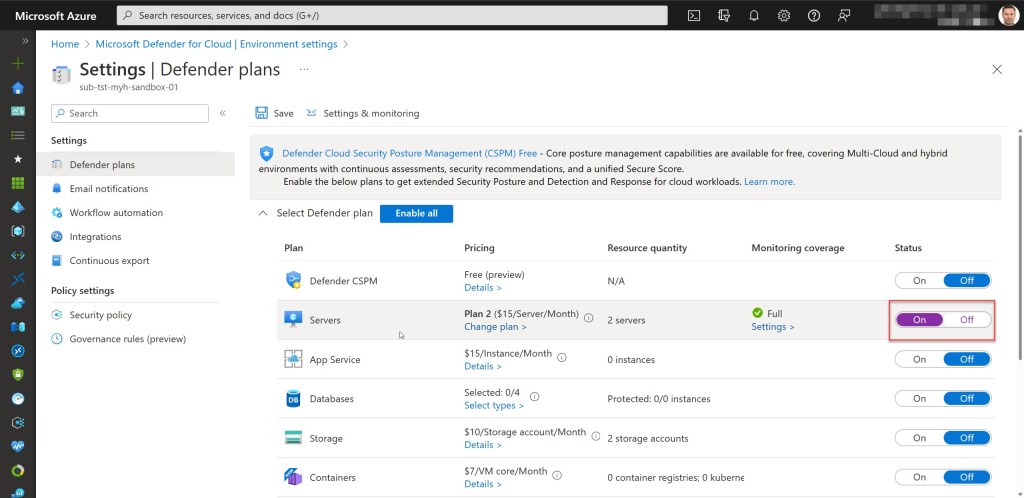
Then, in the Servers Plan, move the slider to the On position.
If required, you can change the Plan from Plan 1 to Plan 2 by using the Change plan > button. Then select the appropriate plan and click Confirm.

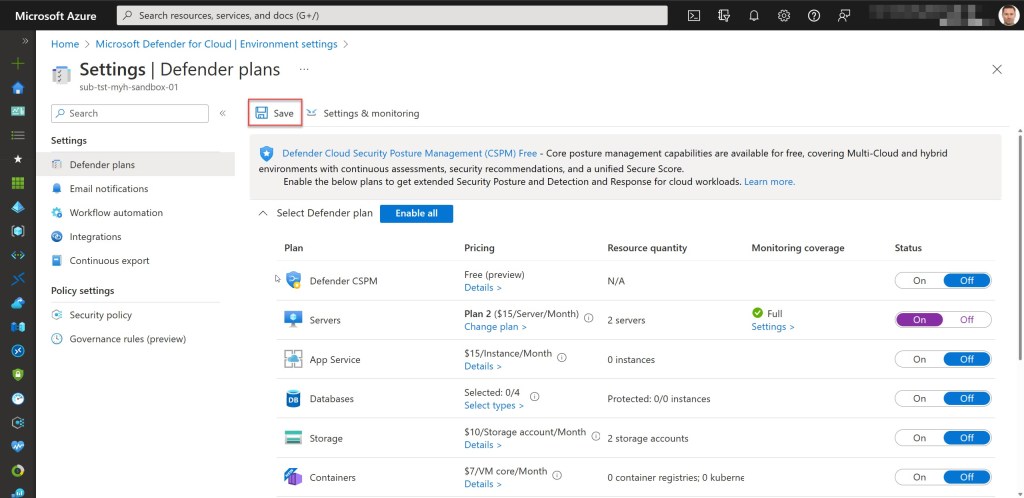
Click Save to turn on the plan. When you do so, all the required monitoring components for the required plan will be deployed to the protected resources.

Enable JIT
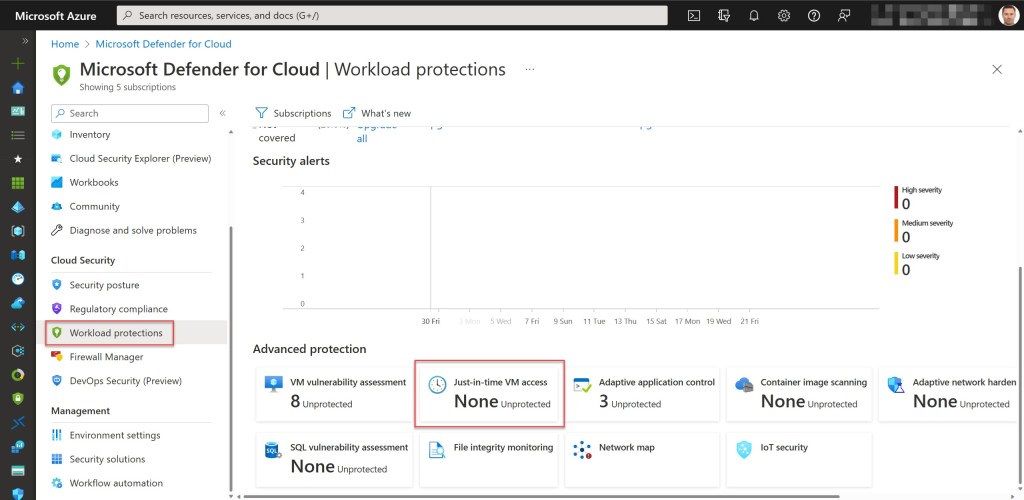
On the Microsoft Defender for Cloud page (blade), select Workload protections. Then, on the Defender for Cloud coverage page, scroll down to the Advanced protection area and select Just-in-time VM access.
On the Just-in-time VM access page, click on the Not Configured tab to get a list of all the VMs without JIT enabled but which can support JIT. Then mark a VM that you want to protect with JIT and click on the Enable JIT on 1 VM button (you can also complete this step for multiple VMs at once).

The first thing to do on the JIT VM access configuration page is to delete any default port(s) that you do not need, such as 5986, 5989, and 22. If required, you can also add other custom ports.

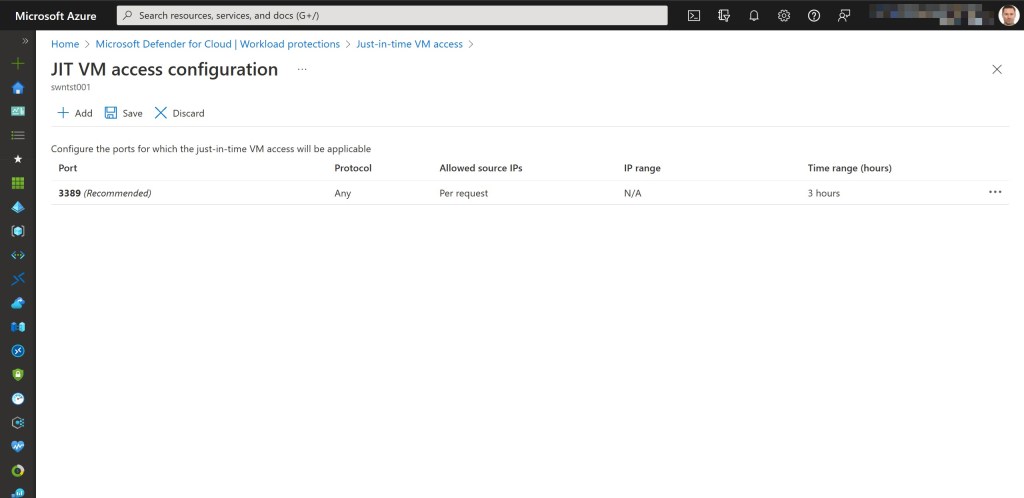
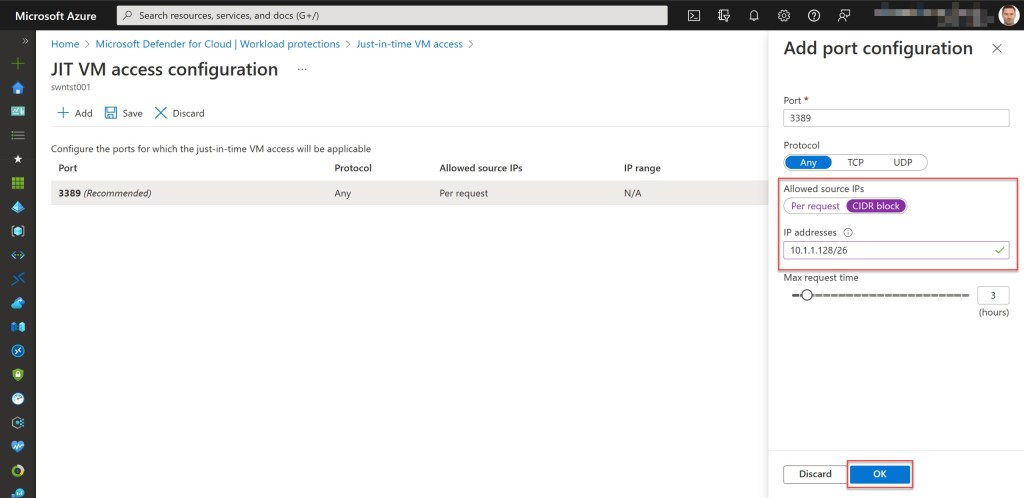
Then click on port 3389 to configure the port configuration. For example, over here you can configure the Max request time to set the maximum time window during which this port can be opened. Next to that, you can also configure the Allowed source IPs. To improve security, I mostly set this one to only allow the AzureBastionSubnet IP range and/or the Point-to-site (P2S) VPN IP range (if you add multiple IP ranges, you can separate them with a comma “,“). Click OK to apply your changes.
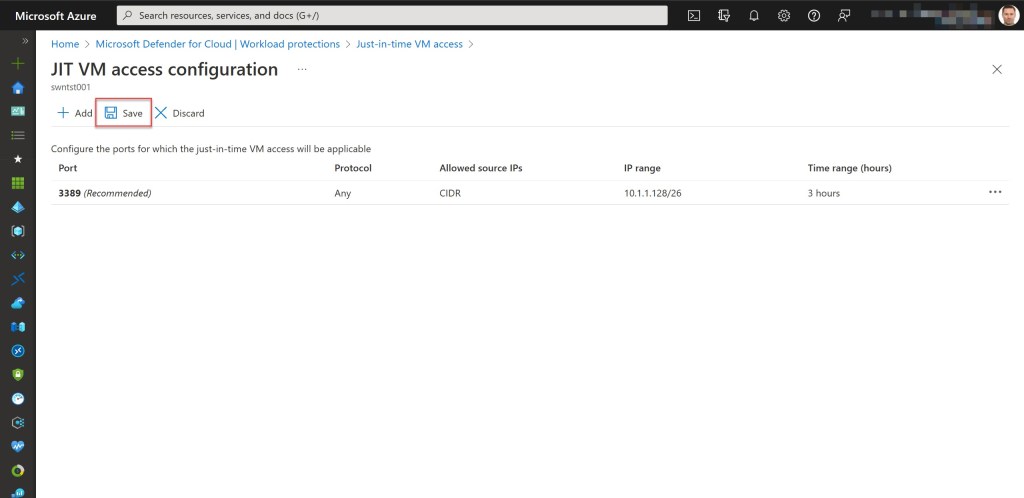
Then click “Save.”
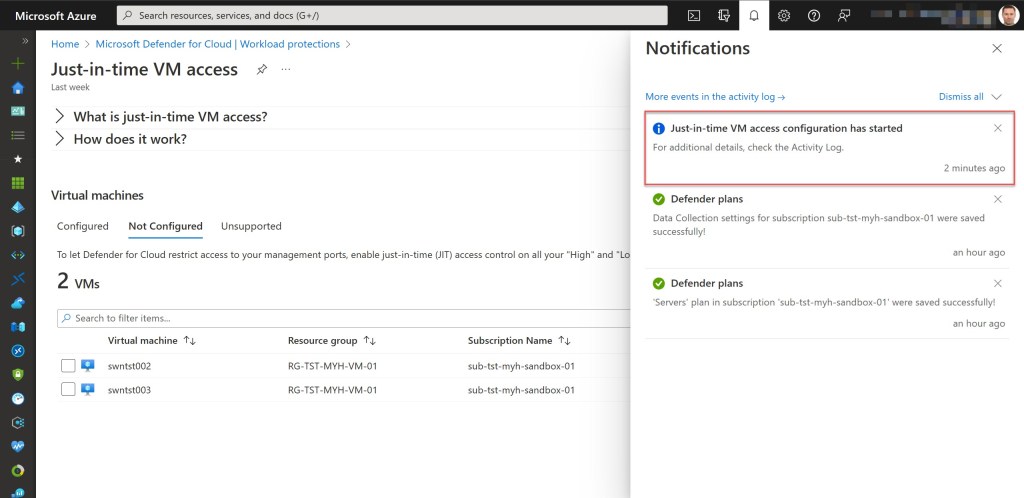
When all went well, you should now be able to find the added VM under the “Configured“ tab.

Use JIT with Azure Bastion
Because we now have a VM that has JIT enabled, we have to request access to connect to it. You can request access in many ways, like from the Microsoft Defender for Cloud page, through Azure PowerShell, or from the Azure virtual machine’s connect page, as I will explain and show in the steps below.
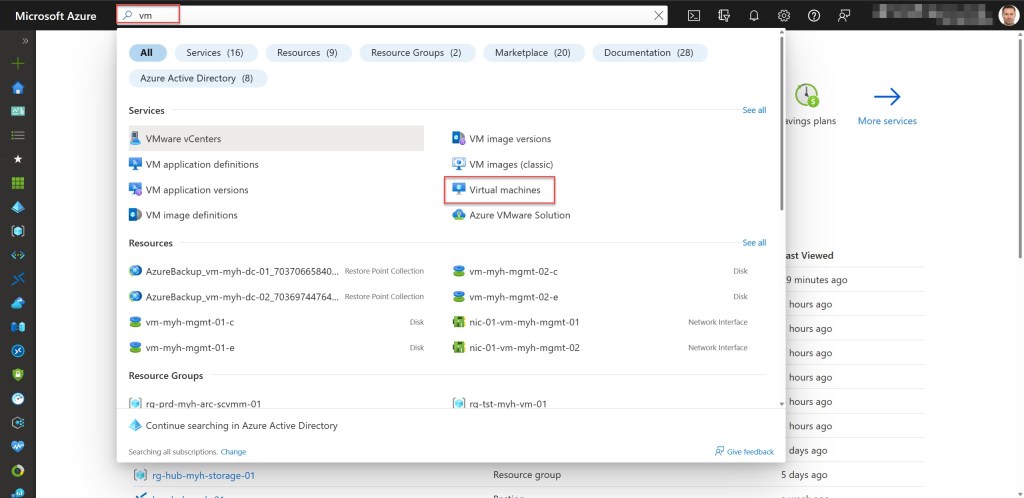
Type “vm” in the Global search bar. Then click on Virtual machines.
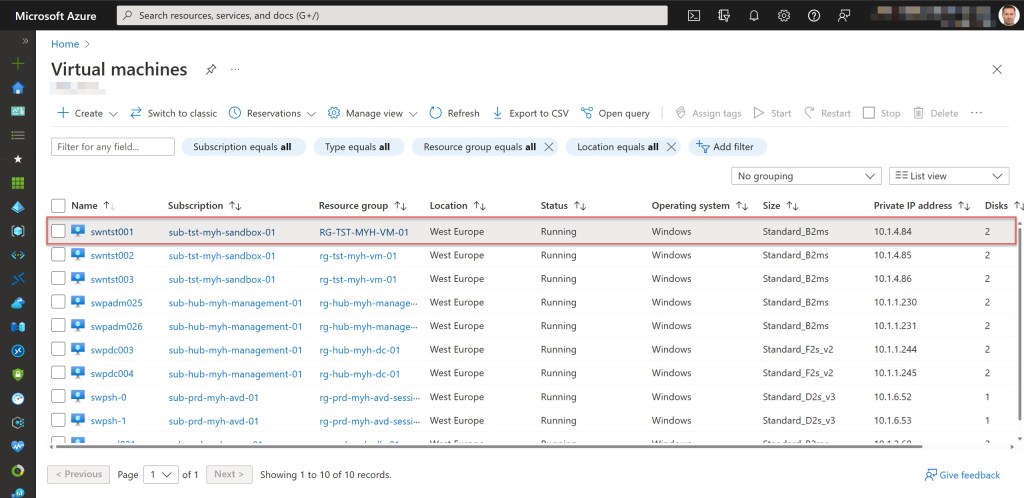
Select the VM to which you want to connect (in my example, swntst001).
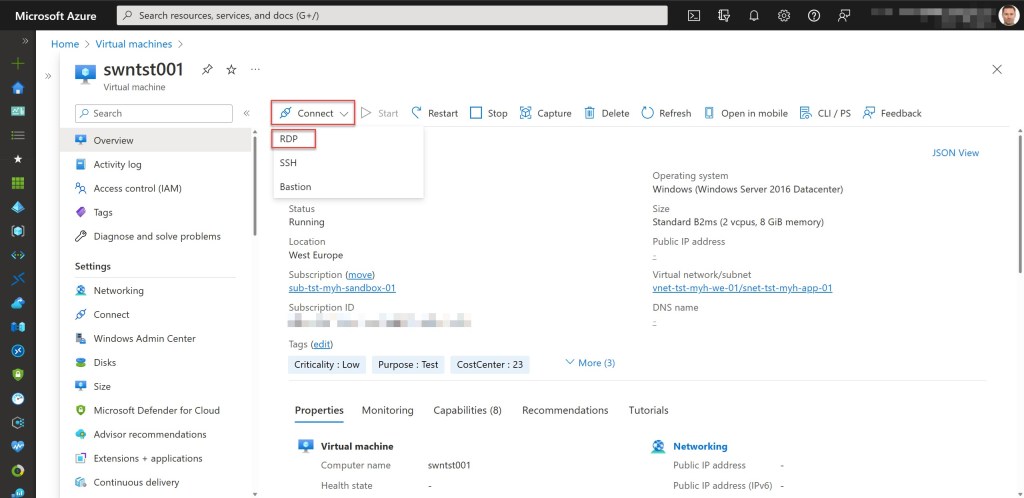
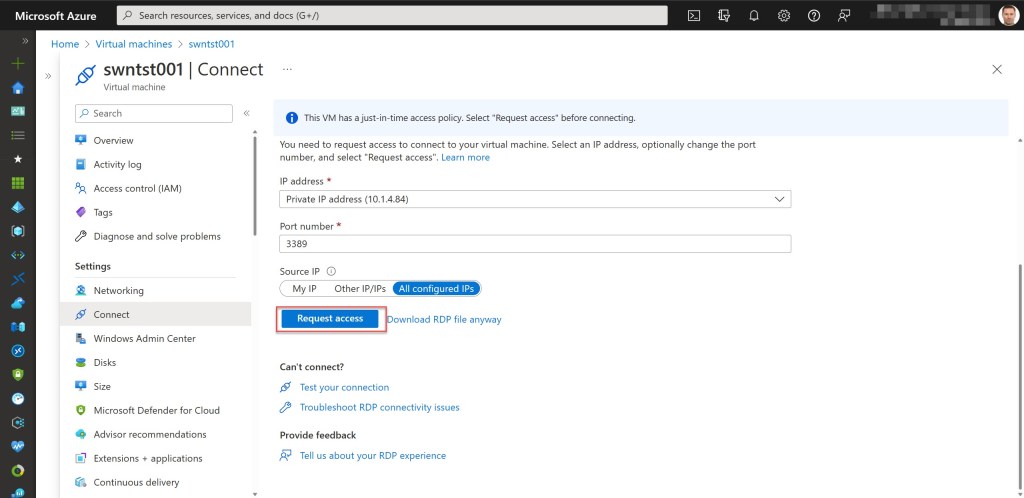
On the Overview page, click Connect and select RDP or SSH, depending on the type of VM (Windows or Linux) you want to connect to.
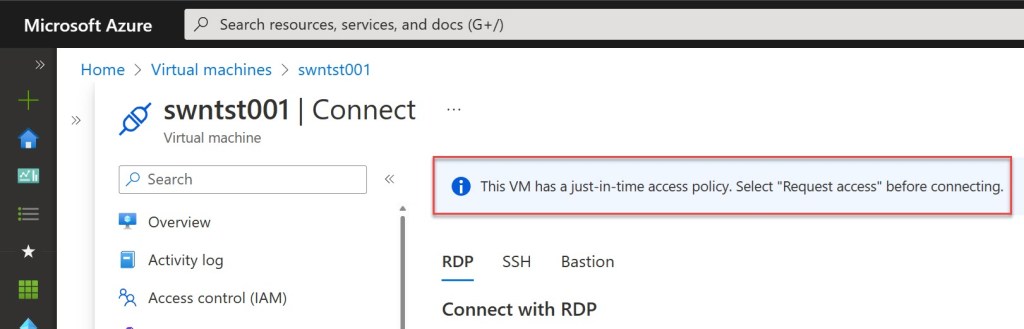
If JIT is enabled for that specific VM, an information message on top of the Connect page will explain that you need to select Request access before connecting. To do so, scroll down and click on Request access.
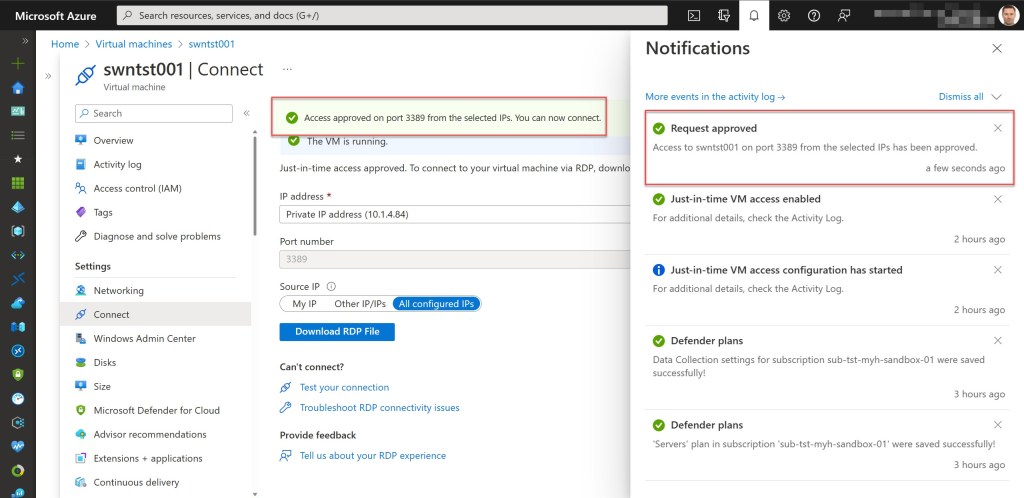
After the request is approved for the VM (which can take up to around one minute), click on the Bastion tab.

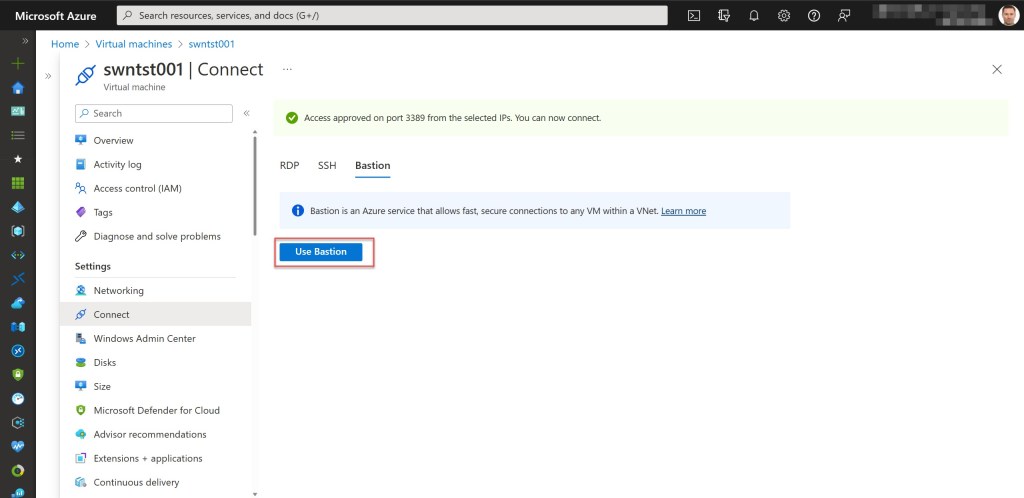
Click “Use Bastion.”
On the Bastion page, enter the required authentication credentials and then click “Connect.”
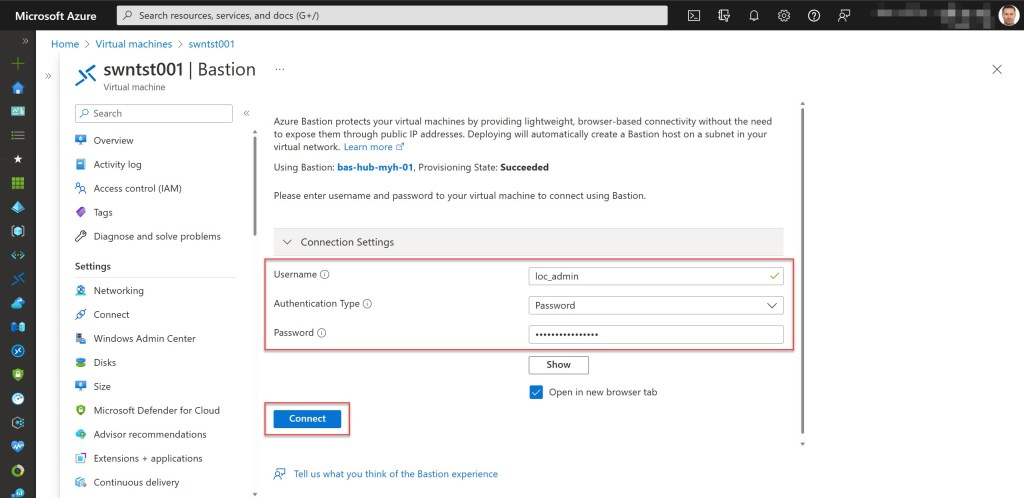
If you used the correct credentials to log on, the RDP connection to this VM via Bastion will now open in a new browser tab.

Session monitoring, troubleshooting, and auditing
To monitor and manage your JIT-enabled Bastion session, you can go to your Azure Bastion resource and choose Sessions from the Azure Bastion page.

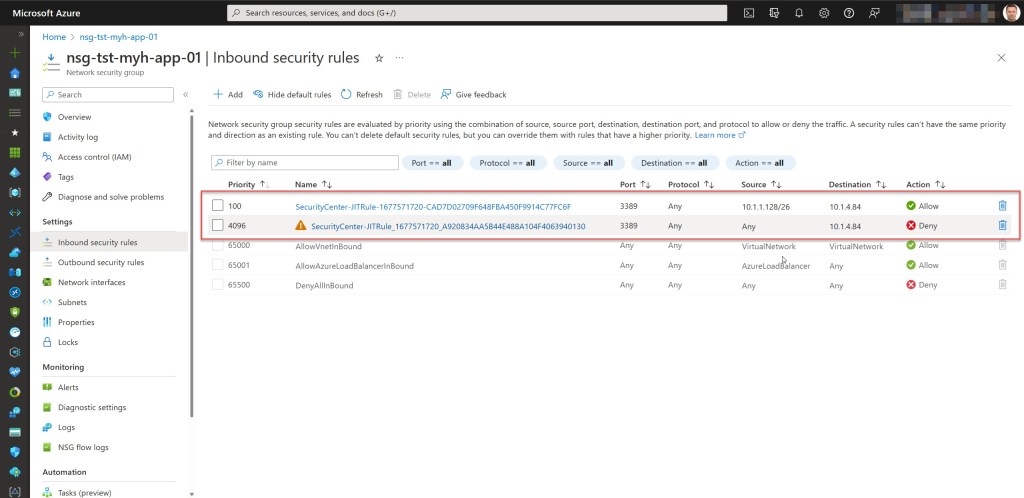
Next to that, you can also validate the added JIT NSG Inbound Security Rules by opening the NSG associated with the subnet where the VM belongs to.

Thereupon, you can audit the JIT access activity in Microsoft Defender for Cloud. Therefore, you go to the Just-in-time VM access page and click the Configured tab. You can already see all active connections and who initiated them on this page.
To view the Activity log, go to the VM that you want to audit and open the ellipsis menu (…). Then click on Activity Log. Now you should see the Activity log, which provides you with a filtered view of all operations performed on that particular VM.


Conclusion
When using Azure Bastion to connect to Azure VMs in your environment, you can combine this with JIT VM access to better secure those connections.
When using JIT, a user is required to request access to the VM. Once access is approved and everything in the background is configured, they proceed to Azure Bastion to make the connection by providing the appropriate authentication credentials, which determine whether or not they are authorized to log in to the VM.
So, by using this multilayered connection approach, you will enhance your overall security and reduce the attack surface of your VMs.
If you have any questions related to the use of Azure Bastion or JIT in your environment, feel free to contact me through my Twitter handle (@wmatthyssen) or to just leave a comment. I am always happy to help.

Pingback: Securely connect to your Azure VMs with JIT and a P2S VPN – Wim Matthyssen
Pingback: Unleash the power of defender plan 2: Just-in-time VM access - part 4 - Vertho | Verheyden Thomas