

This blog post will show you which minimum Azure Role-Based Access Control (Azure RBAC) roles are required to access a virtual machine (VM) with the use of Azure Bastion.
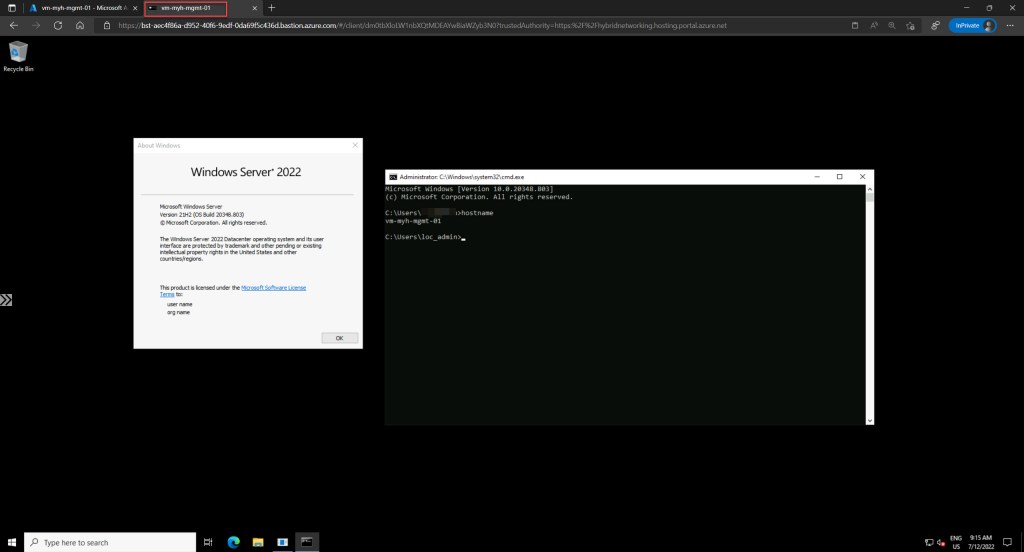
Azure Bastion is an Azure PaaS service that you provision inside a virtual network (VNet), recommendable the HUB VNet. It allows you to securely connect to your Azure virtual machines (VMs) via RDP or SSH and this directly from the Azure portal over SSL. When you use Azure Bastion, your VMs do not need a Public IP Address (PIP), agent or special client software to be able to connect to them.
If you want to read some more about Azure Bastion, you can do so via the following Microsoft Docs link: Azure Bastion documentation
If you want to know how you can deploy Azure Bastion and all associated resources via the use of an Azure PowerShell script, you can look at this blog post.
When using Azure Bastion in a production environment it is best to enhance the user(s) security by using features like Multi-Factor Authentication (MFA) and Conditional Access. Those features can help you to for example enforce that a user logs into the Azure Portal using Multiple Factors of Authorization or that a user needs to connect from a trusted device or IP Address.
Beside MFA and Conditional Access, you can also manage the access to your Azure resources, like your VMs, trough role assignments, by making use of Azure RBAC.
With using RBAC you can for example grant a user access to a VM via Azure Bastion, but at the same time do not allow that same user to make any changes to the Azure infrastructure or to any other Azure resource in your environment.
If you want to read some more about Azure RBAC, you can do so via the following Microsoft Docs link: Azure RBAC documentation
Minimum required RBAC roles
When connecting to a VM using Azure Bastion a user will at least need the following role assignments:
- Reader role on the target VM.
- Reader role on the network interface (NIC) with private IP of the VM.
- Reader role on the Azure Bastion resource.
If the Bastion host also needs to connect to a VM in a peered virtual network, the following role assignment is also required:
- Reader Role on the virtual network (VNet) of the target virtual machine
You can scope these roles at whatever level you want:
- Management Group
- Subscription
- Resource Group
- Resource
As a best practice it is best to only apply RBAC roles on the Management Group, Subscription or Resource Group level. And also, always use the least privilege access model (least privilege principle), when granting access with RBAC. So, just give users the minimum access (limited access) they need to fur fill their tasks.
So, like you can read above you need to make sure the user at least has read access to both the VM(s), and the peered VNet(s). The last role is only required if one or more peered VNet(s) are in use in your environment.
Luckily, to make it all a little bit easier, you can just assign the pre-defined built-in Virtual Machine User Login role at the subscription level. Just know that you need to do this on every Azure subscription where the user need to be able to use the Azure Bastion service to connect to a VM or VMs in that subscription.
Next to that role, you also need to assign the user with the Reader role on the resource group of the Azure Bastion host.
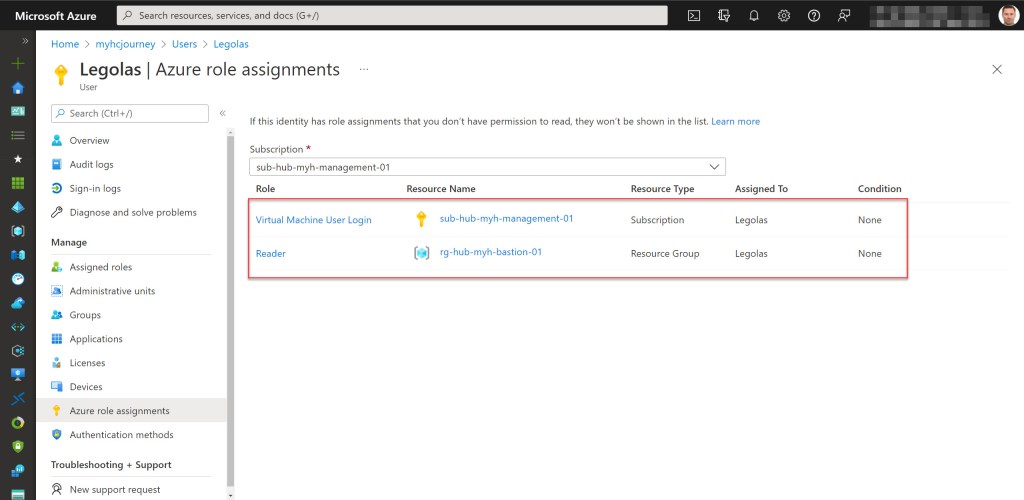

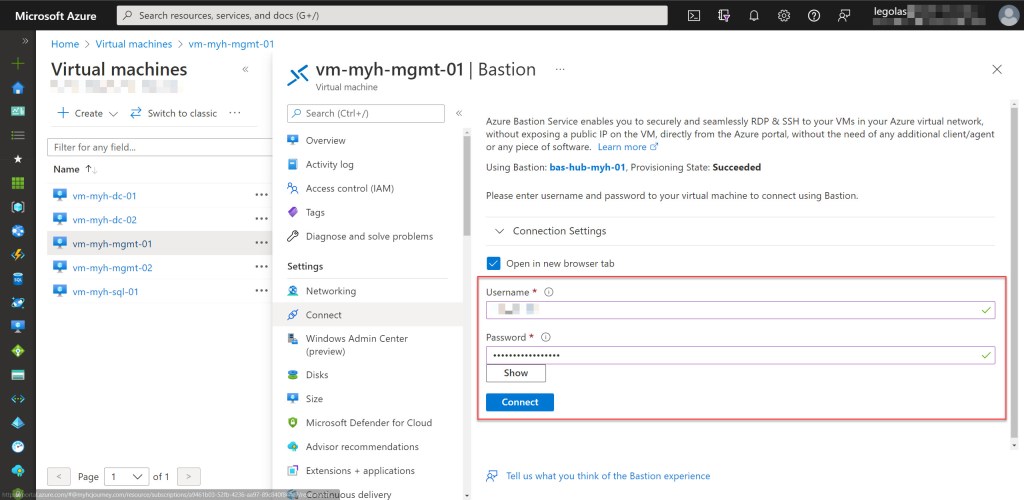
When both roles are assigned at the correct scopes the user will be allowed to use the Bastion host to securely connect to the VM or VMs in the subscription.
As a best practice it is best to only assign RBAC roles to Azure AD groups instead of assigning them to single users. You should also review group memberships and role assignments on a regular base.
Azure Portal view or message when a required role is missing
If a user lacks one of the minimum required roles when using the Bastion host to connect to a VM, no connection options will be visible, or the message “Unable to query Bastion data” will appear.

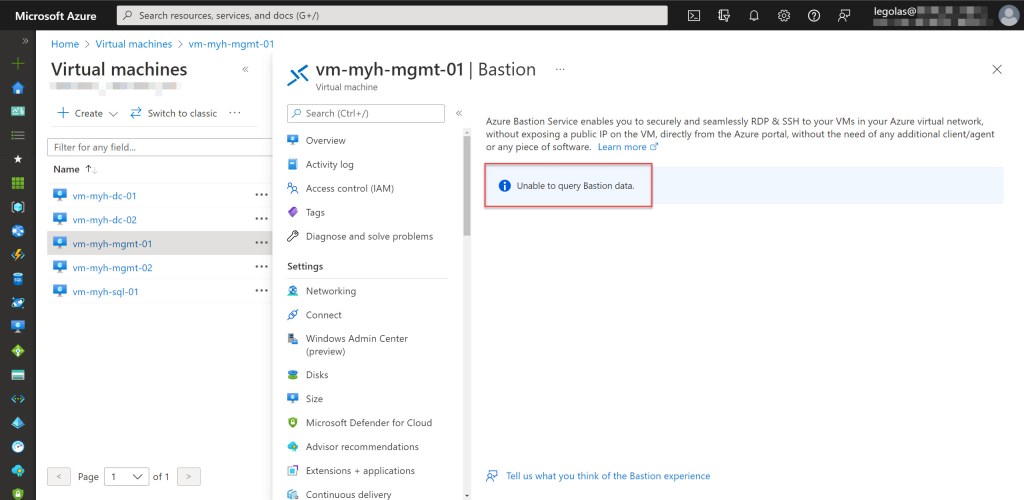
In addition, some people also seem to encounter the “UnauthorizedDataError: data set DataCache:2:1” error.
Steps to follow when assigning the required roles
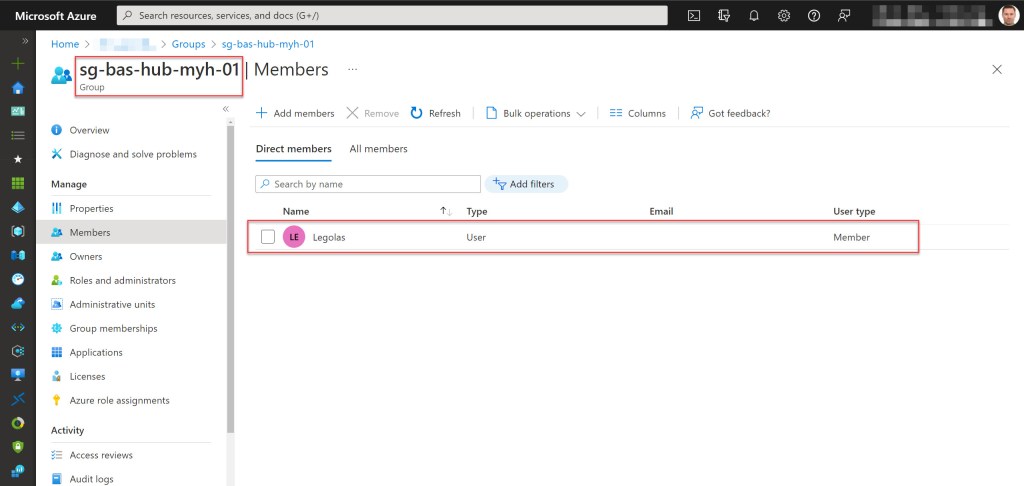
1) Create an Azure AD group (Azure AD Security Group).

## ---------------------------------------------------------------------------------------------------------------------------------------------------------------------------------------------

## Create a group in Azure Active Directory (AD)

Connect-AzureAD
New-AzureADGroup -DisplayName "<your group display name here>" -Description "<your group description here>" -MailEnabled $false -MailNickName "NotSet" -SecurityEnabled $true

## ---------------------------------------------------------------------------------------------------------------------------------------------------------------------------------------------

2) Add the user as a member to the group.
## ---------------------------------------------------------------------------------------------------------------------------------------------------------------------------------------------

## Add a member to an Azure AD Security Group

$user = Get-AzureADUser -Filter "startswith(displayName,"<your user display name here>")"
$group = Get-AzureADGroup -SearchString "<your group display name here>"

Add-AzureADGroupMember -ObjectId $group.ObjectId -RefObjectId $user.ObjectId

## ---------------------------------------------------------------------------------------------------------------------------------------------------------------------------------------------

If you are not familiar with creating groups and adding members via the Azure Portal, you can follow the instructions on this Microsoft Docs page.
3) Add the required Azure role assignments to the group.


## ---------------------------------------------------------------------------------------------------------------------------------------------------------------------------------------------

## Assing required roles to a group

$group = Get-AzureADGroup -SearchString "<your group display name here>"

New-AzRoleAssignment -ObjectId $group.ObjectId -RoleDefinitionName "Virtual Machine User Login" -Scope /subscriptions/<your subscription id here>
New-AzRoleAssignment -ObjectId $group.ObjectId -RoleDefinitionName "Reader" -ResourceGroupName "<your Azure Bastion resource group name here>"

## ---------------------------------------------------------------------------------------------------------------------------------------------------------------------------------------------

4) Test if the user is able to logon to the required VMs with the use of the Bastion host.
Conclusion
When using Azure Bastion to connect to Azure VMs in your environment, it is best to limit the user’s capabilities with the use of Azure RBAC.
By only giving the users the minimum required roles, which only allows them to access those VMs through the use of Azure Bastion, you will enhance your overall security and at the same time keep your Azure environment under control.
If you have any questions related to the use of Azure Bastion in your environment, feel free to contact me through my Twitter handle (@wmatthyssen) or to just leave a comment. I am always happy to help.

Pingback: Azure Bastion: Set Azure Bastion NSG Inbound security rules on the Target VM Subnet with Azure PowerShell – Wim Matthyssen
Pingback: Azure Bastion: Upgrade Basic SKU to Standard SKU with Azure PowerShell – Wim Matthyssen
Pingback: Azure Bastion: Switch Standard SKU to Basic SKU with Azure PowerShell – Wim Matthyssen
Thank you, this is very useful for troubleshooting Bastion access
LikeLike
Thank you, you really saved my bacon on this one as several hours of searching and reading Azure docs didn’t lead to specific steps.
P.S. The error I was getting when missing “reader” permissions for Bastion and NIC resources was “UnauthorizedDataError: data set DataCache:2:1“, a bit different from what’s in your article.
LikeLike
Hi Alex, I’m glad my blog post helped you solve your issue. As you mentioned, more than one error can be related to misconfigured or insufficient permissions. I will add your error to the blog post so it can help others facing the same problem.
LikeLiked by 1 person
Needed read access to the entire RG as I was getting this with just the Bastion and NIC read permissions:
Once I added “read” permissions to the RG, Bastion started working.
LikeLike
(sorry for the formatting in the above comment – unexpected)
LikeLike
Thank you, this was helpful!
LikeLike