

These days there are different authentication methods you can use to configure a Point-to-Site (P2S) VPN connection to a VNet in Azure. Such a P2S VPN connection can be useful when you want to securely connect to resources in that VNet or any of it’s peered VNets from a client device on a remote location, like when you are working from home on your corporate Windows 11 device.
One of the methods you can use to authenticate your P2S VPN client, is by using certificates. Which requires a root certificate (the public key information of this certificate is uploaded to Azure) and a client certificate, generated from the root certificate, and installed on the client device making the connection.
For the root certificate you can either use a certificate that was generated using an enterprise solution (via e.g. Active Directory Certificate Services), which is by the way the recommended method in an enterprise scenario, or you can generate a self-signed certificate.
In this blog post I will show you, how you can automate the creation of a new self-signed root certificate and a client certificate for use with an Azure P2S VPN. For this, I wrote the below PowerShell script which does all of the following:
- Check if the PowerShell window is running as Administrator (which is a requirement), otherwise the PowerShell script will be exited.
- Generate the self-signed root certificate which expires after x months.
- Generate the client certificate which expires after x months.
- Create the Temp folder on the C: drive, if the folder not already exists.
- Export the root certificate and convert it to a Base-64 encoded X.509 (.CER) file in the C:\Temp folder.
- Export the client certificate to a .pfx file with a password in the C:\Temp folder.
- Check if the root certificate is base 64 encoded.
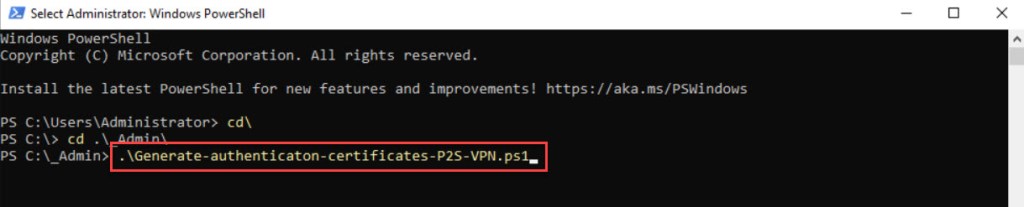
To use the script copy and save it as Generate-authenticaton-certificates-P2S-VPN.ps1 or download it from GitHub. First adjust all variables to your use (you can find an adjusted example in a screenshot below) and afterwards run the customized script with Administrator privileges from Windows PowerShell, Windows Terminal, or Visual Studio Code.
Preferably you run the script on a dedicated management server running Windows Server 2019 or Windows Server 2022.
I also wrote an Azure PowerShell script you can use to configure a P2S VPN to an existing VNet using Azure certificate authentication. You can find the related blog post over here or you can download the script directly from GitHub.
PowerShell script
<#
.SYNOPSIS
A script used to generate a new self-signed root certificate and a client certificate for use with an Azure Point-to-Site (P2S) VPN.
.DESCRIPTION
A script used to generate a new self-signed root certificate and a client certificate for use with an Azure P2S VPN.
The newly generated self-signed root certificate uses the default provider, which is the Microsoft Software Key Storage Provider, and it is stored in the user MY store.
Next to that the self-signed root certificate also uses an RSA asymmetric key with a key size of 2048 bits and expires after 3 months.
The client certificate is generated from the self-signed root certificate and is also stored in the user MY store.
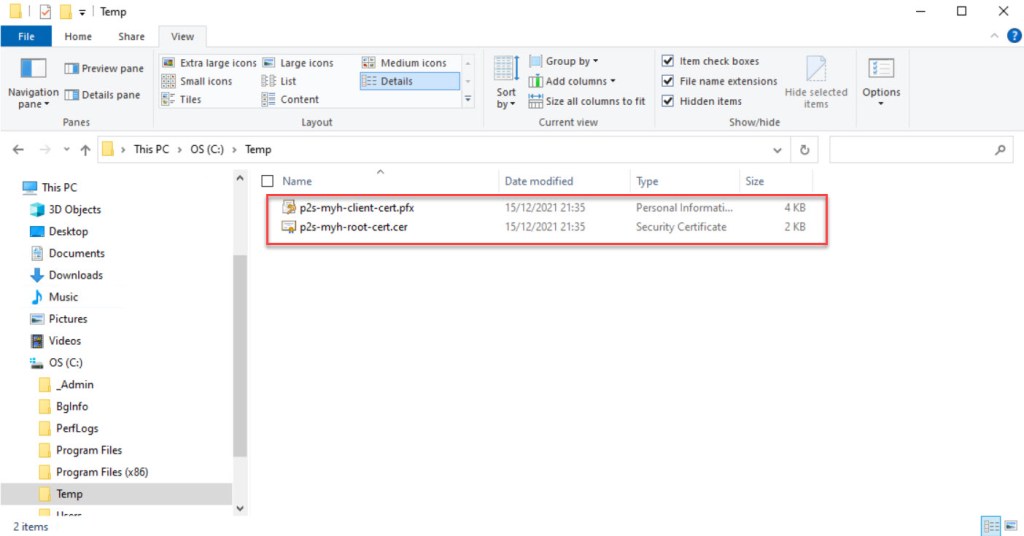
Then both certificates are exported to the C:\Temp folder, which is created if it not already exisits.
The root certificate is exported and converted to a Base-64 encoded X.509 (.CER) file and the client certificate is exported as a PFX file with a password.
The .pfx file containes the root certificate information and the entire certificate chain, and can be used and installed on another client computer to authenticate.
Keep in mind that each client computer that you want to connect to a VNet with a P2S VPN connection must have a client certificate installed.
The root certificate is also opened with Notepad to verify if it is in the base64 format. If the text "Begin Certificate" appears at the beginning of the file, it is in base64 format.
.NOTES
Filename: Generate-authenticaton-certificates-P2S-VPN.ps1
Created: 15/12/2021
Last modified: 15/12/2021
Author: Wim Matthyssen
PowerShell: PowerShell 5.1
Action: Change variables were needed to fit your needs.
Disclaimer: This script is provided "As Is" with no warranties.
.EXAMPLE
.\Generate-authenticaton-certificates-P2S-VPN.ps1
.LINK
https://wmatthyssen.com/2021/12/15/powershell-script-generate-a-self-signed-root-certificate-and-client-certificate-for-use-with-an-azure-p2s-vpn/
#>
## ----------------------------------------------------------------------------------------------------------------------------------------------------------------------------------
## Variables
$rootCertName = #<your root certificate name here> The name of the root certificate. Example: "p2s-myh-root-cert"
$clientCertName = #<your client certificate name here> The name of the client certificate. Example: "p2s-myh-client-cert"
$certStoreName = "cert:\currentuser\my"
$certValidMonths = #<your valid amount of months for both certificates here> The number of months both certificates are valid. Example: "3"
$tempFolderName = "Temp"
$tempFolder = "C:\" + $tempFolderName +"\"
$clientCertPfxPassword = #<your pfx password here> The client certificate .pfx file password. Example: "P@ssw0rd1"
$global:currenttime= Set-PSBreakpoint -Variable currenttime -Mode Read -Action {$global:currenttime= Get-Date -UFormat "%A %m/%d/%Y %R"}
$foregroundColor1 = "Red"
$foregroundColor2 = "Yellow"
$writeEmptyLine = "`n"
$writeSeperatorSpaces = " - "
## ----------------------------------------------------------------------------------------------------------------------------------------------------------------------------------
## Check if running as Administrator, otherwise close the PowerShell window
$currentPrincipal = New-Object Security.Principal.WindowsPrincipal([Security.Principal.WindowsIdentity]::GetCurrent())
$isAdministrator = $currentPrincipal.IsInRole([Security.Principal.WindowsBuiltInRole]::Administrator)
if ($isAdministrator -eq $false) {
Write-Host ($writeEmptyLine + "# Please run PowerShell as Administrator" + $writeSeperatorSpaces + $currentTime)`
-foregroundcolor $foregroundColor1 $writeEmptyLine
Start-Sleep -s 5
exit
}
## ----------------------------------------------------------------------------------------------------------------------------------------------------------------------------------
## Start script execution
Write-Host ($writeEmptyLine + "# Script started" + $writeSeperatorSpaces + $currentTime)`
-foregroundcolor $foregroundColor1 $writeEmptyLine
##-------------------------------------------------------------------------------------------------------------------------------------------------------
## Create the self-signed root certificate which expires after 3 months
$rootCert = New-SelfSignedCertificate -Type Custom `
-KeySpec Signature `
-Subject "CN=$rootCertName" `
-KeyExportPolicy Exportable `
-HashAlgorithm sha256 `
-KeyLength 2048 `
-CertStoreLocation $certStoreName `
-KeyUsageProperty Sign `
-KeyUsage CertSign `
-NotAfter (Get-Date).AddMonths($certValidMonths)
Write-Host ($writeEmptyLine + "# Root certificate $rootCertName created" + $writeSeperatorSpaces + $currentTime)`
-foregroundcolor $foregroundColor2 $writeEmptyLine
## ----------------------------------------------------------------------------------------------------------------------------------------------------------------------------------
## Generate the client certificate which expires after 3 months
$clientCert = New-SelfSignedCertificate -Type Custom `
-DnsName P2SChildCert `
-KeySpec Signature `
-Subject "CN=$clientCertName" `
-KeyExportPolicy Exportable `
-HashAlgorithm sha256 `
-KeyLength 2048 `
-CertStoreLocation $certStoreName `
-Signer $rootCert `
-TextExtension @("2.5.29.37={text}1.3.6.1.5.5.7.3.2") `
-NotAfter (Get-Date).AddMonths($certValidMonths)
Write-Host ($writeEmptyLine + "# Client certificate $clientCertName created" + $writeSeperatorSpaces + $currentTime)`
-foregroundcolor $foregroundColor2 $writeEmptyLine
## ----------------------------------------------------------------------------------------------------------------------------------------------------------------------------------
## Create C:\Temp folder if not exists
If(!(test-path $tempFolder))
{
New-Item -Path "C:\" -Name $tempFolderName -ItemType $itemType -Force | Out-Null
}
Write-Host ($writeEmptyLine + "# $tempFolderName folder available" + $writeSeperatorSpaces + $currentTime)`
-foregroundcolor $foregroundColor2 $writeEmptyLine
## ----------------------------------------------------------------------------------------------------------------------------------------------------------------------------------
## Export the root certificate and convert to a Base-64 encoded X.509 (.CER) file in the C:\Temp folder
Export-Certificate -Cert $rootCert -FilePath C:\Temp\"$rootCertName-DER-encoded.cer"
$derCert = "C:\Temp\$rootCertName-DER-encoded.cer"
$base64Cert = "C:\Temp\$rootCertName.cer"
# Convert the certificate to a Base-64 encoded X.509 (.CER) file
Start-Process -FilePath "certutil.exe" -ArgumentList "-encode $derCert $base64Cert" -WindowStyle Hidden
# Wait 3 seconds and then delete the DER-encoded certificate from the Temp folder
Start-Sleep -Seconds 3
Remove-Item -Path "C:\Temp\$rootCertName-DER-encoded.cer"
if(Test-Path -Path $base64Cert -PathType Leaf){
Write-Host ($writeEmptyLine + "# Root certificate $rootCertName Base-64 encoded X.509 CER file created in the Temp folder" + $writeSeperatorSpaces + $currentTime)`
-foregroundcolor $foregroundColor2 $writeEmptyLine
}else {
Write-Host ($writeEmptyLine + "# Root certificate $rootCertName Base-64 encoded X.509 CER file not created in the Temp folder" + $writeSeperatorSpaces + $currentTime)`
-foregroundcolor $foregroundColor1 $writeEmptyLine
}
## ----------------------------------------------------------------------------------------------------------------------------------------------------------------------------------
## Export the client certificate to a .pfx file with a password in the C:\Temp folder
# Encrypt the standard password string into a secure string
$secureClientCertPfxPassword = ConvertTo-SecureString $clientCertPfxPassword -AsPlainText -Force
Export-PfxCertificate -Cert $clientCert -FilePath C:\Temp\"$clientCertName.pfx" -Password $secureClientCertPfxPassword
if(Test-Path -Path C:\Temp\"$clientCertName.pfx" -PathType Leaf){
Write-Host ($writeEmptyLine + "# Client certificate $clientCertName PFX file created in the Temp folder" + $writeSeperatorSpaces + $currentTime)`
-foregroundcolor $foregroundColor2 $writeEmptyLine
}else {
Write-Host ($writeEmptyLine + "# Client certificate $clientCertName PFX file not created in the Temp folder" + $writeSeperatorSpaces + $currentTime)`
-foregroundcolor $foregroundColor1 $writeEmptyLine
}
## ----------------------------------------------------------------------------------------------------------------------------------------------------------------------------------
## Check if the root certificate is base 64 encoded
# Open the certificate with Notepad. If the text "Begin Certificate" appears at the beginning of the file, it is in the base64 format.
notepad $base64Cert
Write-Host ($writeEmptyLine + "# Check completed" + $writeSeperatorSpaces + $currentTime)`
-foregroundcolor $foregroundColor2 $writeEmptyLine
## ----------------------------------------------------------------------------------------------------------------------------------------------------------------------------------
## Write script completed
Write-Host ($writeEmptyLine + "# Script completed" + $writeSeperatorSpaces + $currentTime)`
-foregroundcolor $foregroundColor1 $writeEmptyLine
## ----------------------------------------------------------------------------------------------------------------------------------------------------------------------------------


To determine if the root certificate file is base64 or DER binary, the file is opened in Notepad. If the text “—–BEGIN CERTIFICATE—–” appears at the beginning of the file, and the file closes with the text “—–END CERTIFICATE—–“, it is in the base64 format. If “—–BEGIN CERTIFICATE—–” does not appear at the beginning of the file, the file is still in the DER binary format.

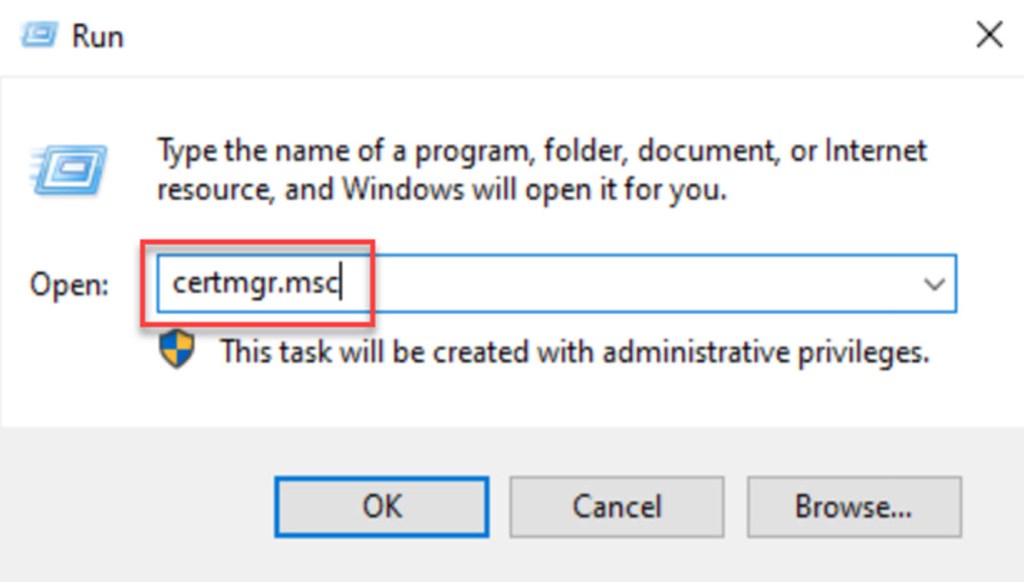
Both certificates are also stored in the Current User’s Personal Certificate Store (on the server or client pc where you ran the PowerShell script). You can check this by opening Run (Windows key + R) and typing in certmgr.msc followed by pressing Enter.

I hope this PowerShell script is useful for you and helps you to easily generate the necessary root and client certificate required to configure a secure connection via a P2S VPN to a VNet in your Azure environment.
If you have any questions or recommendations about it, feel free to contact me through my Twitter handle (@wmatthyssen) or to leave a comment.

Another option is to use the CA in Azure AD Conditional Access.
https://docs.microsoft.com/en-us/windows-server/remote/remote-access/vpn/vpn-create-root-cert-for-vpn-auth-azure-ad
LikeLike
Pingback: Azure PowerShell script: Configure a P2S VPN to an existing VNet using Azure certificate authentication – Wim Matthyssen
Pingback: Configure a P2S VPN connection to your Azure Virtual Desktop Environment using Terraform - Johan Vanneuville