

These days you can onboard a wide variety of servers to Azure with Azure Arc-enabled servers. These Windows or Linux servers can be running on-premises, on Hyper-V, VMware or Azure Stack HCI, and even at other cloud providers, like AWS or Google Cloud.
When you are performing management tasks on these servers, or when you need to create an inventory, it sometimes can be handy to list all your Azure virtual machines (VMs), and Azure Arc-enabled servers in one view. In this blog post I will show you how you can easily do this in the Azure Portal.
You can find a detailed list of all Azure Arc-enabled servers supported operating systems and software requirements on this Microsoft Docs page
Azure Portal
Logon to the Azure Portal and click on All resources in the sidebar to open the All resources page. Then click on Type == all to apply specific filtering to focus on a subset of your Azure resources, in this case your Azure IaaS virtual machines (VMs) and your Azure Arc enabled servers.

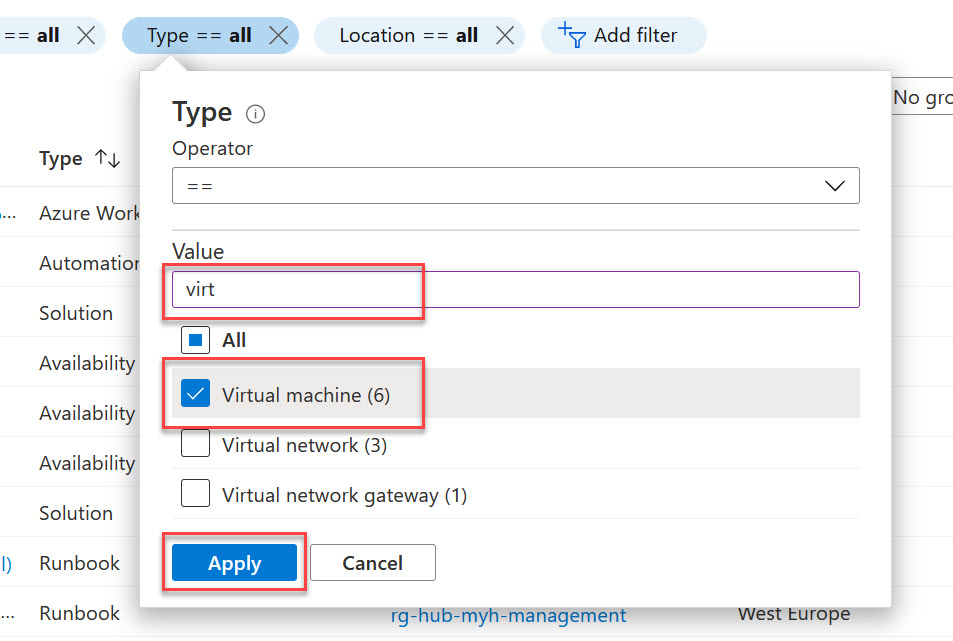
On the filter page under Value type in “virt” and the select Virtual machine. Click on Apply to apply the filter.
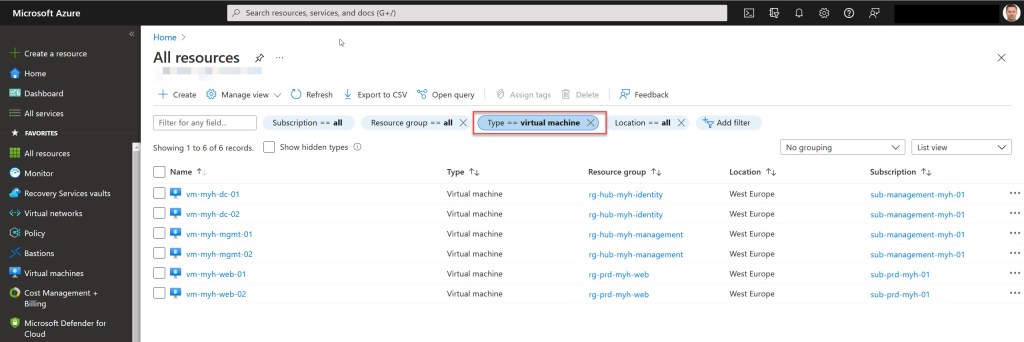
Like you can see in the screenshot below, this will already list all your IaaS VMs.
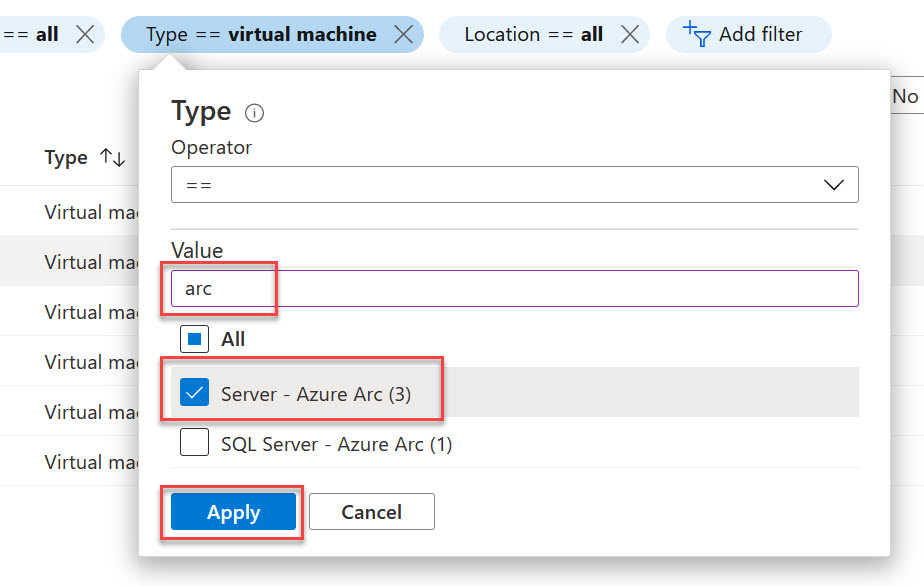
Next you need to add an extra value filter to target all your Arc enabled servers. To do so, click on Type == virtual machine. On the filter page under Value type in “arc” and the select Server – Azure Arc. Click on Apply to apply the filtering.
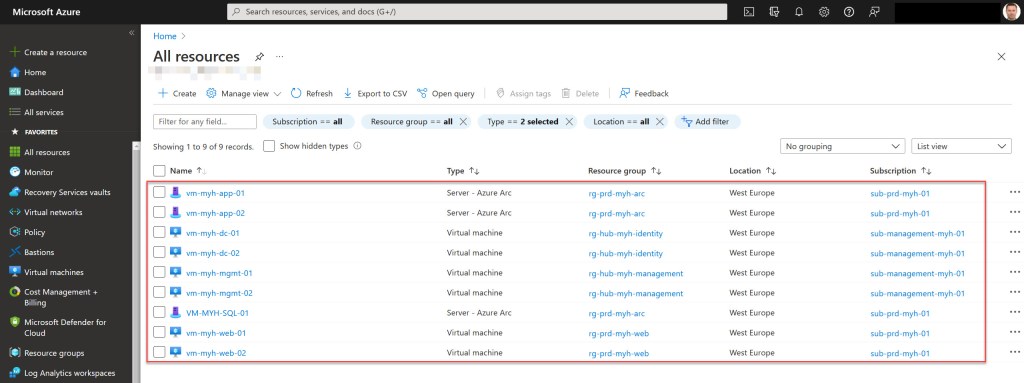
And with the combined filter, you will now see all your IaaS VMs and Arc-enabled servers listed under the All resources page.
To even make it more human readable you can apply grouping. To do so select Group by type.
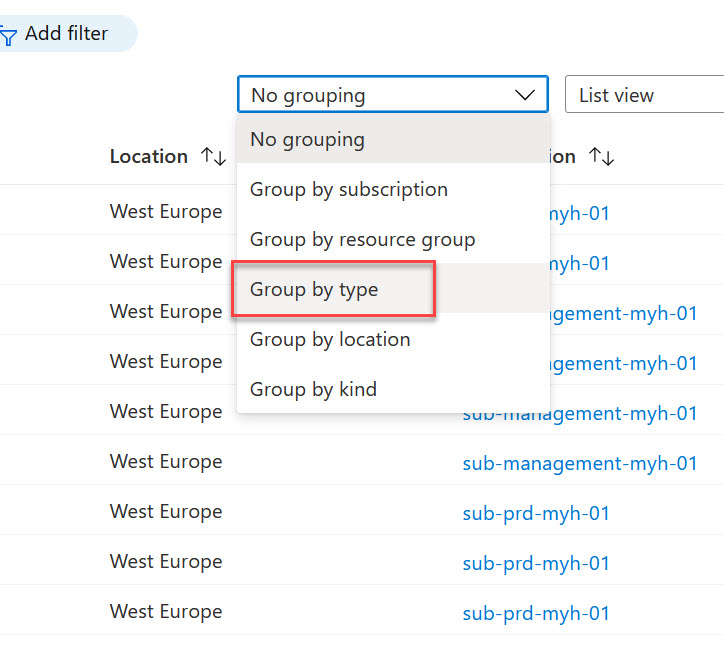
This will group your Azure Arc-enabled servers and your IaaS VMs separately.

Hope this can help you and comes in handy!

Pingback: Festive Tech Calendar 2021: Battle for the Hybrid Cloud – The Christmas edition – Wim Matthyssen
Pingback: Azure Spring Clean 2022: Govern and manage your hybrid servers with Azure Arc-enabled servers – Wim Matthyssen
Pingback: Azure Back to School 2022: Let’s take a look at Azure Arc-enabled VMware vSphere – Wim Matthyssen
Pingback: Azure Back to School 2023: Let’s take a look at Azure Arc-enabled System Center Virtual Machine Manager – Wim Matthyssen