In my Festive Tech Calendar contribution this year, I’ll show you how to manage AWS Virtual Machine instances with Azure Arc.
The Festive Tech Calendar is a community-driven project run by Gregor Suttie (Azure Greg), Richard Hooper (Pixel Robots), Keith Atherton, Simon Lee, and Matt Boyd. Every December, tech enthusiasts from around the world share videos and blog posts packed with tips, tutorials, and insights.
Check out all the content at festivetechcalendar.com or on the Festive Tech YouTube Channel. You can also follow @_CloudFamily or or track hashtags like #festivetechcalendar2025 and #CloudFamily on X.
Now, let’s dive in and see how you can manage AWS Virtual Machine instances (AWS VMs) with Azure Arc.

Table of Contents
- Why manage AWS VMs with Azure Arc
- Prerequisites
- Onboard an AWS VM with the onboarding script
- Understanding the Multicloud connector enabled by Azure Arc
- Registering the required resource provider for the AWS Multicloud connector
- Add Your AWS public cloud to Azure using the AWS Multicloud connector
- Viewing AWS resource inventory via the AWS Multicloud connector
- Onboarding new AWS VMs via the AWS Multicloud connector
- Conclusion
Why manage AWS VMs with Azure Arc
Managing AWS VMs with Azure Arc brings a lot of benefits for anyone running workloads across multiple environments.
First, it gives you centralized management across clouds. Whether your resources are on Azure, AWS, on-premises, or in Google Cloud (GCP), you can manage them all from a single control plane. This makes monitoring, configuration, and governance much simpler.
Next, you get consistent operations and policies. You can apply the same security rules, compliance policies, and management practices to your AWS VMs as you do to your Azure resources, ensuring a uniform approach across your hybrid or multi-cloud environment.
Azure Arc also provides enhanced monitoring and insights. By integrating with tools like Azure Monitor and Log Analytics, you gain detailed visibility into performance, security, and health metrics for your AWS VMs.
Finally, one of Azure Arc’s biggest advantages is that it lets you use Azure services anywhere. Even if your workloads are running on AWS, you can take advantage of services like Microsoft Defender for Cloud, Azure Update Management, or Azure Automation, unlocking powerful capabilities without needing to migrate your workloads.
Prerequisites
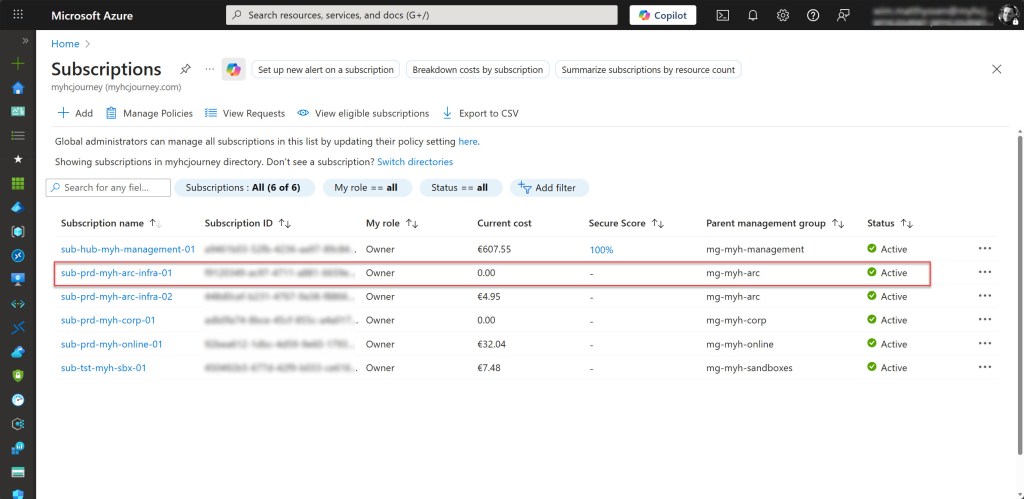
- An Azure subscription, preferably more than one if you plan to follow the Cloud Adoption Framework (CAF) enterprise-scale architecture. This includes a connectivity and/or management subscription, with at least one ARC subscription (landing zone) for deploying your Arc-related resources.
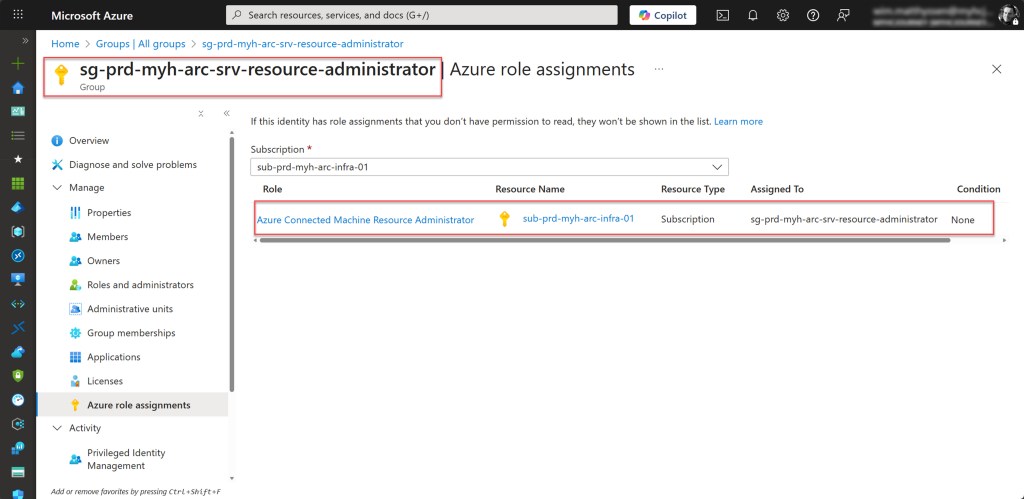
- An Azure administrator account with at least the Azure Connected Machine Resource Administrator role, preferably assigned through membership in a security group.
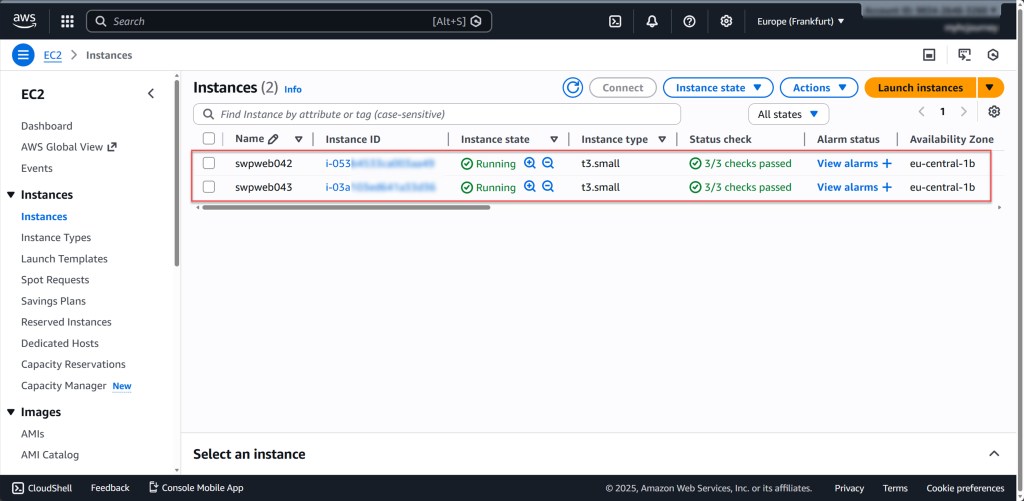
- One or more EC2 instances (AWS VMs) running a Windows Server operating system (for example, Windows Server 2025) that are already running and available. These VMs will be connected to Azure Arc, so ensure they are properly configured and accessible before you begin.
- An Azure Arc onboarding script (OnboardingScript.ps1) that uses a service principal for automatic authentication, used to onboard AWS VMs at scale.
- Administrator permissions are required on the machines you want to onboard, as they are needed to install the Connected Machine agent.

Onboard an AWS VM with the onboarding script
One way to onboard your AWS VMs into Azure Arc is by using an onboarding script, which you can easily generate from the Azure Arc blade in the Azure portal.
When you use this script with a service principal, the connection to Azure Arc is established automatically using the azcmagent command. This means that after running the script, no manual intervention is required.
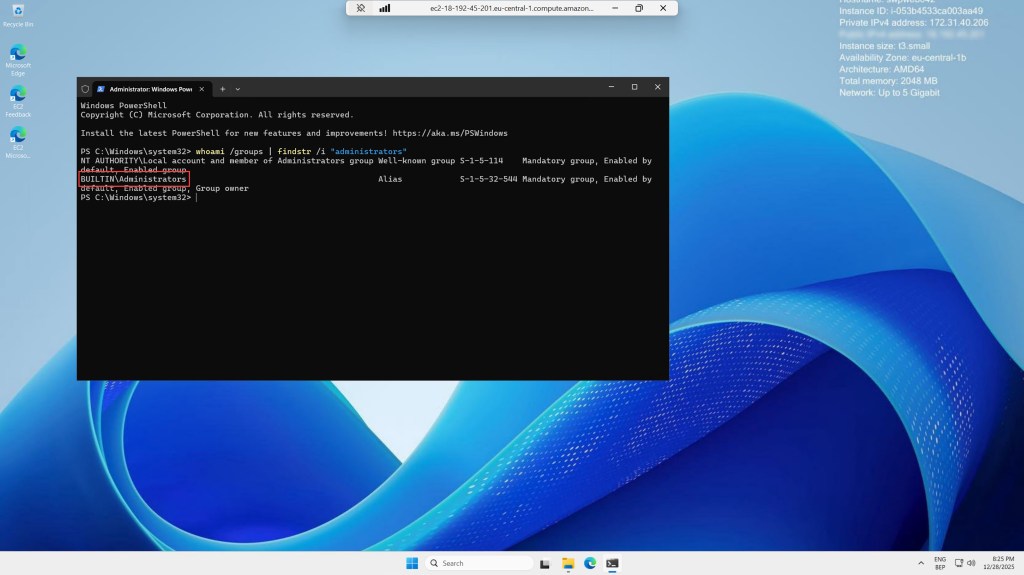
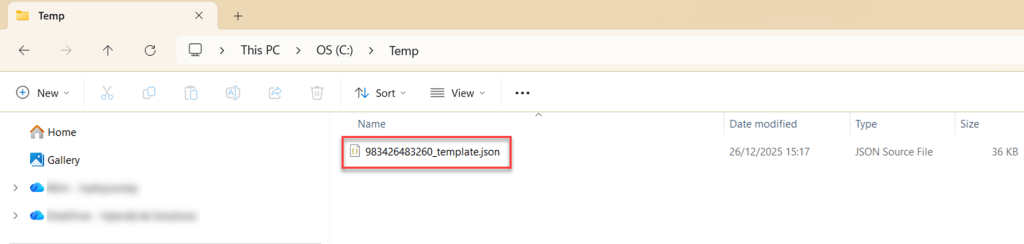
To start, RDP into one of your AWS VMs and log in as a user with administrator rights. Then, copy your onboarding script to a folder. I usually use the Temp folder.

Then run the script by right-clicking it and selecting ‘Run with PowerShell,’ and wait until it completes.

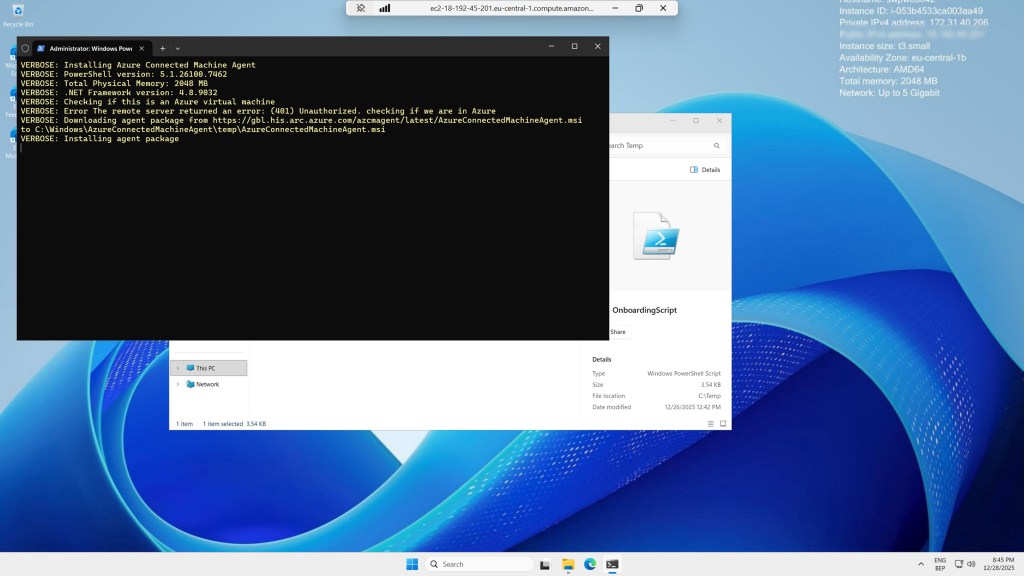
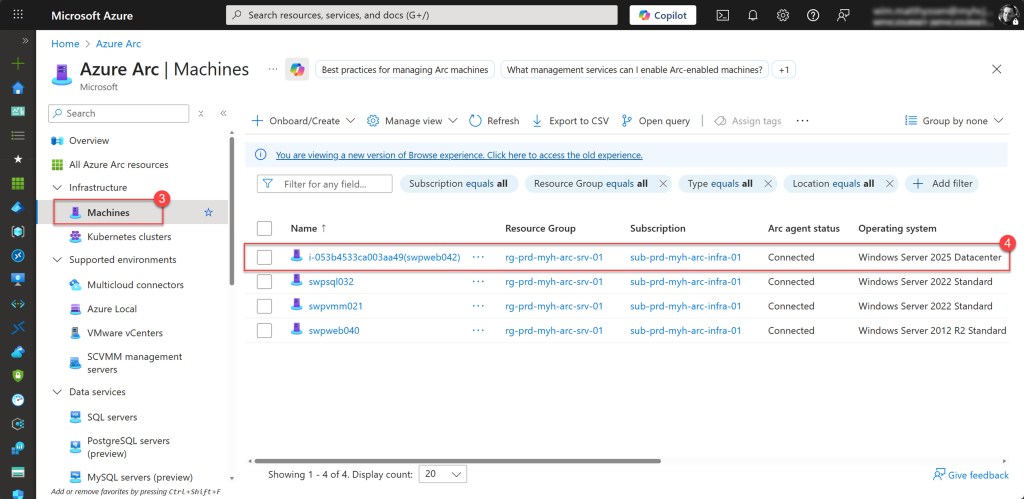
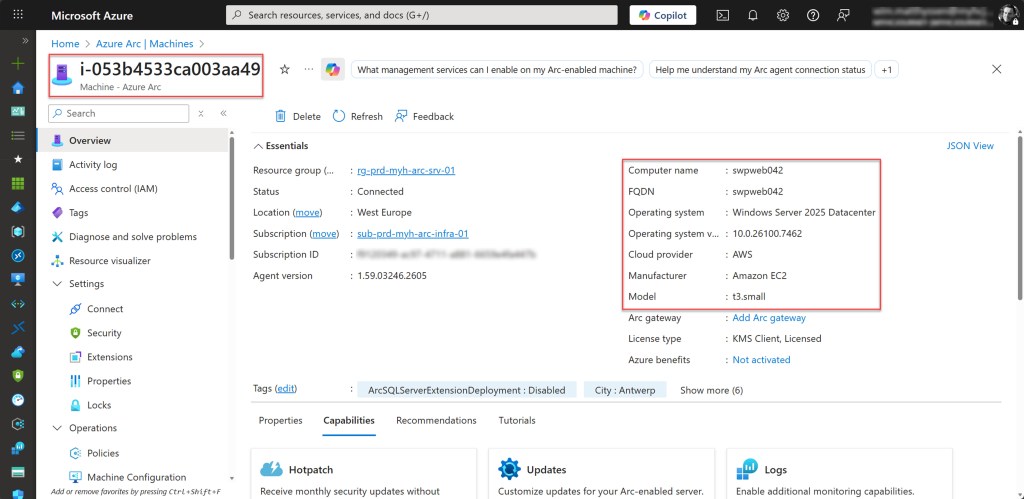
If the script completes without any errors, you can check the Azure Arc blade to see if the AWS VM has been successfully onboarded. To do this, go to the Azure Arc blade and look under ‘Machines‘. You should find the newly onboarded AWS VM there.
As just explained, you can onboard your AWS VMs using the same onboarding script that you used for onboarding your on-premises physical Windows Servers or Windows Server VMs running on Hyper-V or VMware.
However, there is an even more scalable method, which is explained in the other parts of this blog post.
Understanding the Multicloud connector enabled by Azure Arc
Simply said, an Azure Arc–enabled Multicloud connector establishes a trusted integration between Azure and other public cloud platforms, such as AWS and GCP (preview).
For AWS, this integration works by communicating directly with the AWS APIs. No agents, appliances, or additional components are installed in AWS. The connector is lightweight and operates purely through secure API calls.
In this way, it functions as a control-plane connection that allows Azure to discover, query, and manage resources across cloud boundaries. By configuring the connector, Azure becomes aware of the specific AWS account and region it should interact with, enabling supported Azure services to securely communicate with resources in that environment.
Once configured*, and as mentioned earlier, the connector provides a centralized and consistent way to manage, monitor, and govern resources in AWS and GCP alongside your Azure and Arc-enabled resources. This simplifies day-to-day operations and supports scenarios such as cloud-to-cloud migrations and unified governance.
*💡 You need to create a separate connector for each cloud if you want to onboard AWS and GCP assets. AWS requires the AWS Connector, while GCP requires a GCP Connector.
It’s important to note that the Multicloud connector is free to use, but it integrates with other Azure services that have their own pricing. For example, if you use Azure Update Manager with the connector, you’ll be billed according to that service’s pricing.
Additionally, the Multicloud Connector queries the relevant resource APIs several times a day. These read-only calls don’t incur any charges in AWS or GCP. However, if you’ve enabled CloudTrail for read events in AWS, these API calls will be recorded there.
Registering the required resource provider for the AWS Multicloud connector
If you want to inventory and/or Arc-onboard AWS VMs into an existing subscription (landing zone) already used for your Arc-enabled resources via the AWS Multicloud Connector, most required resource providers, such as Microsoft.HybridCompute and Microsoft.HybridConnectivity, are likely already registered.

In addition, you also need to have the Microsoft.AwsConnector registered*.
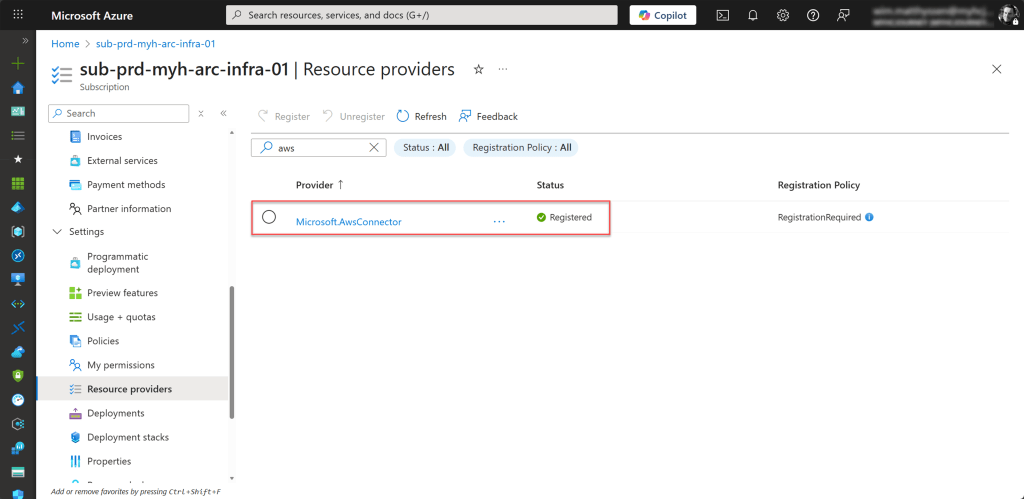
To do so, go to the subscription via the Global Search bar, then navigate to Resource providers. In the search bar of the opened blade, type “aws“.
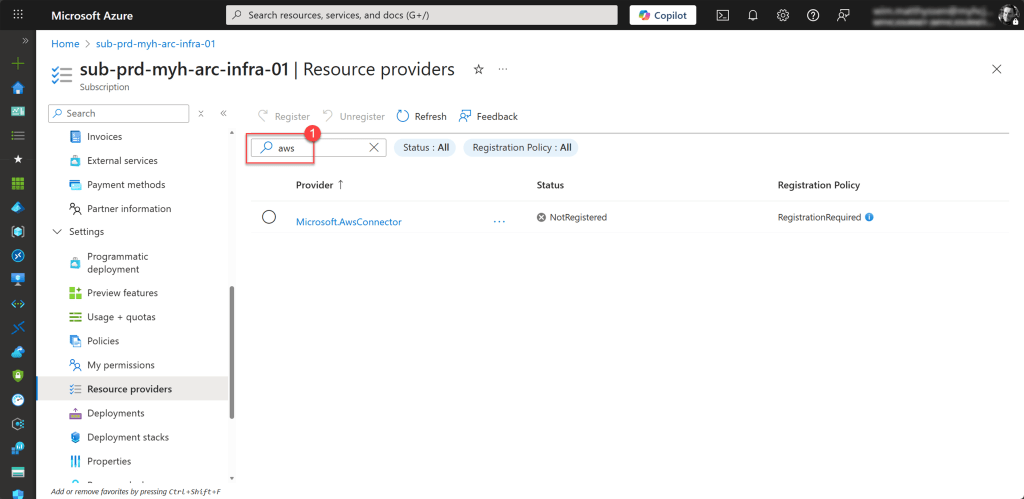
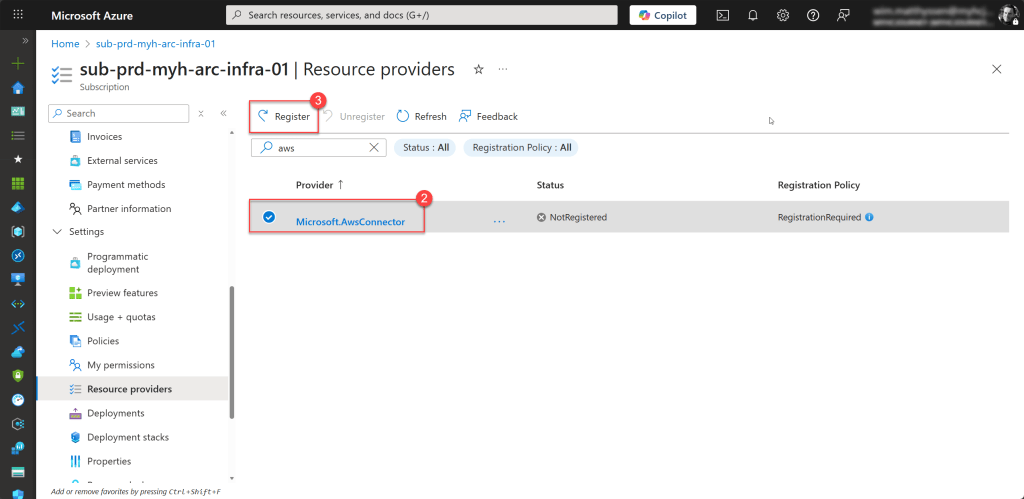
Then select Microsoft.AwsConnector and click Register.
* 💡To register it, don’t forget that you need at least Contributor access on the subscription. Also, keep in mind that registration can take up to 10 minutes to complete.
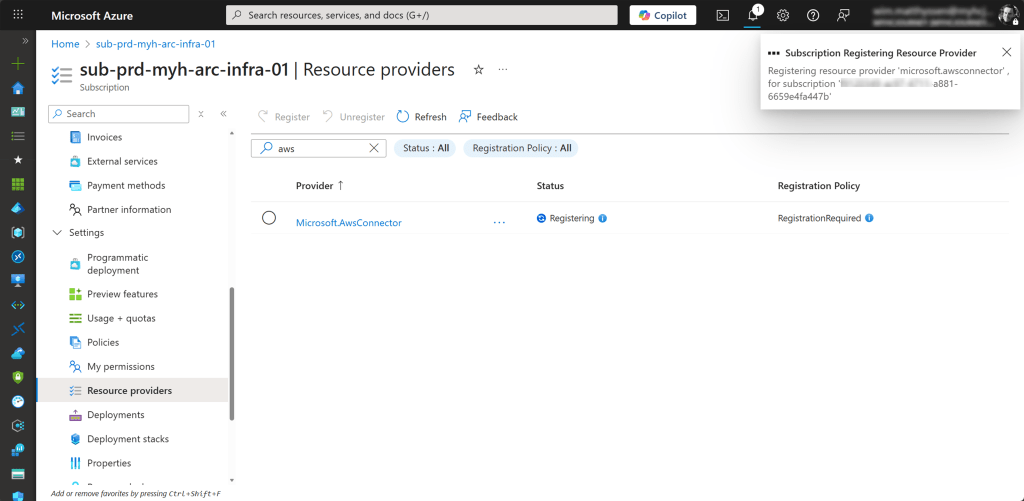
If the registration was successful, you can continue with the next part.
Add Your AWS public cloud to Azure using the AWS Multicloud connector
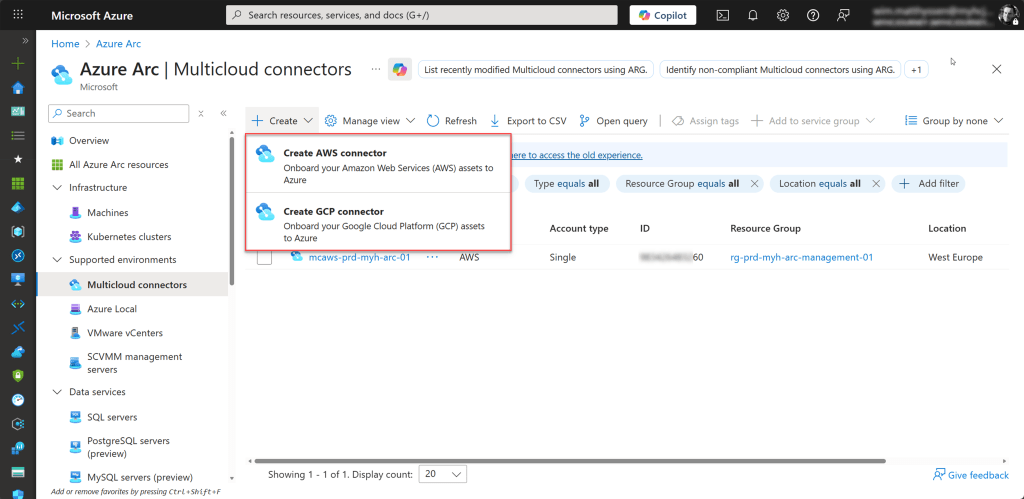
To start, open the Arc blade and go to Multicloud connectors under Supported environments. Then click on Create and select Create AWS connector.

On the opened blade, fill in the Project details by selecting the correct subscription and resource group. Then complete the Connector details by specifying a connector name that follows your Azure naming convention and selecting the appropriate Azure region*.
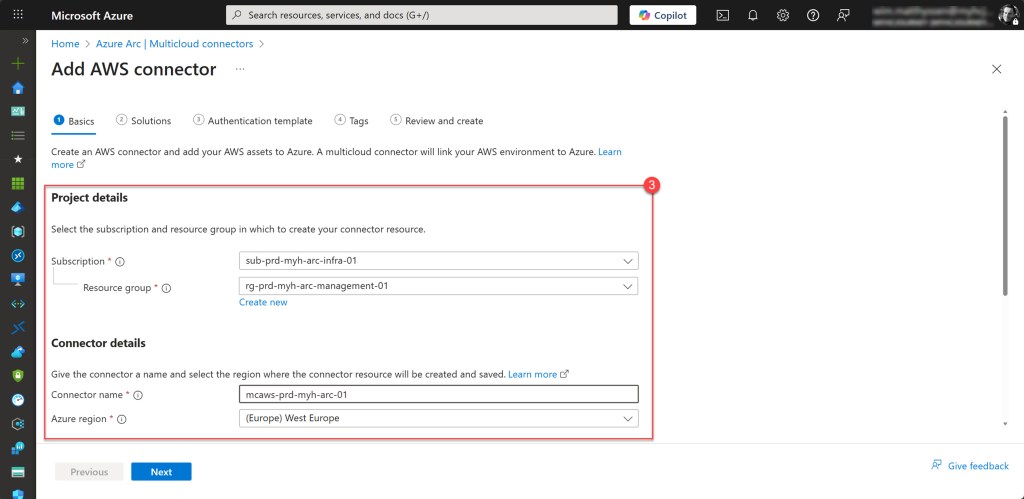
*💡Currently, the following Azure regions support the multicloud connector: East US, East US 2, West US 2, West US 3, West Central US, Canada Central, West Europe, North Europe, Sweden Central, UK South, Southeast Asia, and Australia East.
Then scroll down on the same blade and fill in your AWS account details by selecting the account type (in my case, I chose Single Account) and entering your correct 12-character AWS account ID*. Click Next when finished.
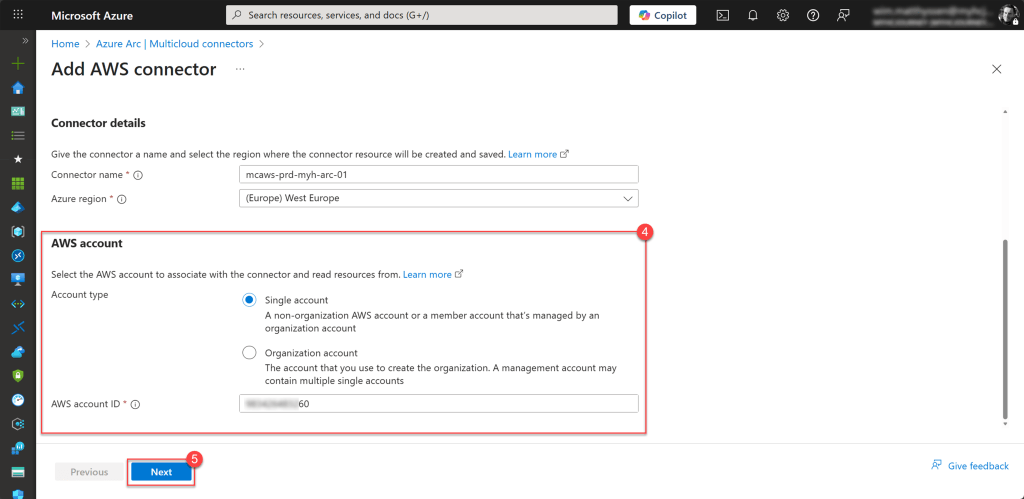
*💡 You can connect either to an entire AWS organization, including all underlying AWS accounts, or to a single AWS account. In both cases, the appropriate permissions are required for the option you choose.
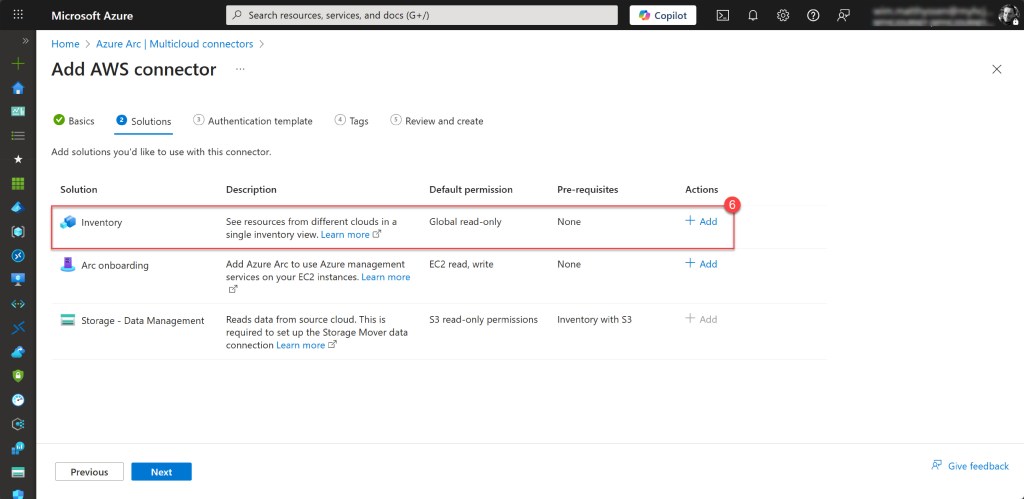
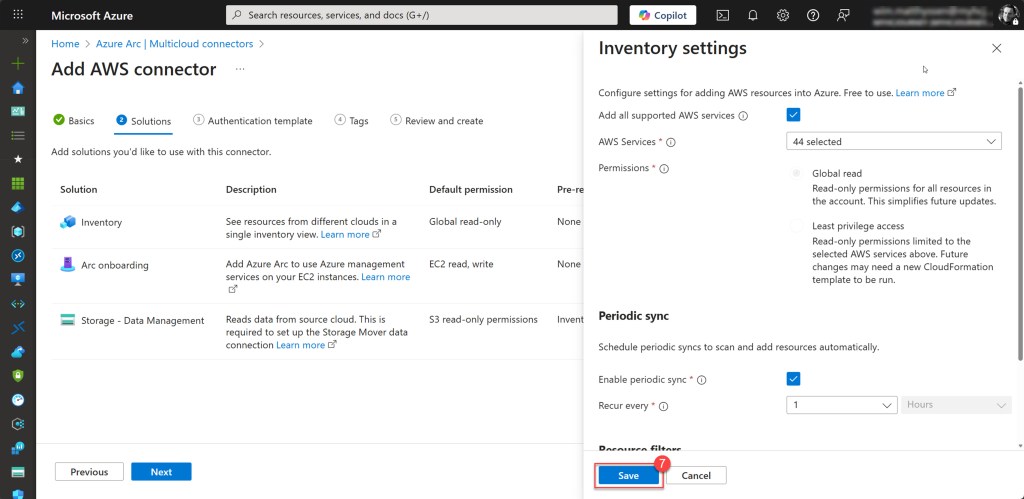
On the Add AWS connector blade, click + Add in the Inventory section. Next, configure the inventory settings and click Save when you’re done. This includes selecting the AWS services to inventory, defining the Periodic sync frequency (how often the scan should run), and specifying the AWS regions to include.
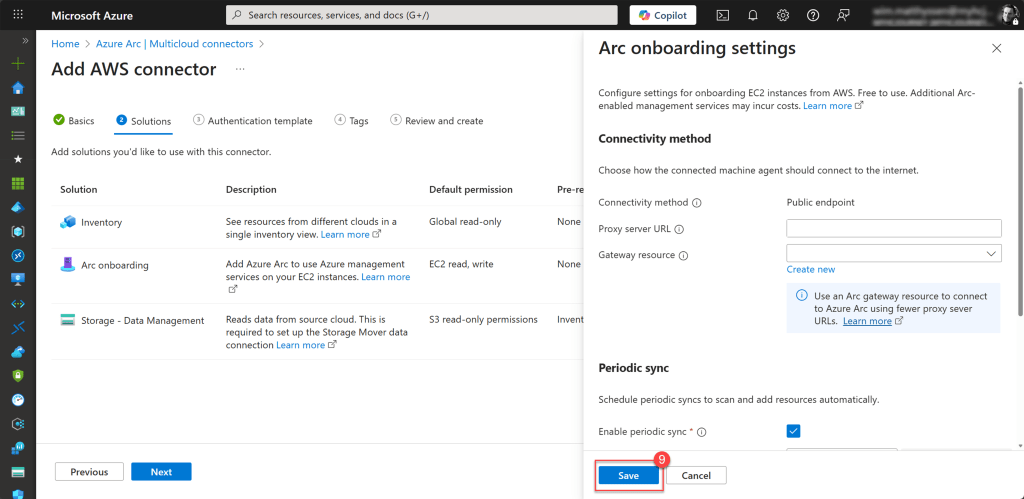
Next, click + Add on the Arc onboarding line to enable the Azure Arc management plane for your EC2 instances.
In this step, you’ll configure the connectivity method, selecting whether your instances connect via a public endpoint, a proxy server, or an Azure Arc gateway resource. You’ll also set the periodic sync interval and AWS regions, similar to the previous configuration.
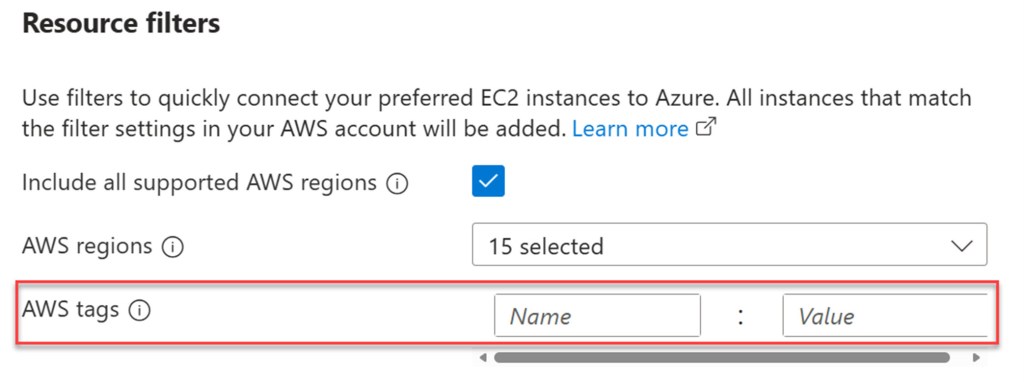
AWS tags are particularly useful here. If you only want to onboard AWS VMs with a specific tag applied, you can specify the tag by providing its Name and Value, ensuring that only those VMs are Arc-enabled.
Once you’ve configured the onboarding settings, click Save to complete the process.

Then click Next to proceed to the next blade.

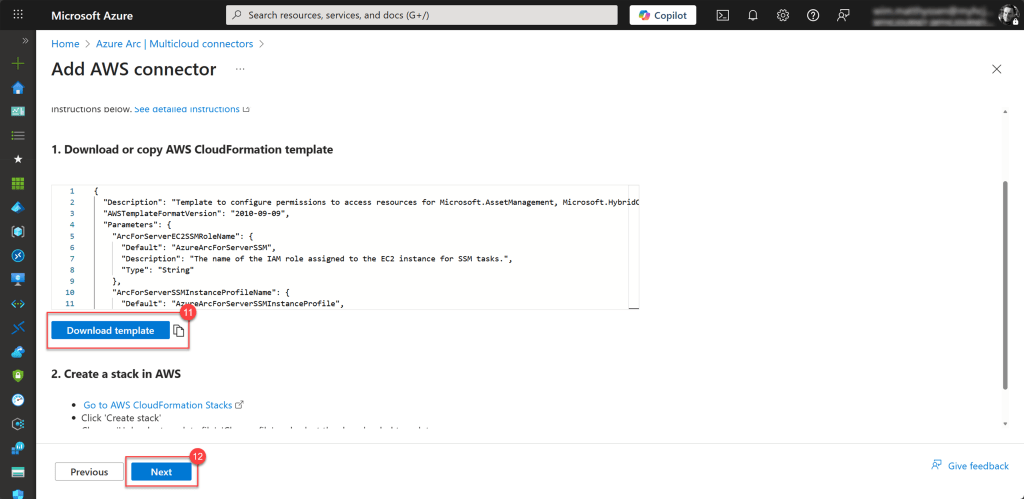
In the next blade, the template* you just generated, which includes all the settings you configured earlier, can be downloaded and later uploaded to AWS CloudFormation as a stack to automatically create the required resources. Click Download template to save it in a central or easily accessible location for later use. When you’re ready, click Next to continue.
*💡 This template contains the necessary resources, such as the IAM role and trust relationship, that Azure Arc needs to authenticate and communicate with your AWS account.
On the Tags blade, fill in all the required tags, and then click Next.
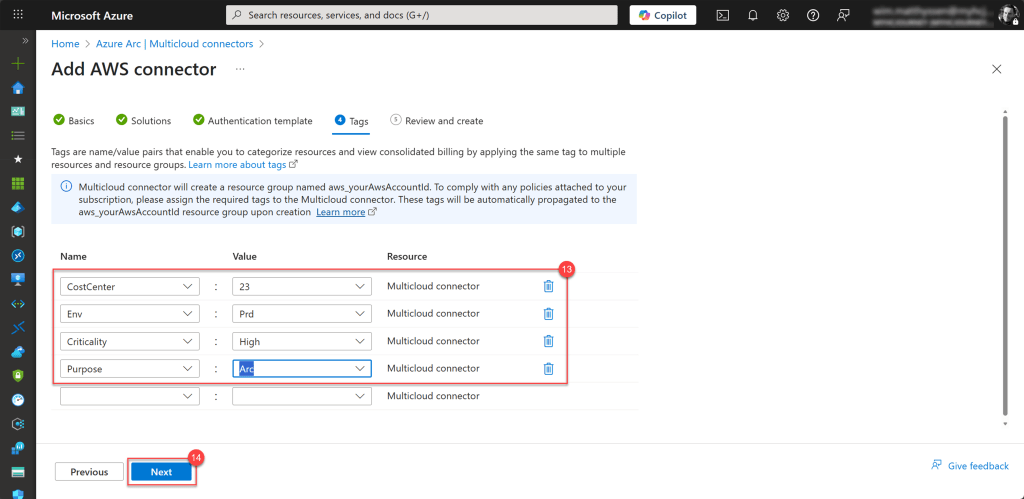
Then review all the parameters to ensure they are correct, and if so, click Create to start the creation process.

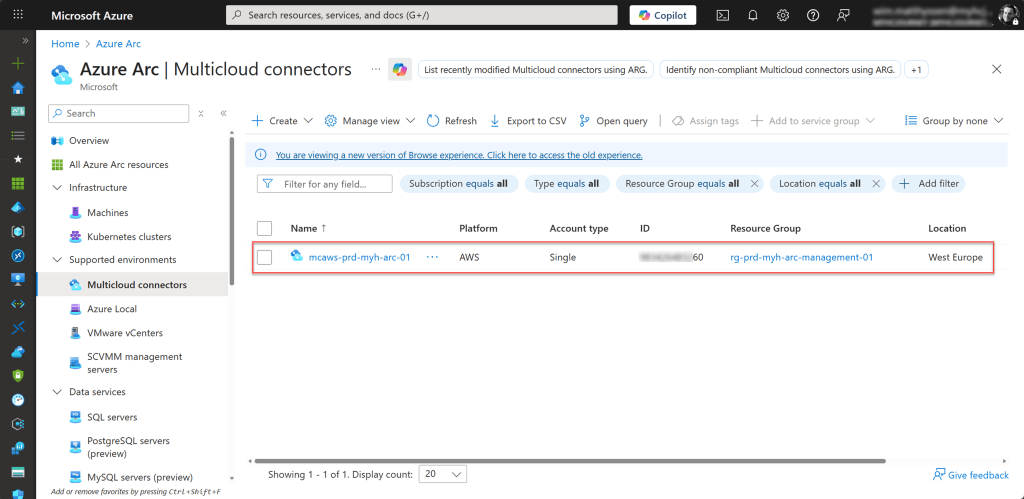
If all goes well, your AWS connector has now been created.
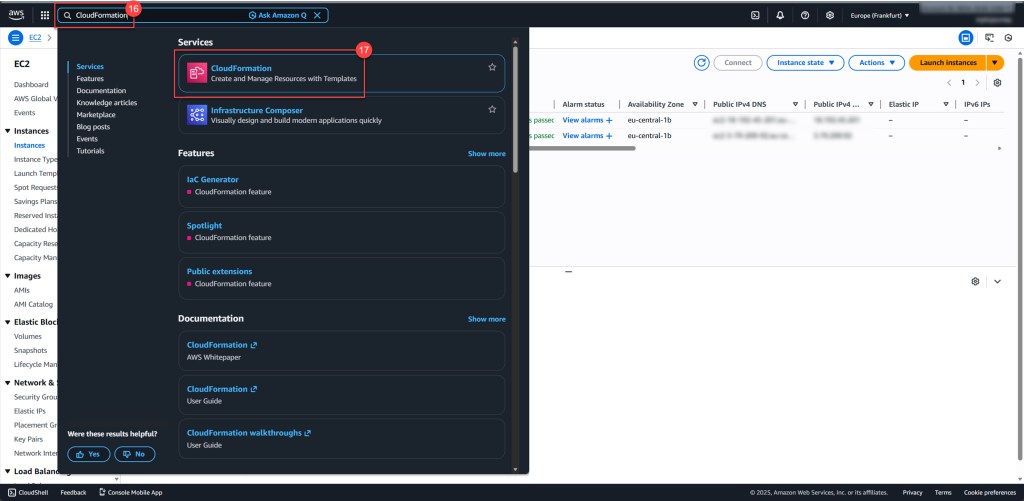
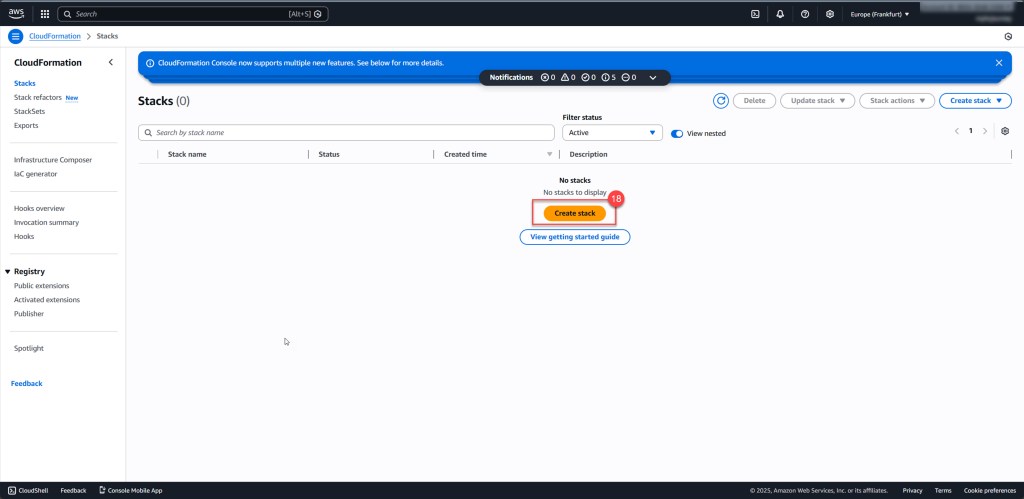
The final step is to upload the template to your AWS environment. To do this, log in to your AWS account, type CloudFormation in the search bar, and click on it when it appears.
On the screen that opens, click Create stack.
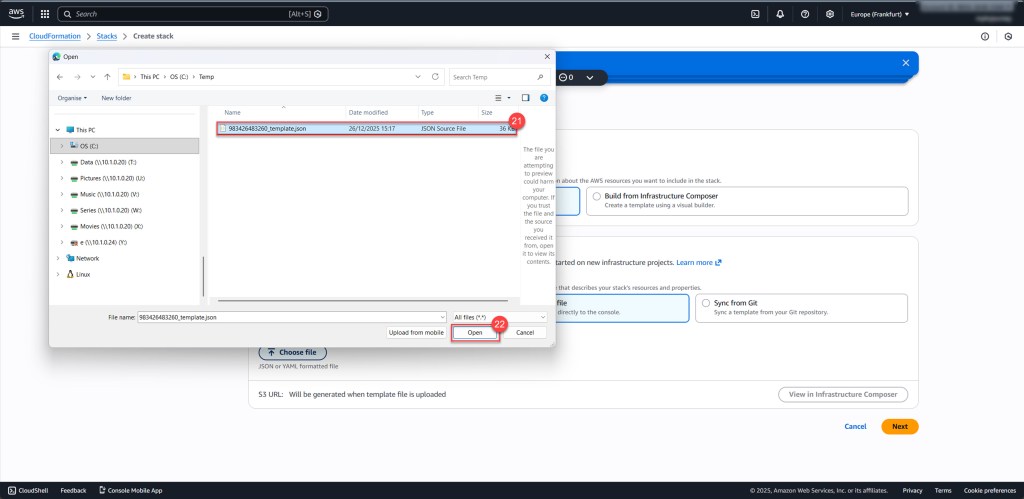
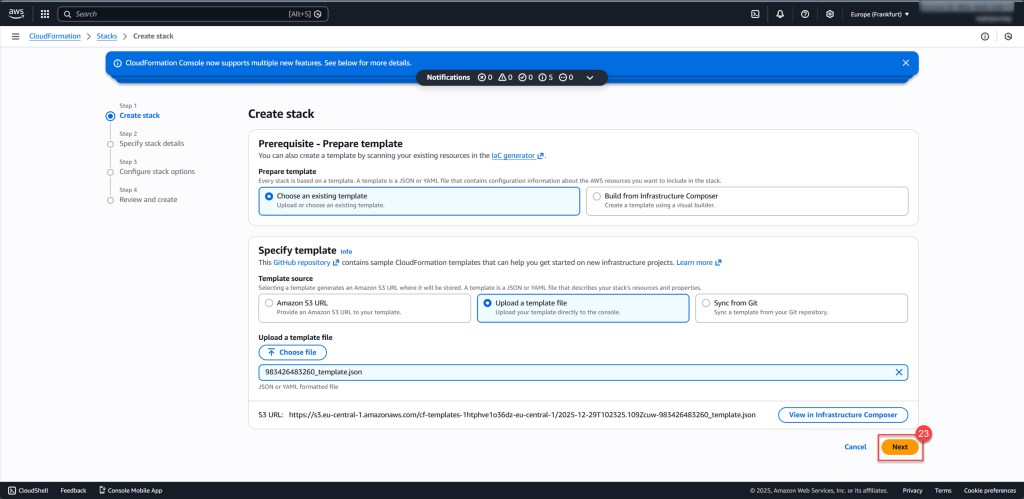
Next, select Upload a template file and click Choose file to upload your downloaded template.

Then, select the template file you previously downloaded and saved, and click Open. Once the file is uploaded, click Next to proceed to the next screen.
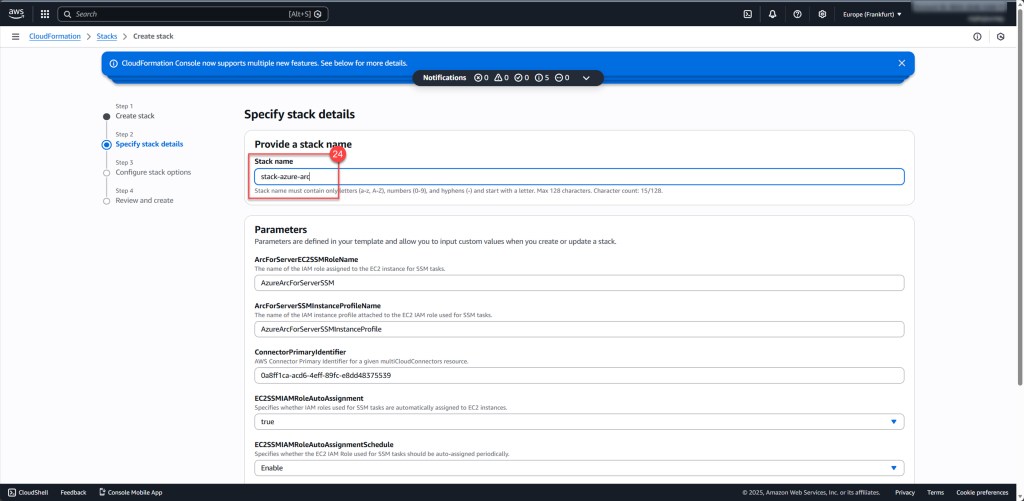
Choose a descriptive Stack name that follows your AWS naming conventions, then scroll down and click Next. On this screen, you’ll also notice that all the parameters are automatically filled in.
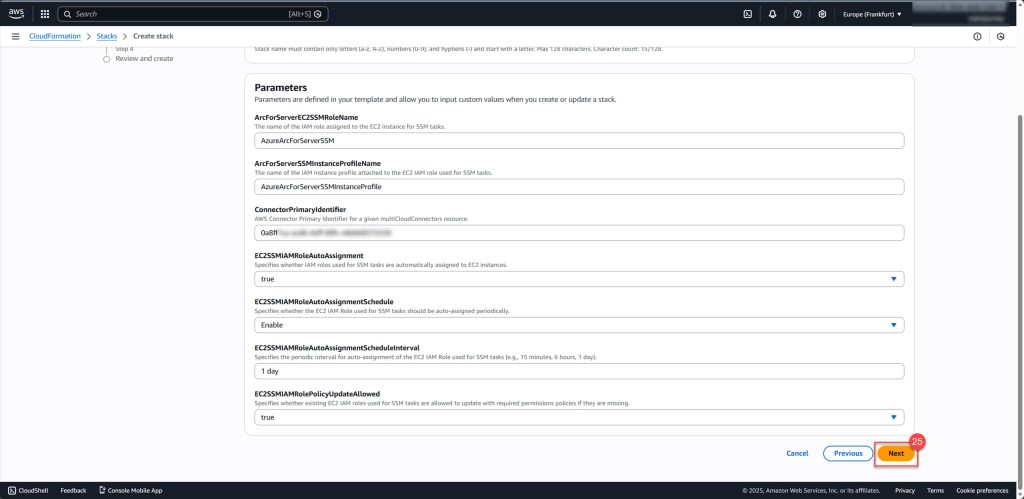
On the next screen, you can configure options such as Tags, Permissions, and other settings. For now, leave everything at its default values, check the box for “I acknowledge that AWS CloudFormation might create IAM resources with custom names”, and then click Next to continue.

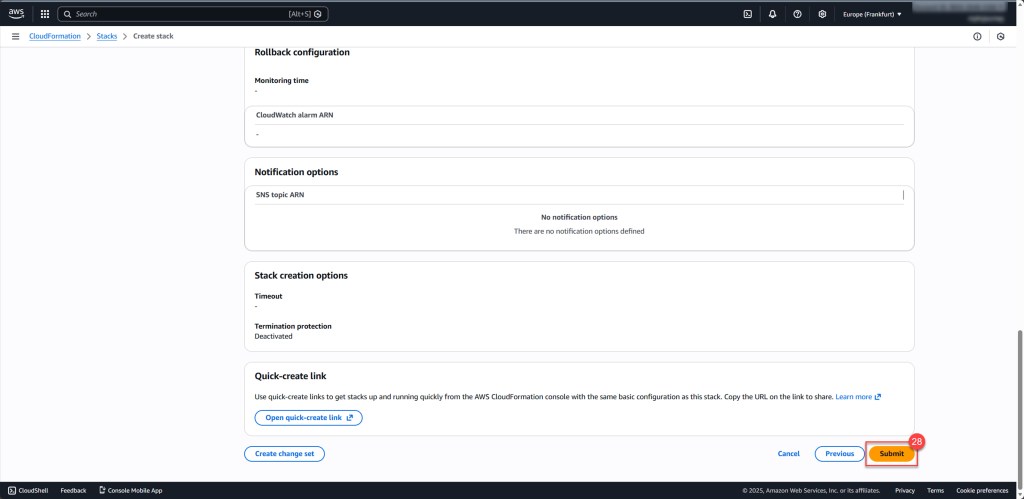
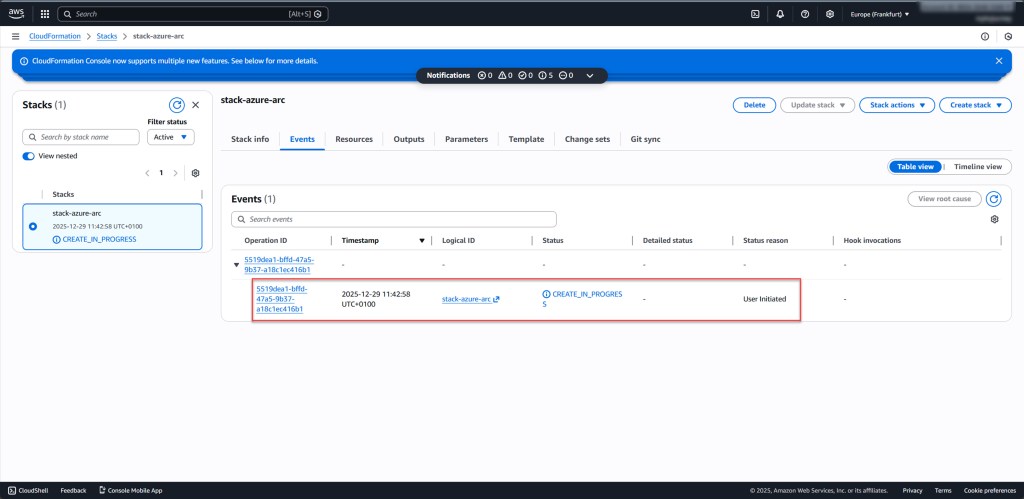
On the next screen, scroll down and click Submit. Once submitted, the process can take up to 10 minutes to complete.
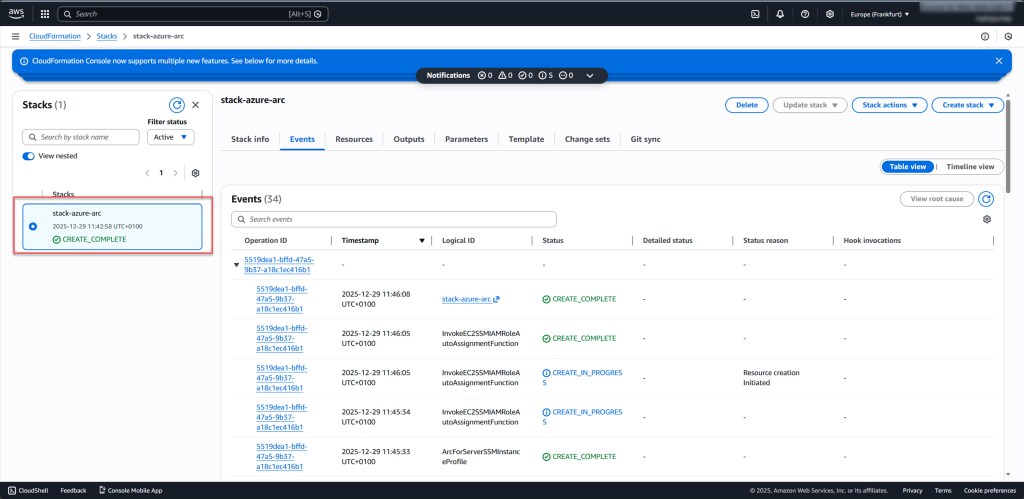
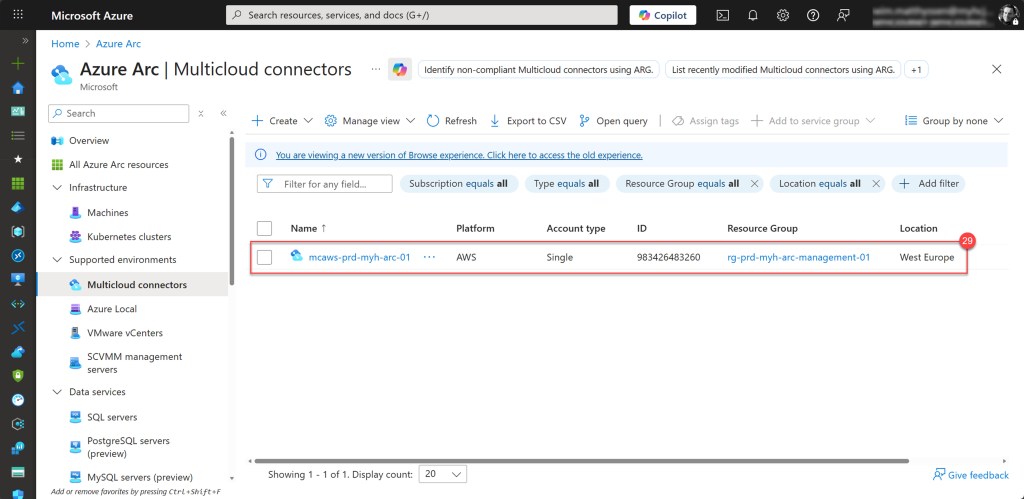
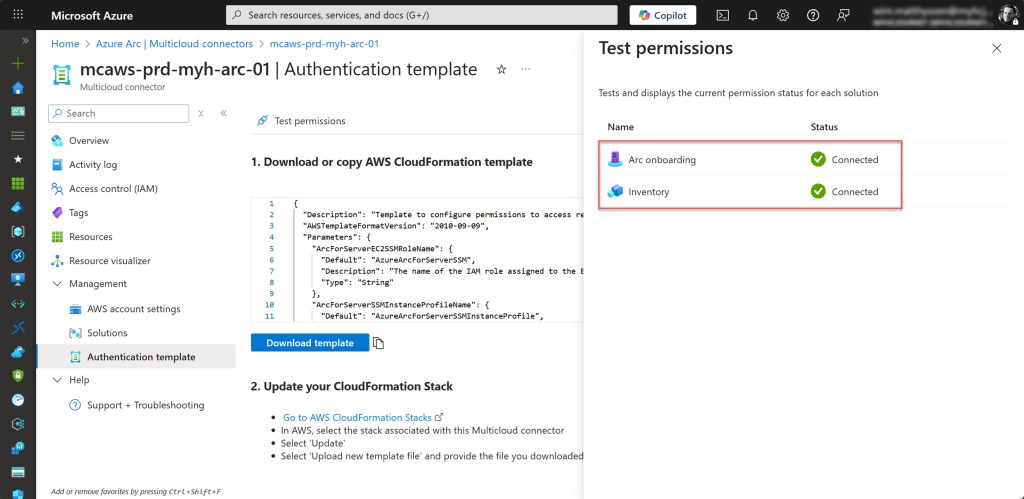
Once the stack is successfully created, return to the Arc blade in the Azure portal and select the newly created Multicloud connector. On the opened blade, under Management, select Authentication template and click Test permissions to verify that the connection you previously created is set up correctly.

If everything is set up and configured correctly, the test will show that both the Arc onboarding and Inventory statuses have a connection status of Connected. If not, it indicates an issue, and you’ll need to review your configuration to ensure everything is set up properly.
You should now also see the success status reflected on the Overview page.
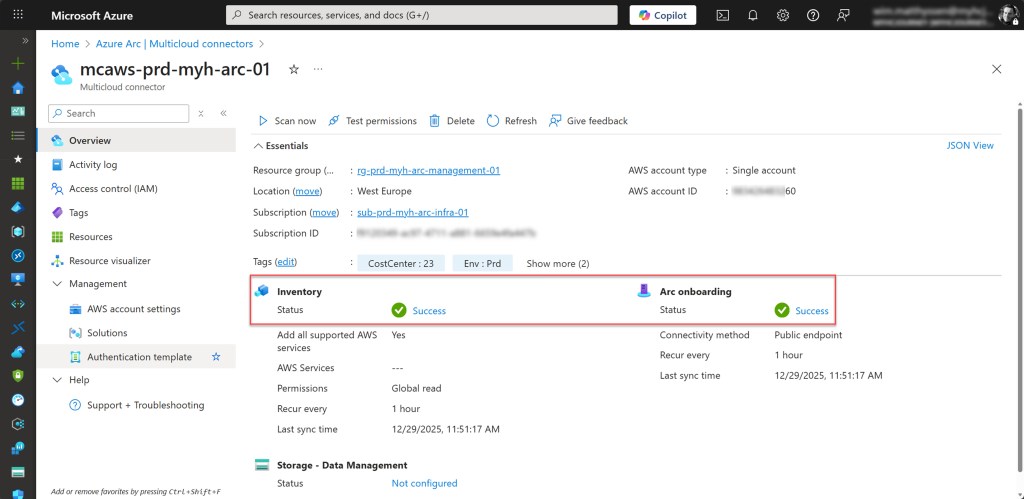
Your AWS Multicloud connector is now successfully configured, and you’re ready to proceed to the next step.
Viewing AWS resource inventory via the AWS Multicloud connector
Because we enabled the Inventory feature when setting up the AWS Multicloud connector, we can now see a complete inventory of all selected AWS resources.
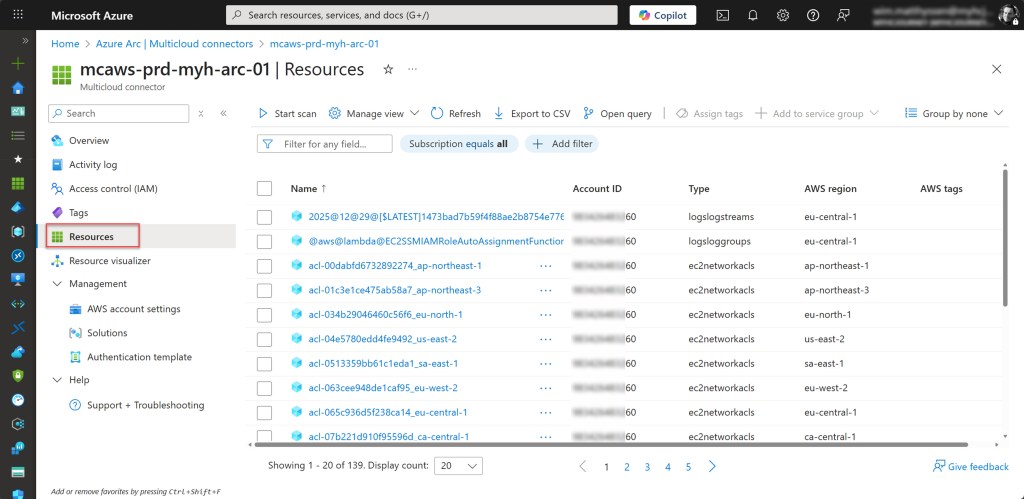
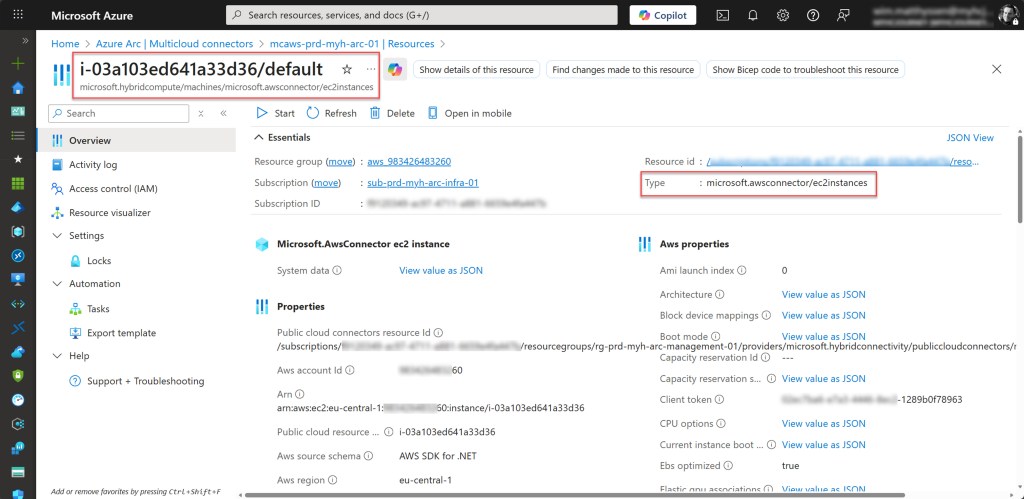
On the Microsoft side, for each AWS resource added to the inventory, an equivalent Azure resource is created. Most of these resources will have a Type starting with microsoft.AWSconnector, followed by the specific AWS resource type. For example, the EC2 instance i-03a103ed641a33d36 will have the type microsoft.awsconnector/ec2instances.
When an EC2 instance is Arc-enabled, Azure creates a Hybrid Compute resource under Microsoft.HybridCompute/machines to represent that VM. The original microsoft.awsconnector/ec2instances resource remains as an inventory object containing AWS metadata, while the Arc-enabled machine becomes the manageable resource in Azure. This approach allows you to track all AWS resources while also enabling full management capabilities for Arc-enabled VMs.
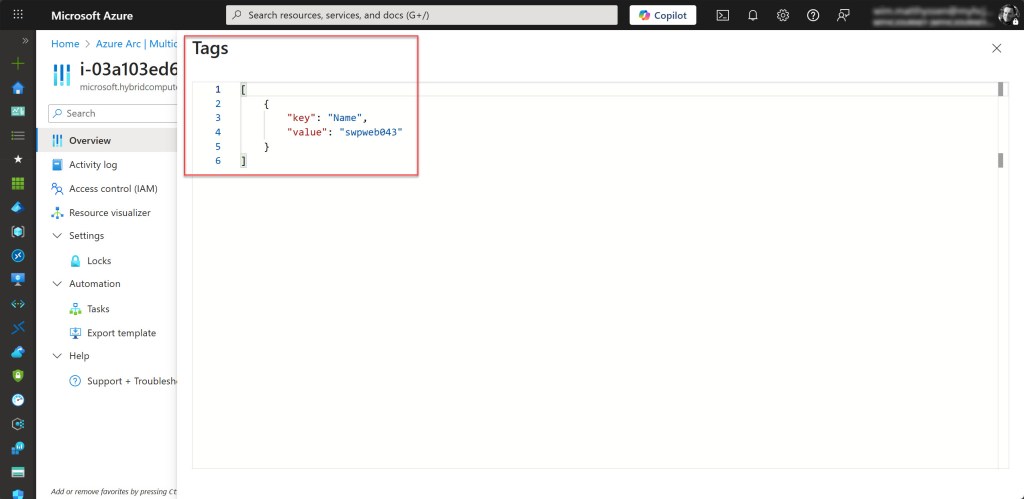
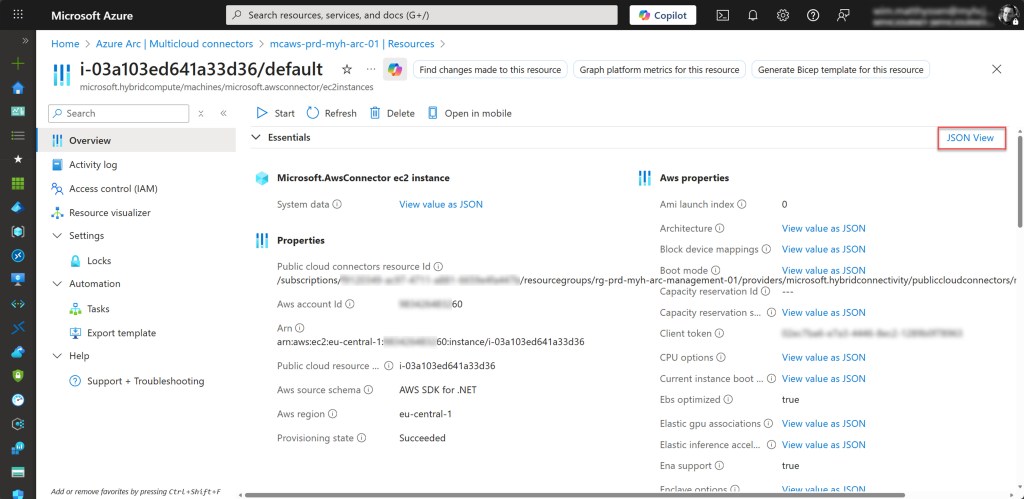
You can view all inventoried AWS resources by opening the Arc blade, navigating to your AWS Multicloud connector, and selecting Resources. From there, simply click on any resource to see its Type and other relevant properties and information, such as its Tags.
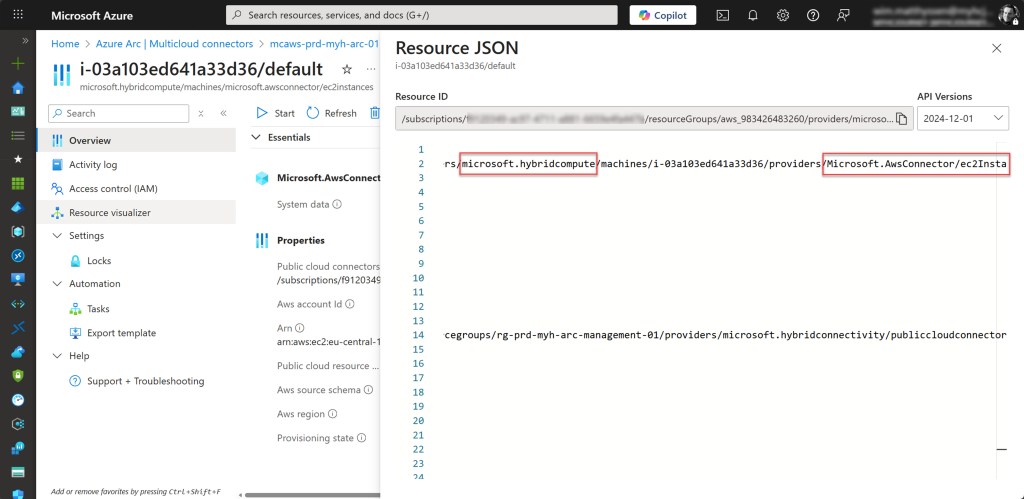
By clicking on JSON View, you can see even more details, such as the resource providers it uses, and its exact location in Azure.
Onboarding new AWS VMs via the AWS Multicloud connector
Although the periodic sync you configured earlier (set to one hour) will automatically handle the inventory and Arc onboarding of newly created or not yet onboarded AWS VMs, you can also perform this step manually at any time.
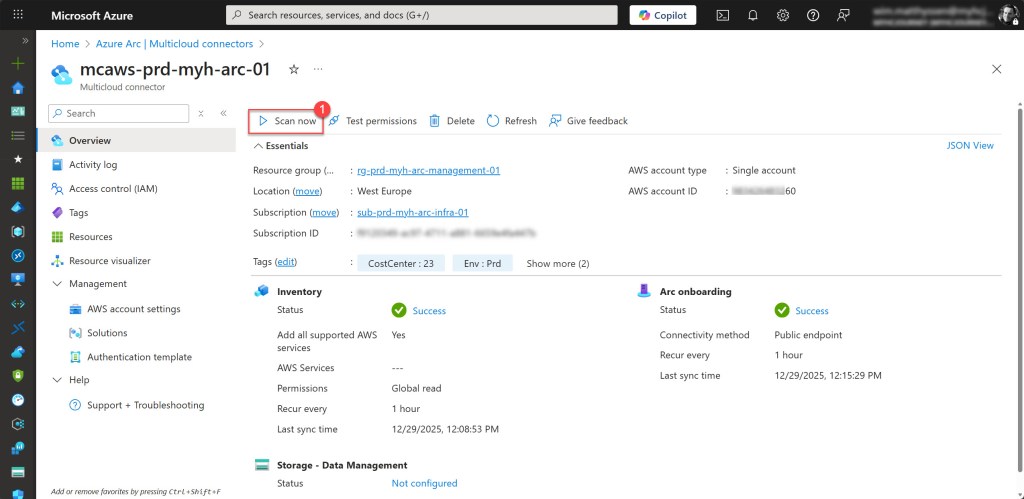
To do so, go back to the previously created AWS Multicloud Connector blade and click Scan now on the Overview page.
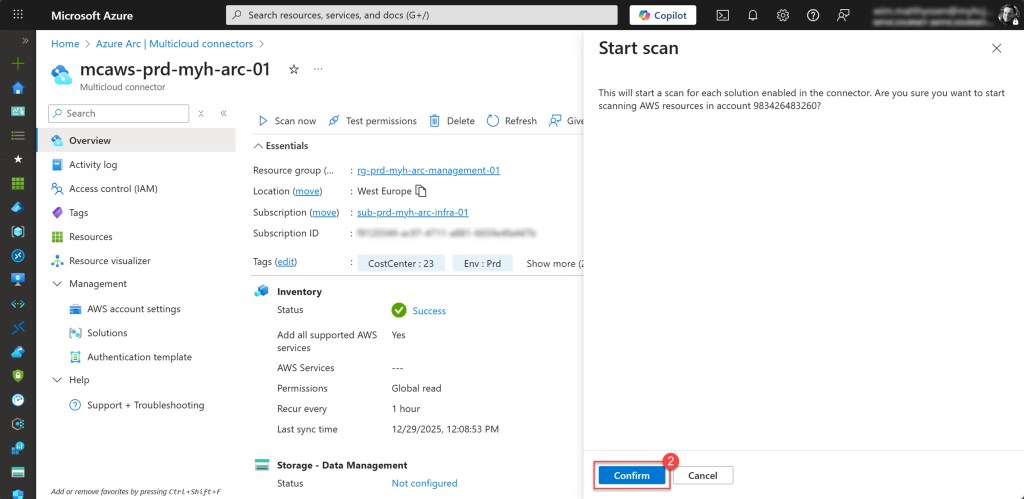
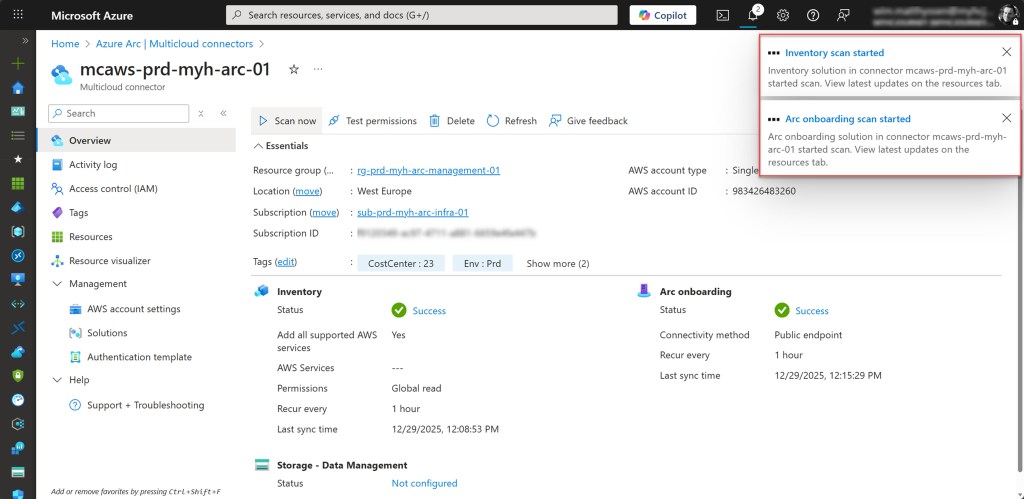
Then click Confirm to start both scans. The completion of these scans may take some time, depending on the number of changes in your AWS environment.
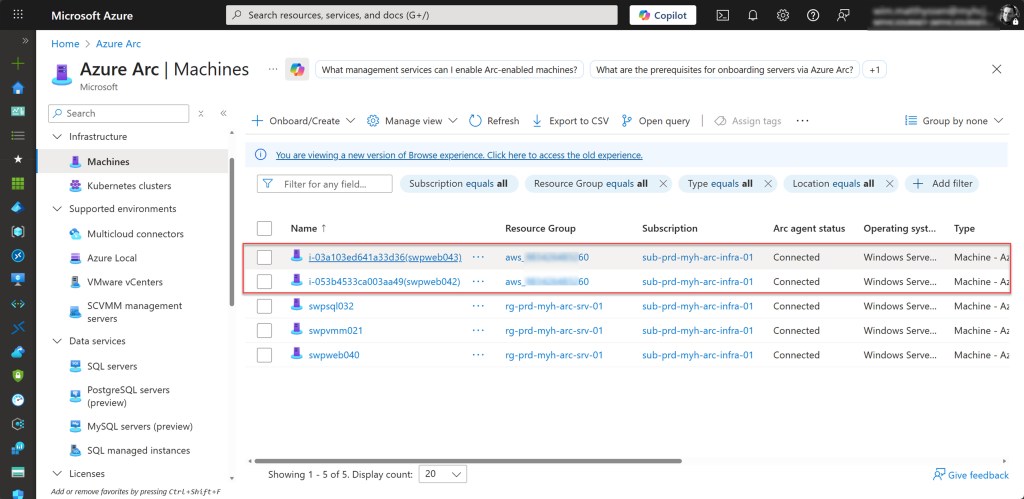
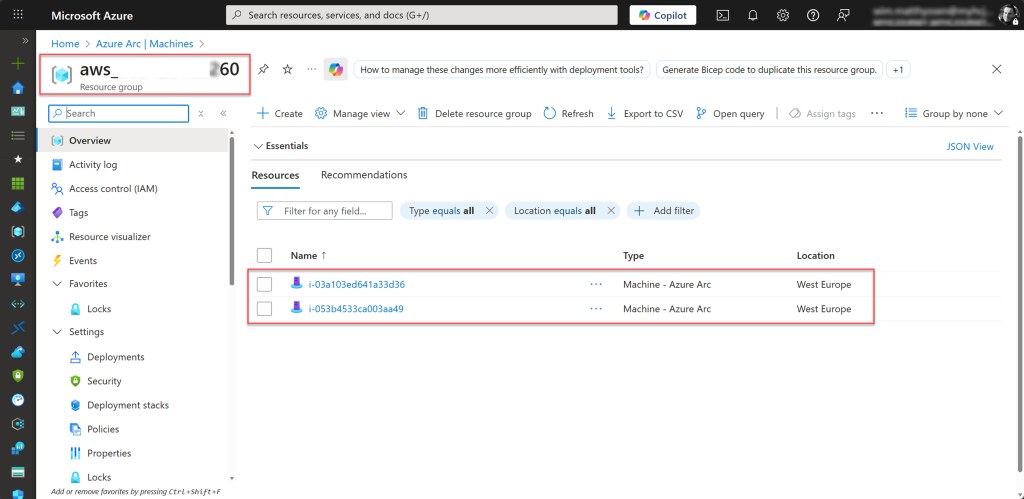
Once the scans are complete, any newly discovered AWS VMs will appear in the Machines blade. Keep in mind that a default resource group is created to store these VMs, named aws_ followed by your AWS account ID.
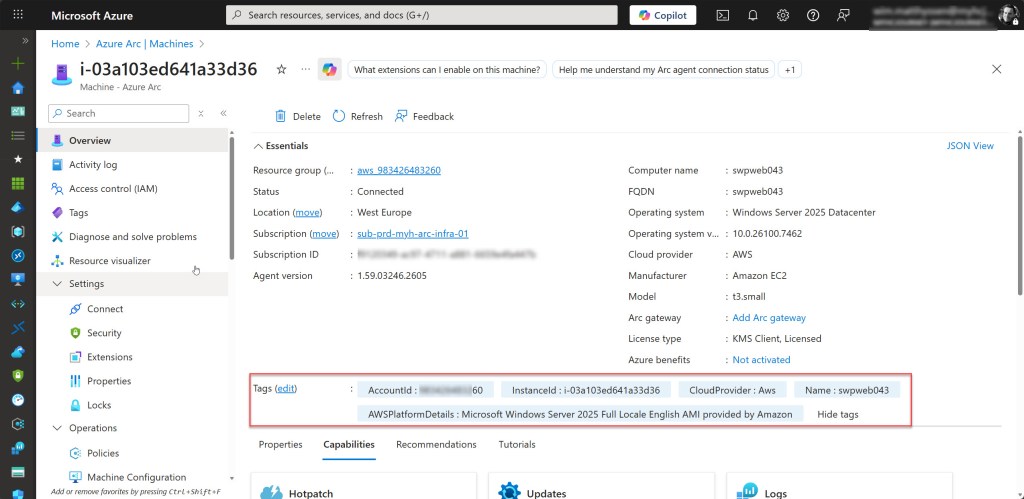
Azure will also automatically add several tags to the Arc resources representing the AWS VMs. These tags include AccountId, InstanceId, CloudProvider, Name, and AWSPlatformDetails.
Now that you’ve learned several ways to onboard your AWS VMs with Azure Arc, you can start using all the other services available for your Arc-enabled resources, such as Azure Update Manager, Microsoft Defender for Cloud, Azure Policy, and more, on those VMs.
Conclusion
Thank you for reading! I’m so excited to be part of this year’s Festive Tech Calendar again and hope you enjoy all the amazing content being shared this December.
If you have any questions about managing AWS VMs with Azure Arc, don’t hesitate to reach out on X at @wmatthyssen or connect with me on LinkedIn. I’d love to hear from you!
Happy reading and viewing. Take care, and have a wonderful holiday season! 🎄🎆

Pingback: Azure Arc: Creating or updating an AWS Multicloud connector for S3 bucket to Azure Storage account migrations – Wim Matthyssen